Share
Amazon EMR is a cost-effective and scalable Big Data analytics service on AWS. EMR clusters are extremely flexible: they can be deployed in just a few steps, configured for one-time use or as permanent clusters, and can automatically grow to sustain variable workloads.
To take advantage of EMR’s capabilities, NetApp created NIPAM (NetApp-In-Place-Analytics Module), a plug-in that allows EMR to run analytic jobs on your Cloud Volumes ONTAP instances in AWS. Using NIPAM, Cloud Volumes ONTAP users don’t need to move data to different repositories or incur additional costs to run analytics jobs.
In this Amazon EMR tutorial, we will show you how to deploy an EMR cluster with NIPAM so you can run all your data analytics jobs using your existing Cloud Volumes ONTAP storage in AWS.
What Is Amazon EMR?
Amazon Elastic Map Reduce (EMR) is a service for processing big data on AWS. It allows data analytics clusters to be deployed on Amazon EC2 instances using open-source big data frameworks such as Apache Spark, Apache Hadoop or Hive. EMR frees users from the management overhead involved in creating, maintaining, and configuring big data platforms.
Thanks to NIPAM, EMR users can run analytics jobs on their current NFS repositories on AWS with Cloud Volumes ONTAP, or burst their on-prem data instantly to Cloud Volumes ONTAP by using FlexCache. Access to Cloud Volumes ONTAP also gives EMR users cost-cutting storage efficiencies, zero API costs, data mobility, AI-driven data mapping via Cloud Data Sense, and automated data tiering between Amazon S3 and Amazon EBS, so cold data is stored at low-cost when EMR isn’t running analytics jobs. For Cloud Volumes ONTAP users, this integration with EMR provides an easy way to analyze all the NFS data stored in the cloud.
Let's go over our step-by-step guide on how to deploy an EMR cluster with NIPAM on it so you can point it to your AWS Cloud Volumes ONTAP NFS repository and start analyzing your data.
We are going to accomplish this in two main steps:
1. Deploy the Cloud Volumes ONTAP instance in AWS.
2. Deploy an EMR cluster with the NetApp In-Place Analytics Module on it.
Deploying Cloud Volumes ONTAP HA in AWS
In order to deploy a Cloud Volumes ONTAP storage AWS high availability (HA) pair , you need to have a BlueXP Console instance already created. If you don't have one already, first follow this blog on how to create a BlueXP Console instance, then proceed with the steps that follow in this section.
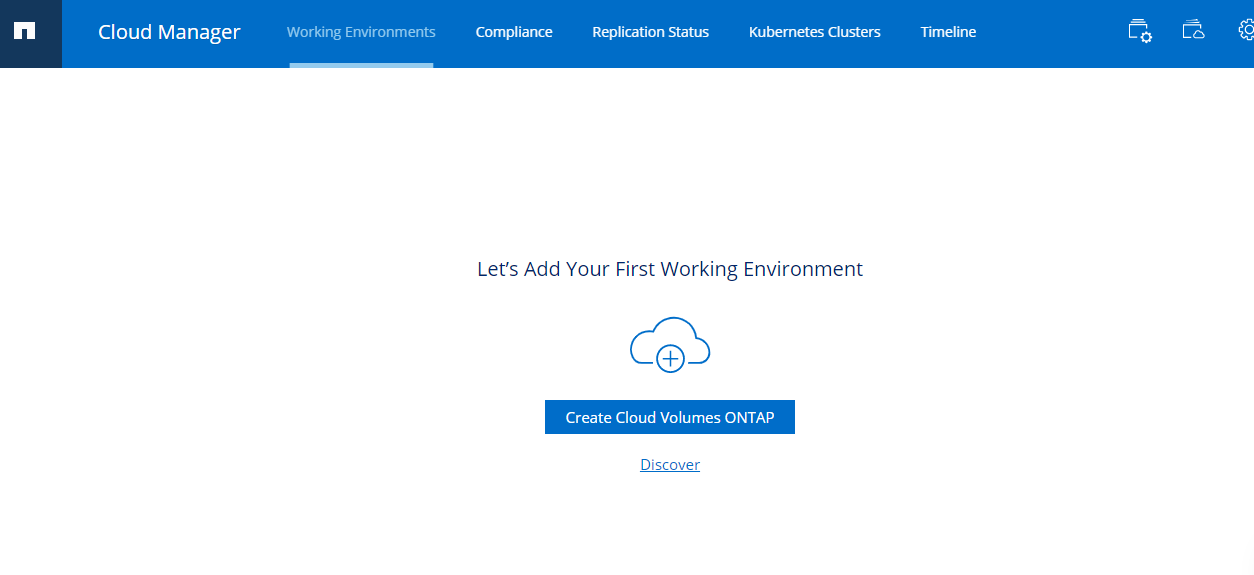
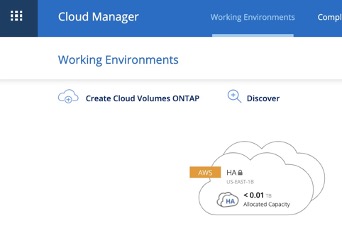
1. Login to your NetApp BlueXP account and select Cloud Volumes ONTAP from the Products menu. Click “Create Cloud Volumes ONTAP”:
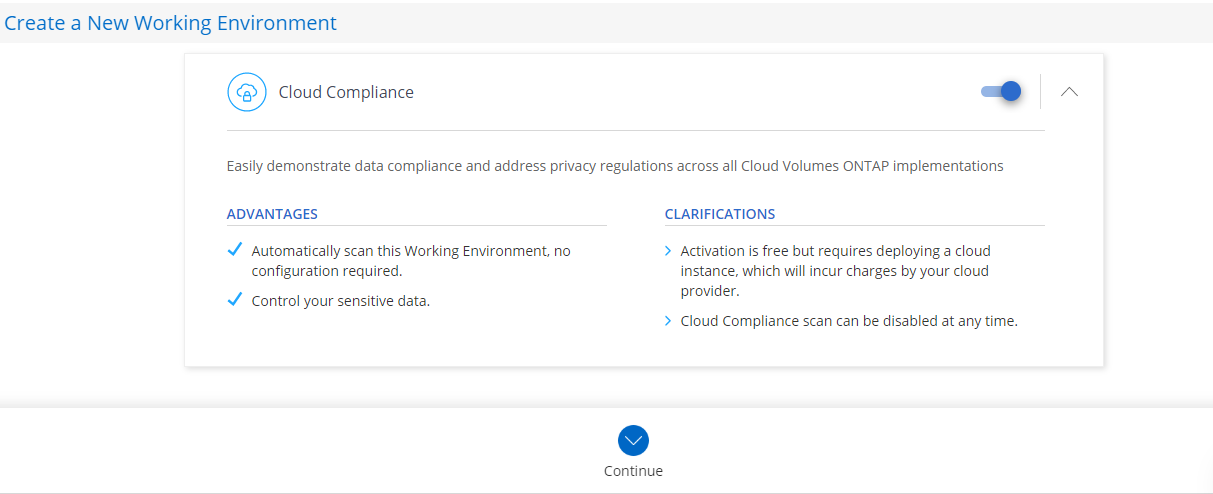
2. After giving your future cluster a name and credentials, choose whether you want NetApp Cloud Data Sense and Backup to S3 to be activated along with your Cloud Volumes ONTAP instance or not.
NetApp Cloud Data Sense is an AI-driven feature that maps, categorizes, and provides compliance insights for all your cloud data so it aligns with strict public compliance regulations:
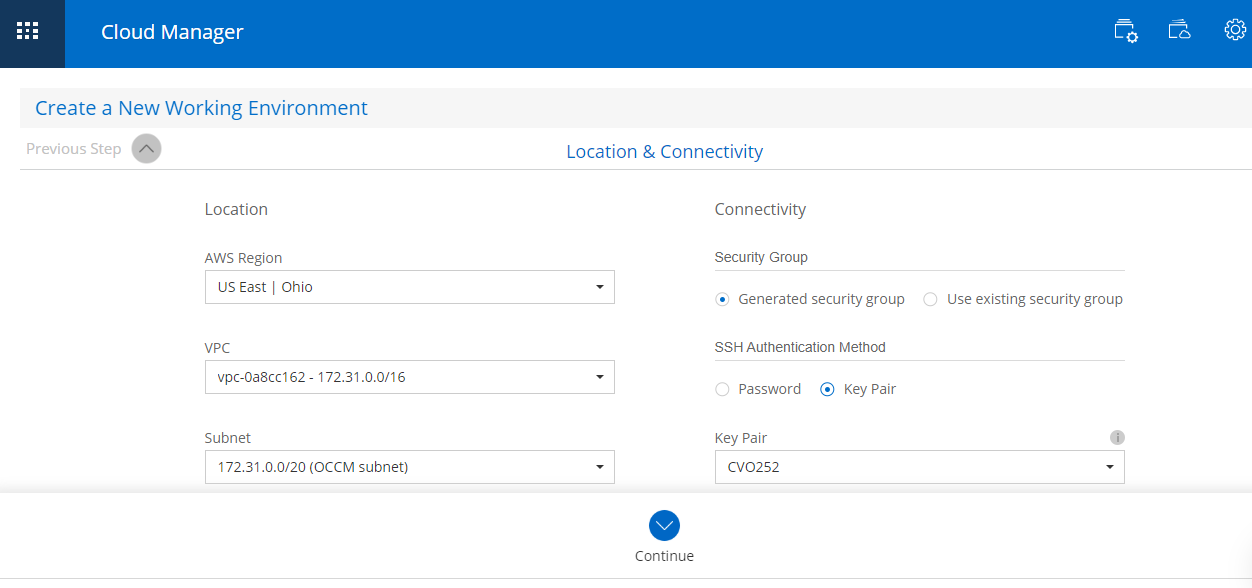
3. Now you need to provide connectivity details such as AWS region you want to deploy Cloud Volumes ONTAP instance on, your VPC, security group, and whether the data will have encryption or not.
If you select an SSH key for SSH access, make sure to store it safely for future shell access to your Cloud Volumes ONTAP cluster:
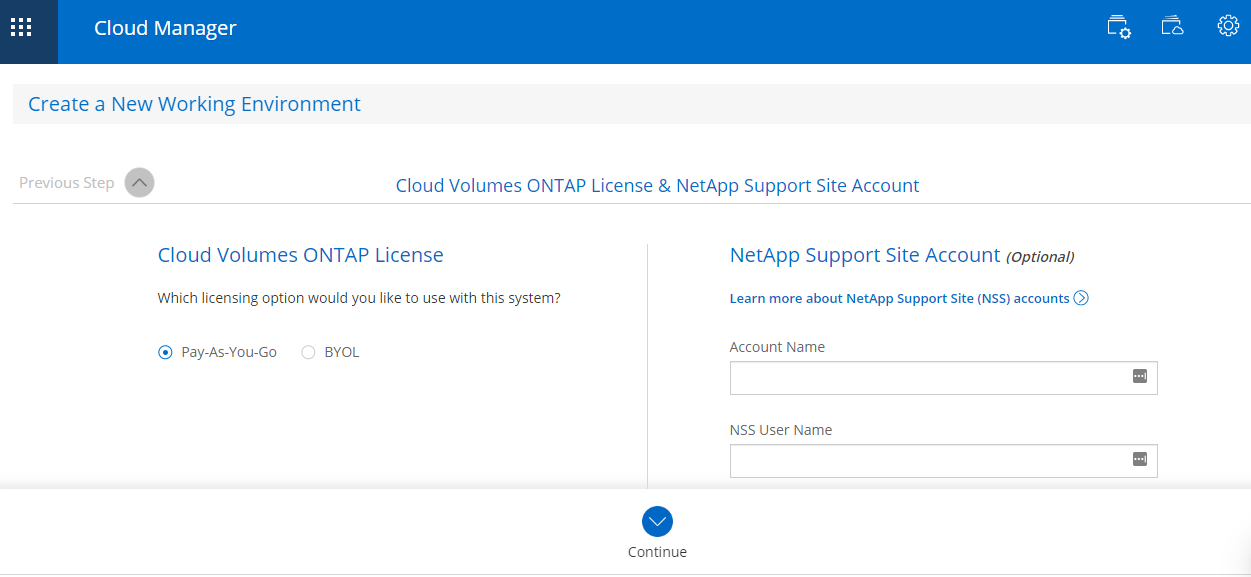
4. You will be prompted to choose your licensing model. You can also provide your NetApp Support Site Account which will give you access to NetApp Support Technical documentation and updates:
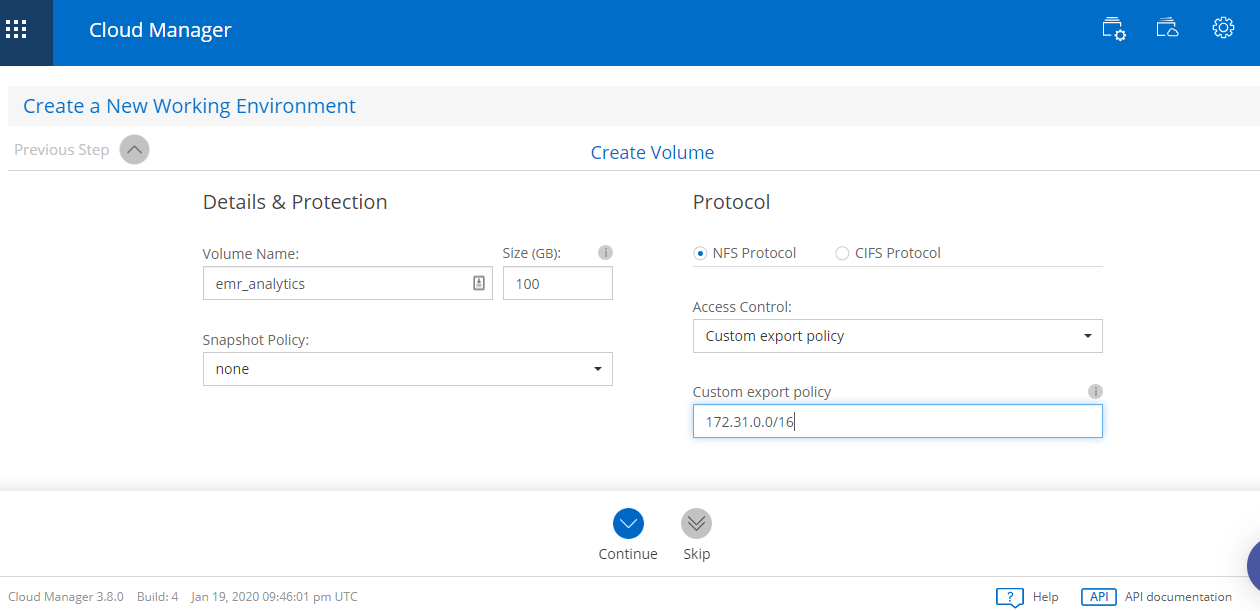
5. After you select one of the pre-configured packages, BlueXP Console will automatically make sure to scale up or out your volumes to make sure you don’t run out of space. Next, you will be promoted to create your first volume.
For this example, we want to create an NFS volume that is going to hold the data to be analyzed using EMR. Make sure that the export policy allows access from the IP range where the EMR cluster is going to reside:
6. After you select your cloud data storage cost saving storage efficiency preferences (deduplication, compression, etc.), you are taken to the last confirmation overview screen:
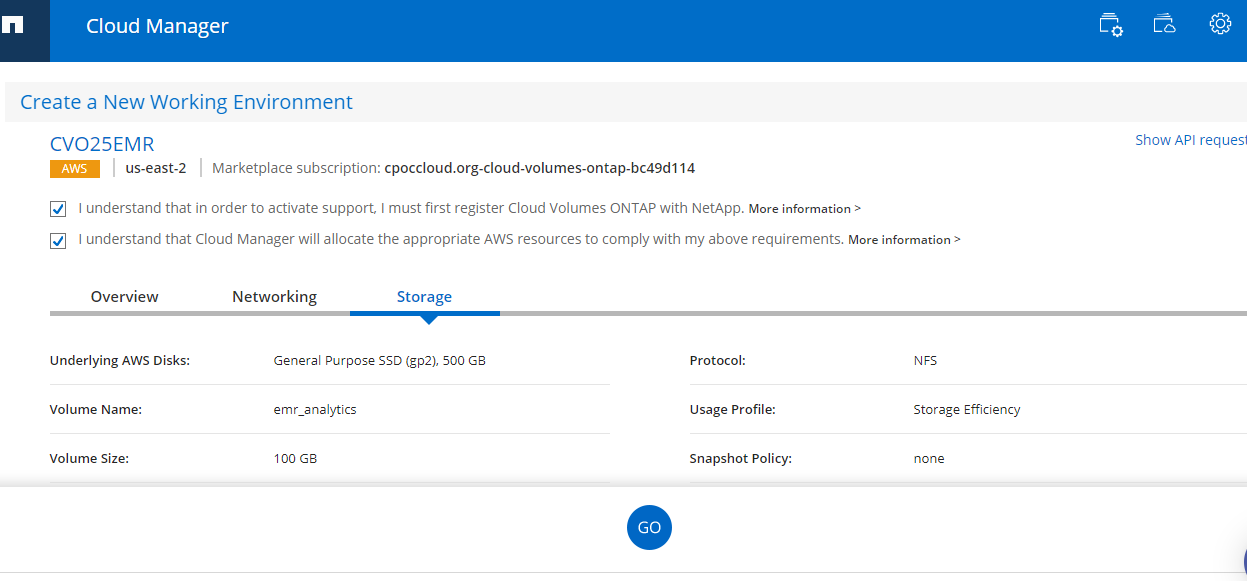
7. BlueXP Console will begin creating your new Cloud Volumes ONTAP storage cluster. Note, this process will take around 25 minutes. Once the process is finished, your new Cloud Volumes ONTAP cluster is going to show up under your BlueXP Console working environments:
Deploying an EMR-Hadoop Cluster with NetApp In-Place Analytics Module
NetApp In-Place Analytics Module was developed so that Hadoop jobs can run on existing NFS repositories hosted in NetApp ONTAP systems without having to move the data somewhere else. This allows you to use your existing storage silo and run your data analytics on your ONTAP data pools, including those in Cloud Volumes ONTAP.
The module installation process involves a few manual steps. Fortunately, NetApp made it easier by uploading a folder hosted in Amazon S3 storage with a few scripts which you can use as a bootstrap action when creating an EMR cluster. This avoids having to manually install the module into the master and each of the worker nodes.
Begin deploying your EMR-Hadoop cluster with NIPAM by following these steps:
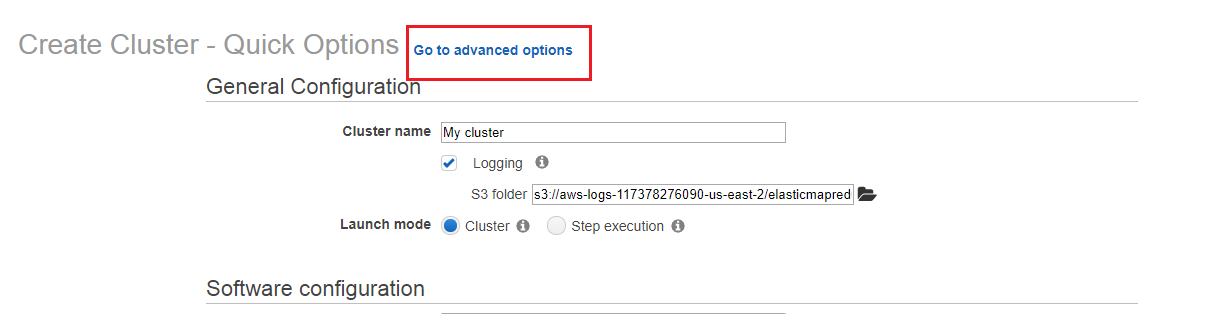
1. Log into the AWS Management Console and from the Services menu select Amazon EMR. Once selected, click “Create Cluster”:

2. The first screen will take you to the Quick Options process. Choose “Go to Advanced Options” which will take you through four steps:
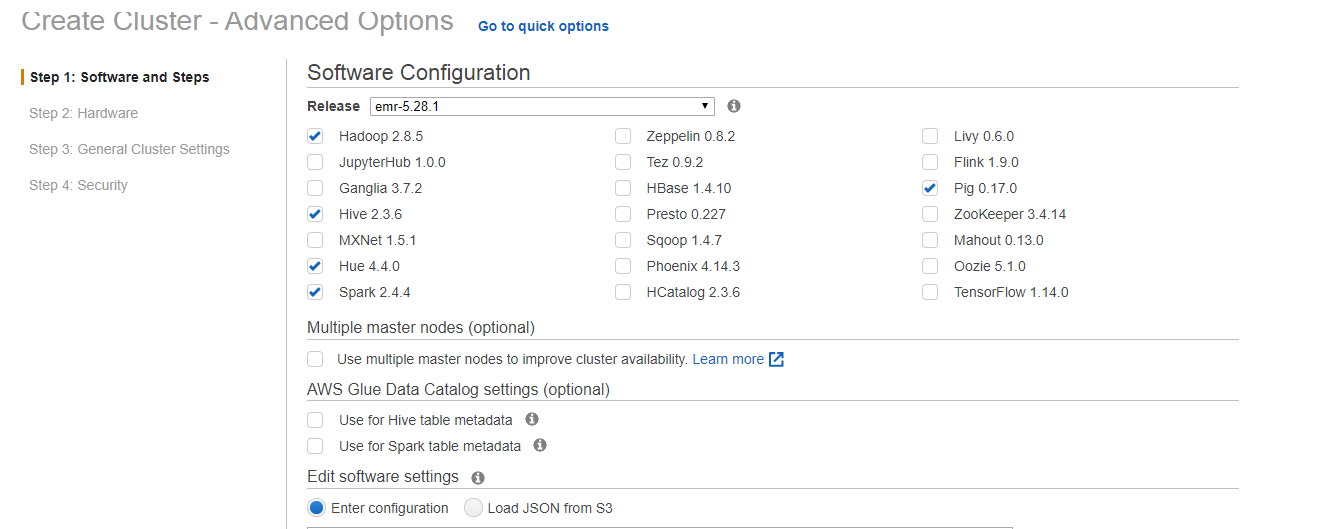
3. In Step 1: Software and Steps you will do the following:
- Tell your EMR cluster the big data frameworks you want on it, such as EMR Spark or Hive.
- Enable more than one Master node for the cluster.
- Edit software settings. This isn’t necessary in our case since this will be done by the bootstrap action we are going to provide below.
- Provide job steps (Hive program, Custom JAR, etc.) in case you are ready to run your data analysis code from the start.
4. In Step 2: Hardware, you will be setting the whole instance scheme for the cluster nodes. On this screen you will:
- Choose the instance group configuration: For example, with instance fleets there is greater flexibility for instance type and purchase option (On Demand or Spot) for wider EMR clusters.
- Choose your VPC and subnet: Preferably these will be the same ones in which Cloud Volumes ONTAP was deployed.
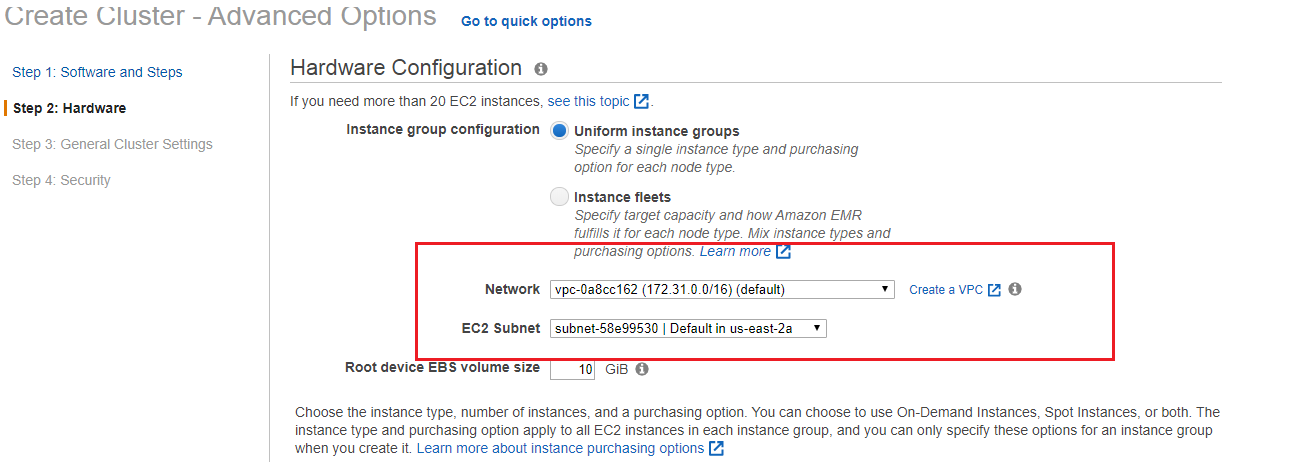
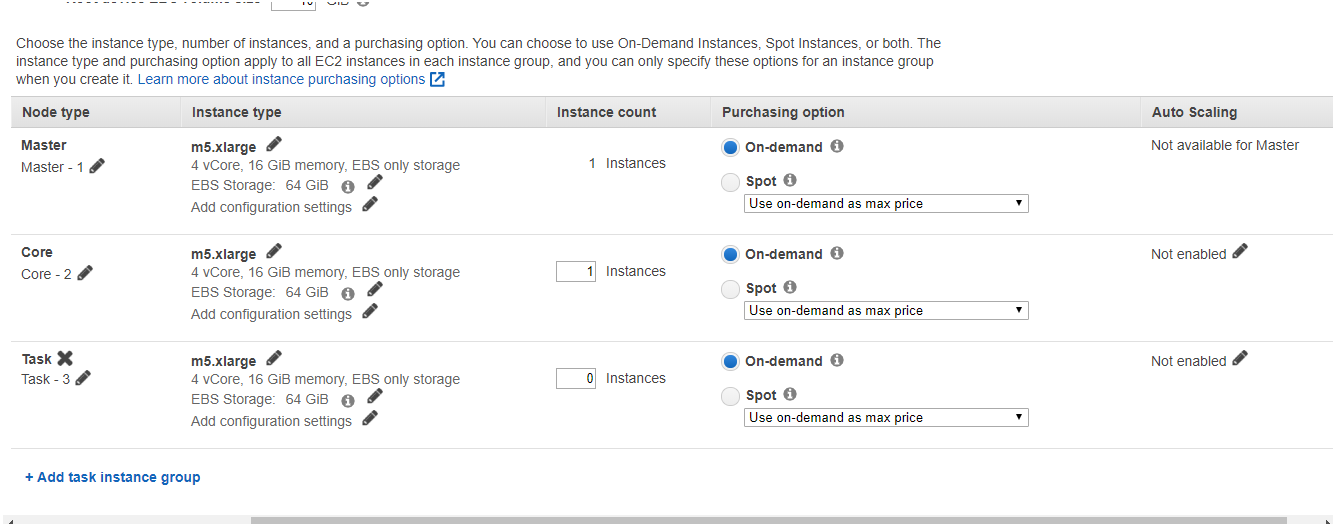
- You will also select the number of Master, Core, and Task nodes. This will include the instance type and purchasing option for each.
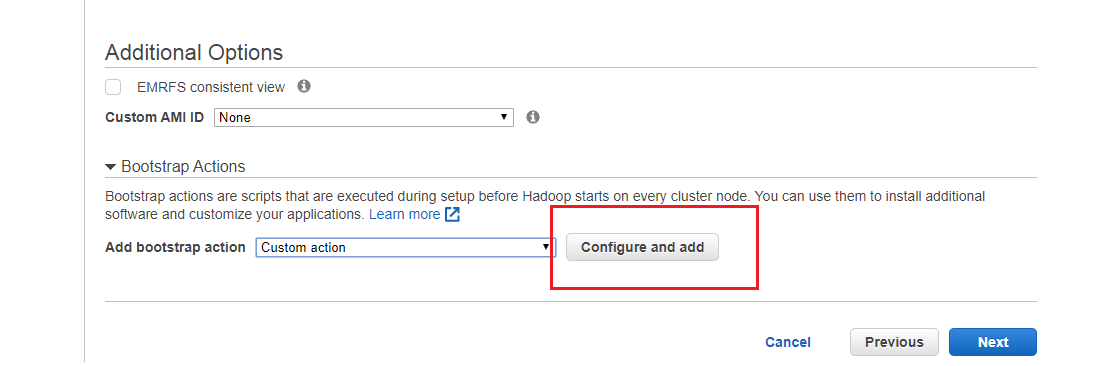
5. In Step 3: General Cluster Settings, you will add the custom bootstrap action which implements the NetApp In-Place Analytics Module into the EMR cluster. After setting the General Options, go to Additional Options > Bootstrap Actions > Add Bootstrap Action > Custom Action.
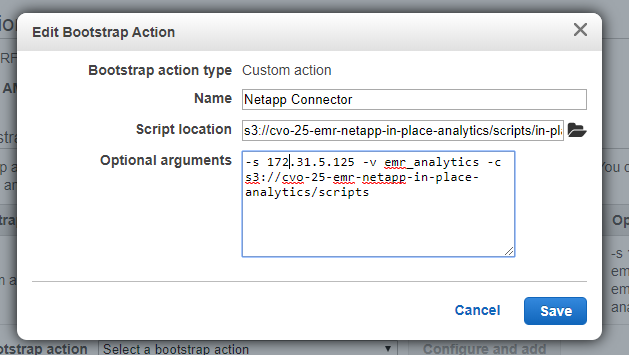
6. A window will prompt you for the bootstrap action details. Below are the details you need to provide:
- Name (of your choice)
- Script location (This is where NetApp uploaded the set of scripts that conform the module, so users have access to it):
s3://cloudvolume-netapp-inplace-analytics-bucket/scripts/in-place-analytics-module-deploy.sh
3. Optional Arguments you need to enter:
-s <NFS volume ip of your Cloud Volumes ONTAP storage>
-v <volume name>
-c <path to the scripts folder>
It will look like this:
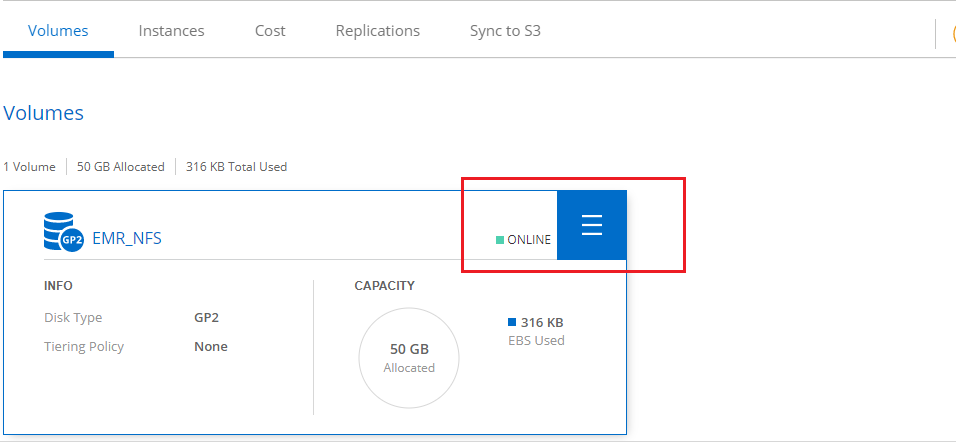
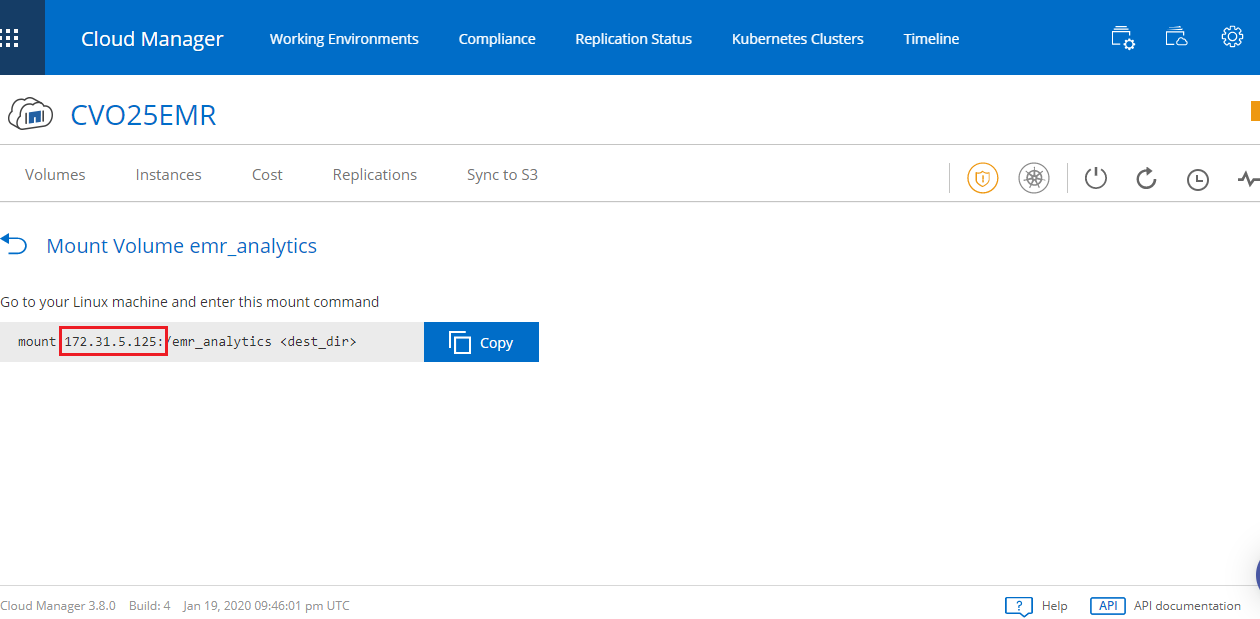
7. If you are not certain about what your NFS volume’s IP address is, you can go back to BlueXP Console, select your Cloud Volumes ONTAP storage cluster, then go to the volume options. Get the IP address from the mount information, as shown below:
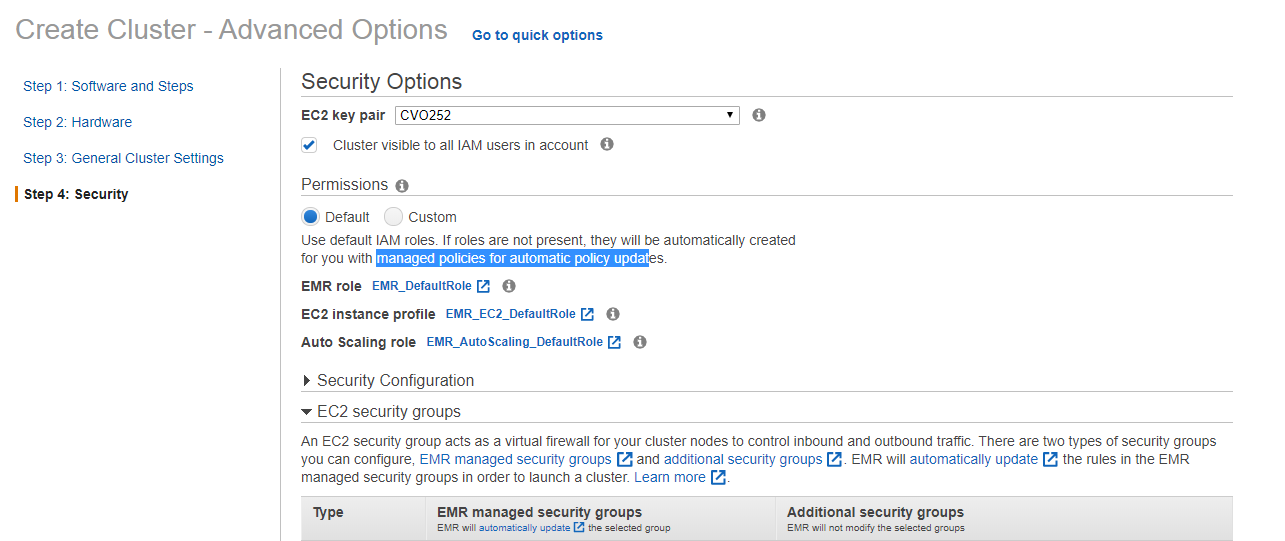
8. In Step 4: Security, you enable IAM roles and Security settings for your cluster. If you don't provide custom ones EMR sets default IAM roles and security permissions for the functioning of the cluster:
9. Finally, if you didn't provide any job steps from the start, the cluster should enter a waiting state and the bootstrap tab should display all the details we just entered:
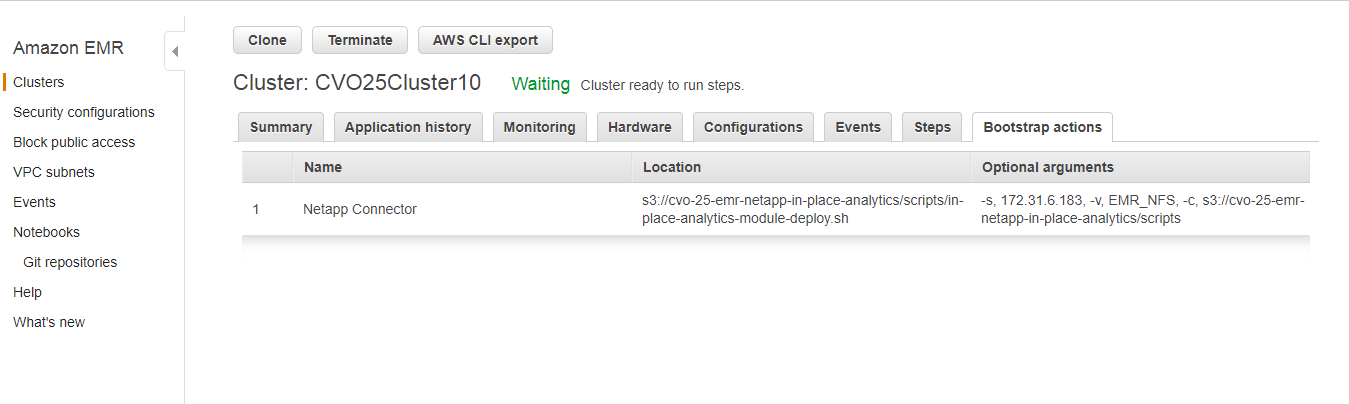
This will leave the cluster ready for you to run jobs against the datasets stored in any of your Cloud Volumes ONTAP NFS repositories.
Conclusion: Working Together to Get Big Data Processing for Less
The NetApp In-Place Analytics Module makes it possible to utilize your existing NFS repositories as pools for your big data tasks without having to move all that data somewhere else, which will take extra effort and come with significant cost increases.
For Cloud Volumes ONTAP users, NIPAM integrates EMR and all its analytics capabilities with your Cloud Volumes ONTAP deployment. All you have to do to begin running analytics on your data is to install the module as a bootstrap action in your EMR cluster. This eliminates all the manual work involved, and lets you start running analytics jobs immediately.
For EMR users, Cloud Volumes ONTAP can be leveraged to provide IAC capabilities via the zero-cost API, easy data mobility between repositories (even between different clouds), storage tiering between Amazon S3 and AWS EBS, and other storage efficiencies to lower cloud data storage costs for analytics data.

