Share
As the perpetual march to the cloud rolls on, enterprise customers are mulling over options for migrating existing workloads in the data center to equivalent cloud services. They seek to gain efficiencies for the business by taking advantage of the operational scale and performance offered by Amazon Web Services (AWS), Microsoft Azure, and Google Cloud Platform (GCP). Often, the challenge with this exercise is selecting an appropriate solution because there are multiple to choose from (including IaaS, marketplace, and native offerings), and how to migrate the data.
Why?
Data is at the heart of practically every application. Storage of this data is paramount to the success of the business. But for customers currently using Dell EMC PowerScale (in other words, Isilon or OneFS), the opportunity to take advantage of AWS native services has proven to be difficult. The option to rehome this dataset onto a native service on AWS that is performant, reliable, and offers rich data management features hasn’t been open until recently.
At AWS Storage Day 2021, AWS announced the availability of Amazon FSx for NetApp ONTAP. With Amazon FSx for NetApp ONTAP, customers can leverage best of breed storage as a native AWS offering, meaning it’s fully managed and supported by Amazon. Migration from PowerScale to this new offering is very straightforward compared to other means, and allows you to move your data closer to other resources in the AWS cloud.
Networking Prerequisites
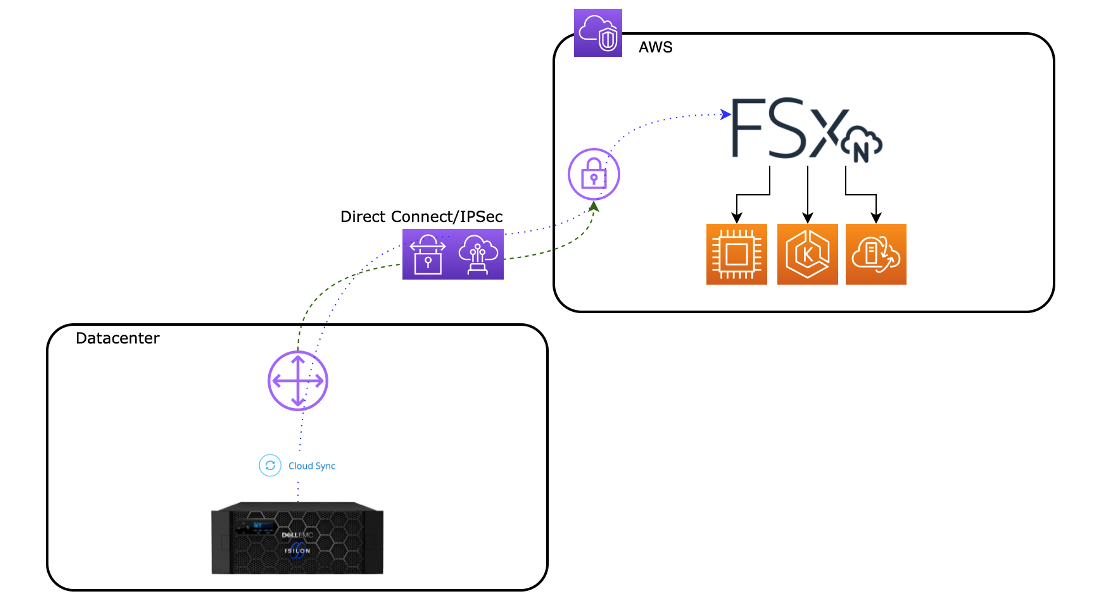
A key tenet of the hybrid cloud is the connecting and/or extending your on-premises network to the target Virtual Private Cloud or VPC. AWS Direct Connect or Site-to-Site VPN are common methods for connecting networks. They open up the path for data transport between a source PowerScale cluster and a target FSx for NetApp ONTAP solution (example topology below):
Migration of Data
While there are many services and tools that can be used for data migration we’ll focus on a specific tool in this post: NetApp Cloud Sync. Cloud Sync provides a simple way to replicate to and from a wide variety of end points and protocols. Data is copied from the source cluster to FSx for NetApp ONTAP as either a single/one time copy or an ongoing scheduled task.
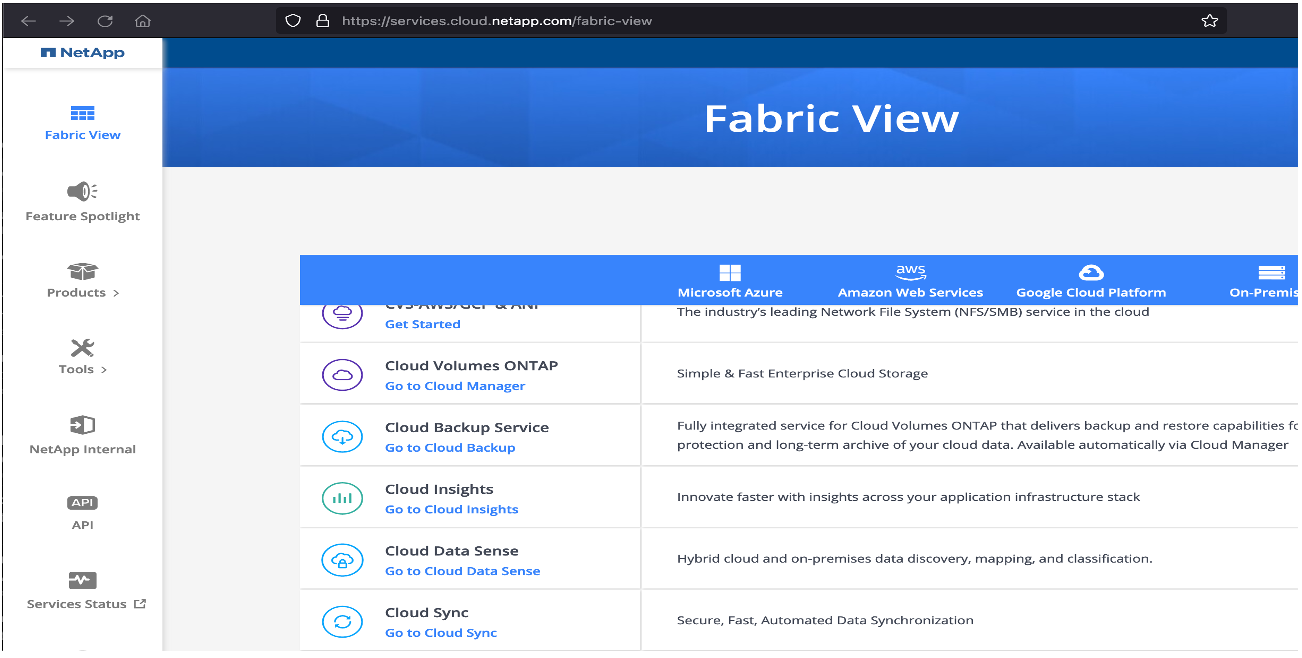
To get started, sign up or login to NetApp Cloud Central, and select Cloud Manager from the Fabric View landing page (or connect to Cloud Manager directly via this link).
Once you’re logged into Cloud Manager, you’ll need to set up shop and create a few items:
- Workspace – This allows for the creation of objects to be managed via Cloud Manager
- Connector – Allows for connectivity and resource creation for a cloud provider (in this case, we’ll spin up one for AWS)
- Working environment for FSx for NetApp ONTAP – this process either creates a new filesystem or allows for the discovery of an existing filesystem for use
- Create a target volume for the data being copied from the source cluster
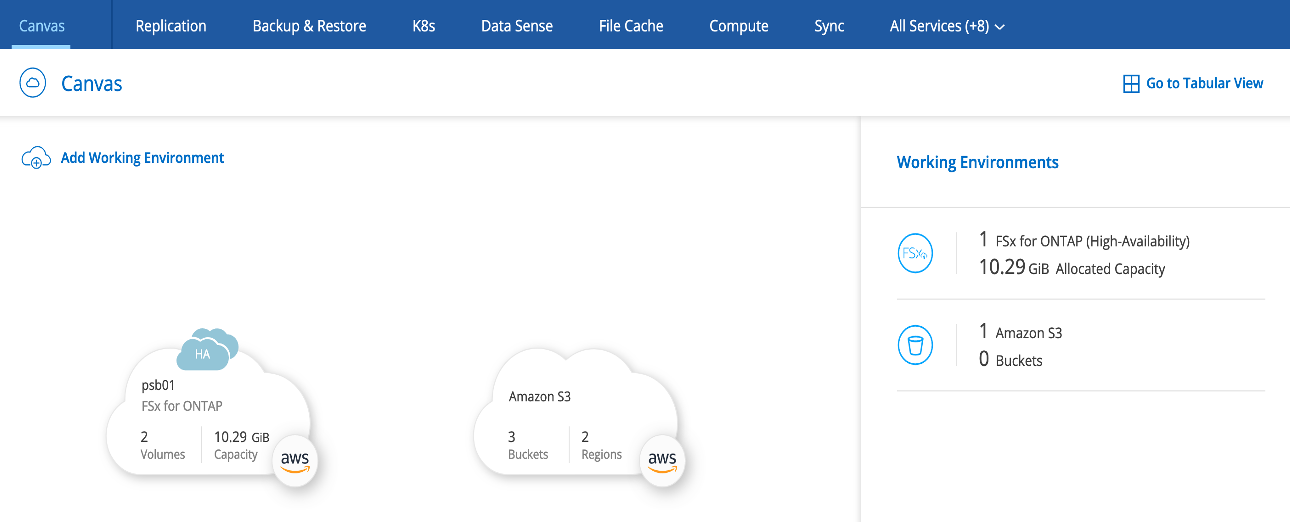
After adding the FSx for NetApp ONTAP filesystem, you should see the FSx instance:
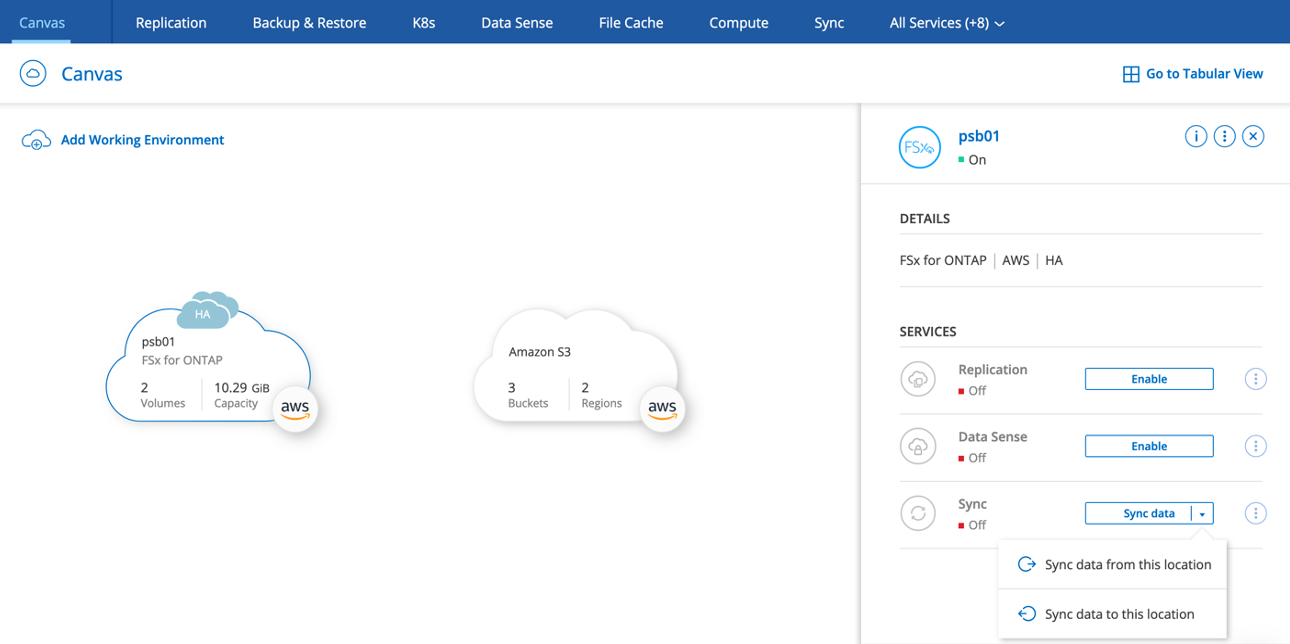
Select the FSx instance, and details will be listed on the right-hand blade. Under Services, select Sync, then Sync data to this location.
For this example, we’ll use an NFS source volume. Drag and drop the “NFS Server” option to the “Drag Source Here” box.
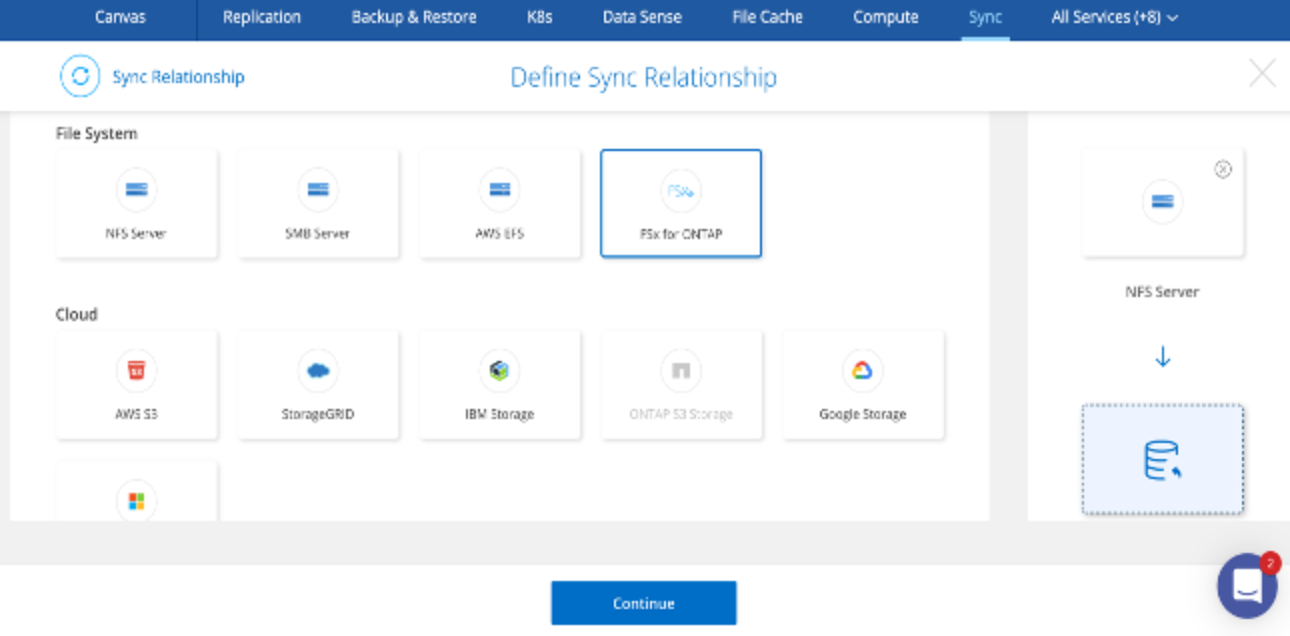
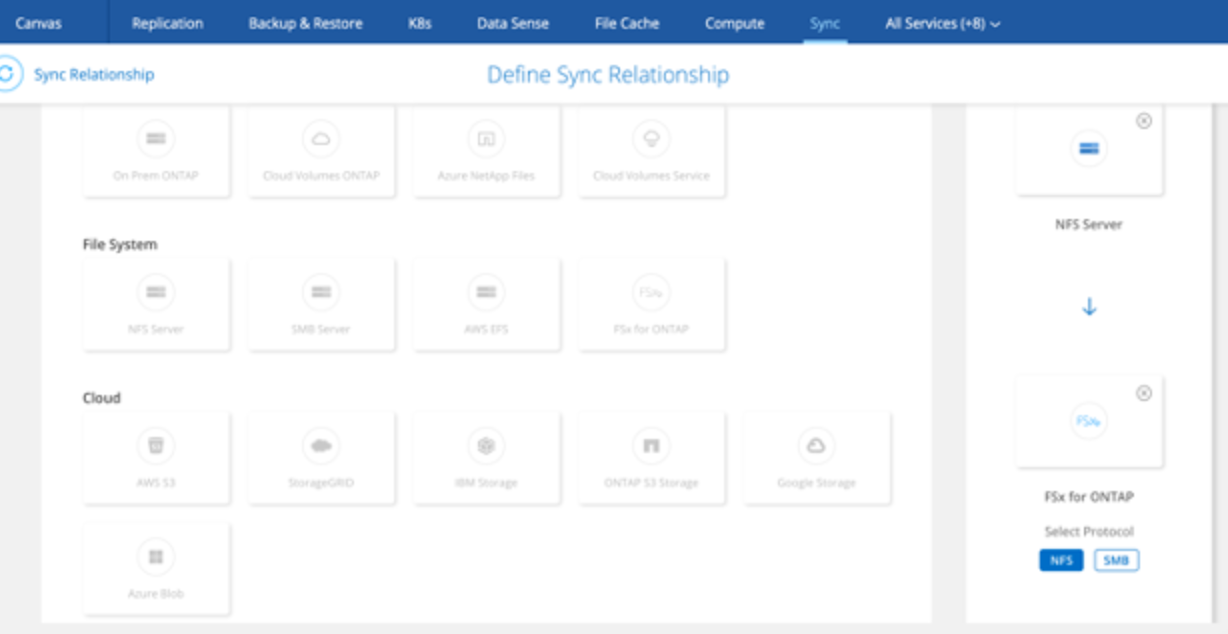
The FSx filesystem is our default target, however we do need to select the protocol required. So, click on NFS for this exercise then click Continue.
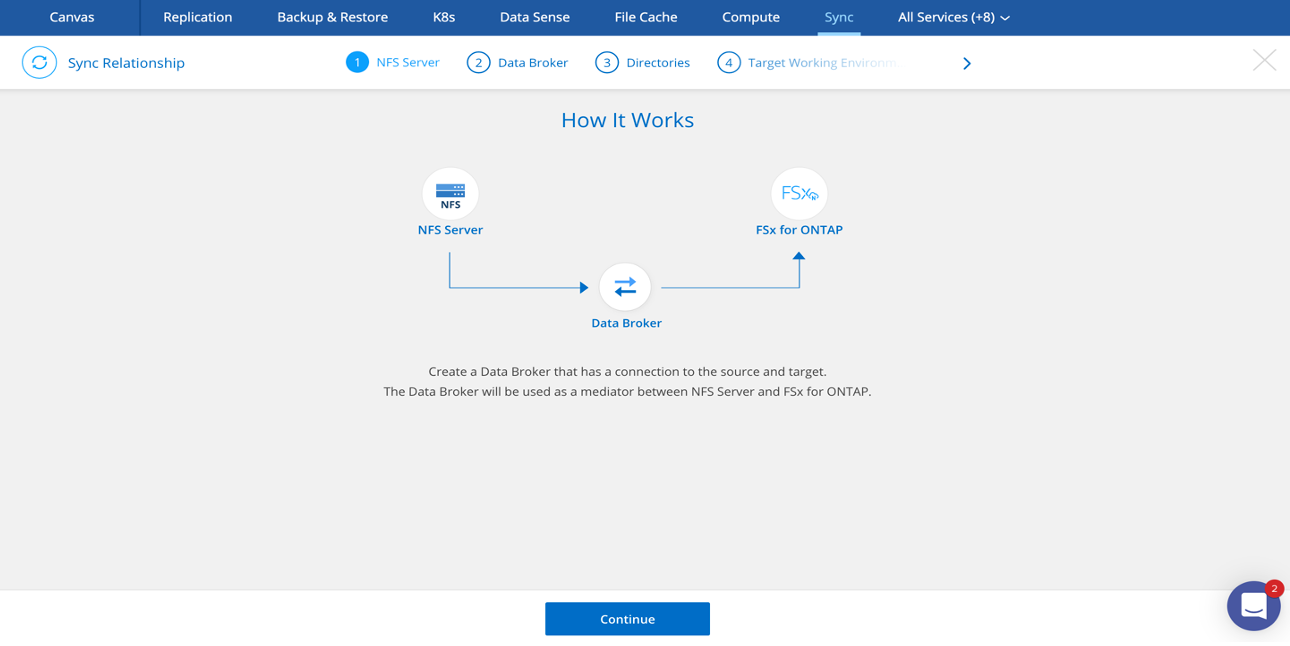
Cloud Sync requires a helper VM to be deployed either in the cloud or on premises to facilitate a connection to the source (in our case, the PowerScale cluster) and the data movement to the target (FSx for NetApp ONTAP). Refer to the Cloud Sync documentation for detailed steps and requirements.
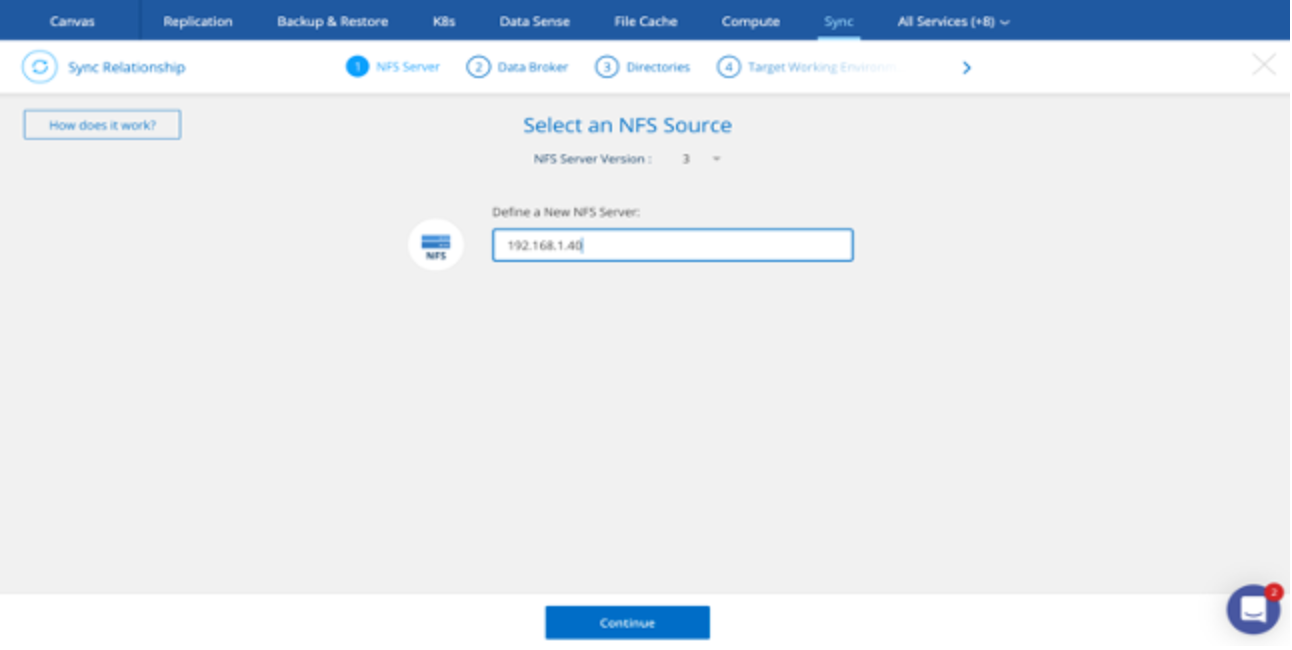
Now, we’ll enter the IP address of the NFS export on the source cluster.
And select the recently deployed Data Broker.
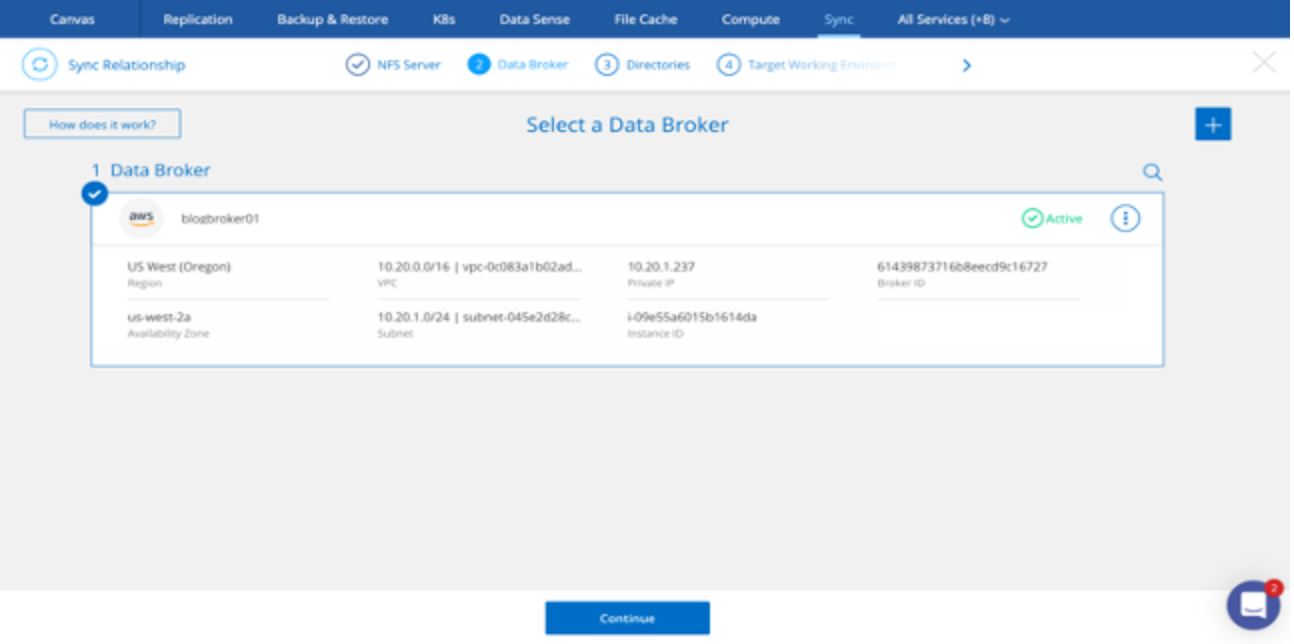
The Data Broker will then scan the source NFS exports; choose your preferred volume and select Continue.

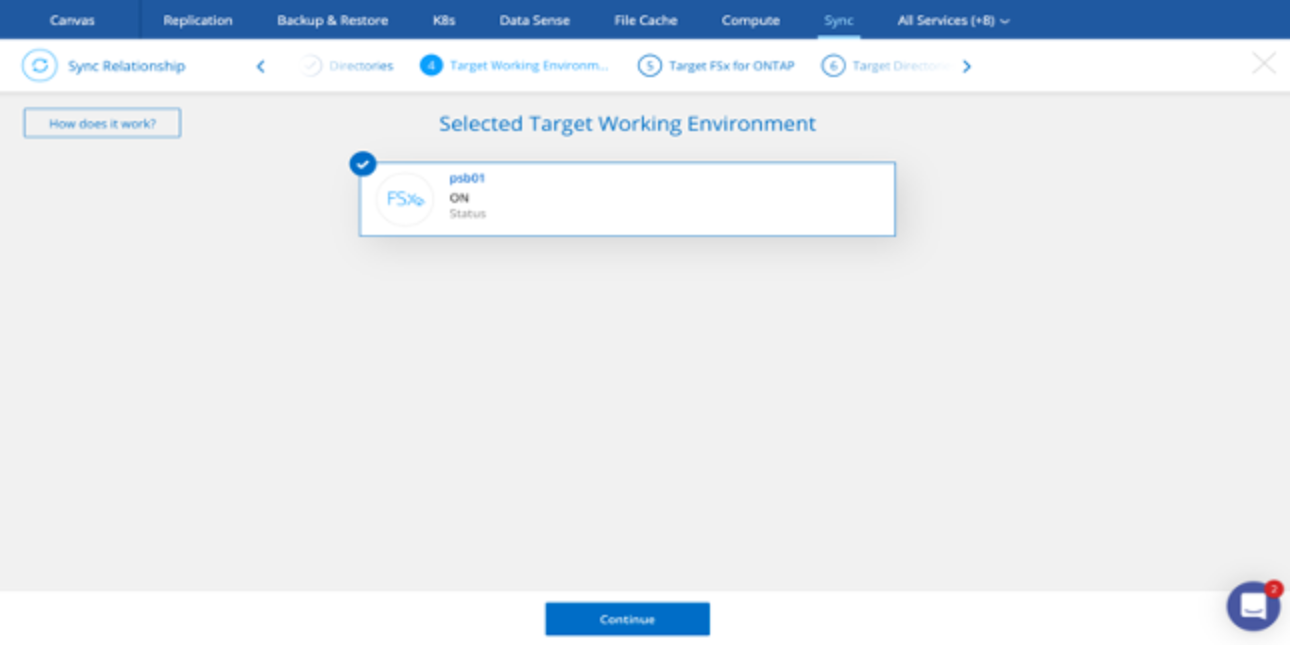
Select the target FSx filesystem.
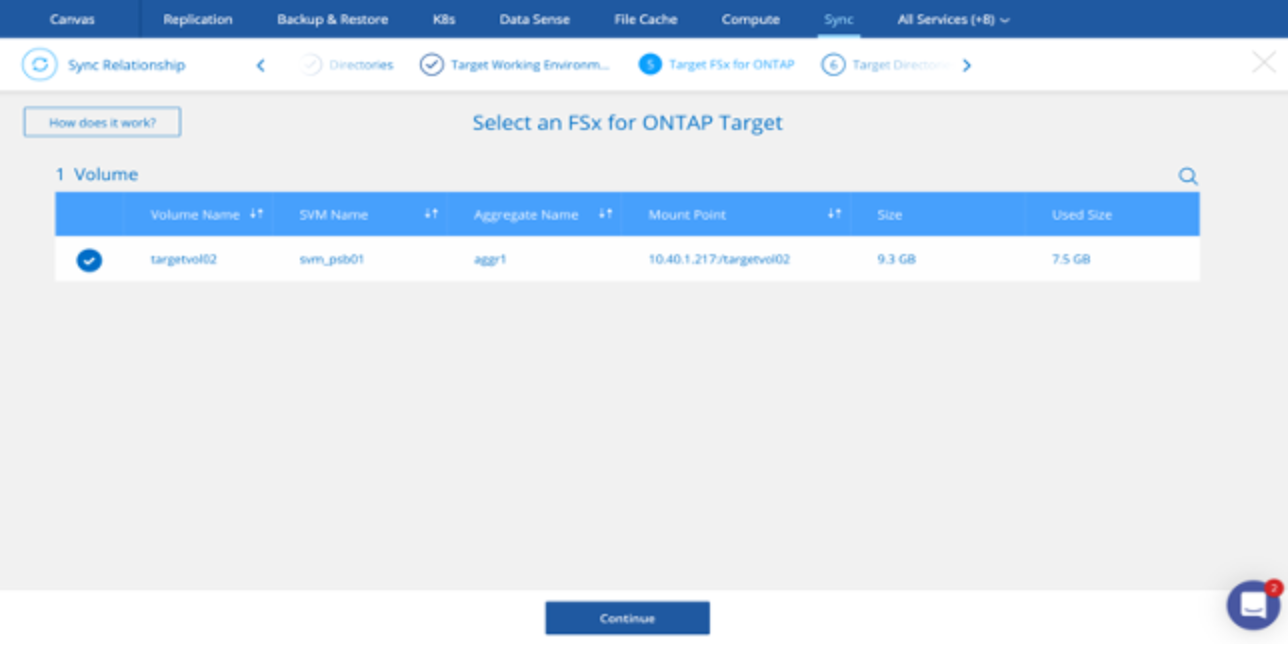
And select the target FSx volume.
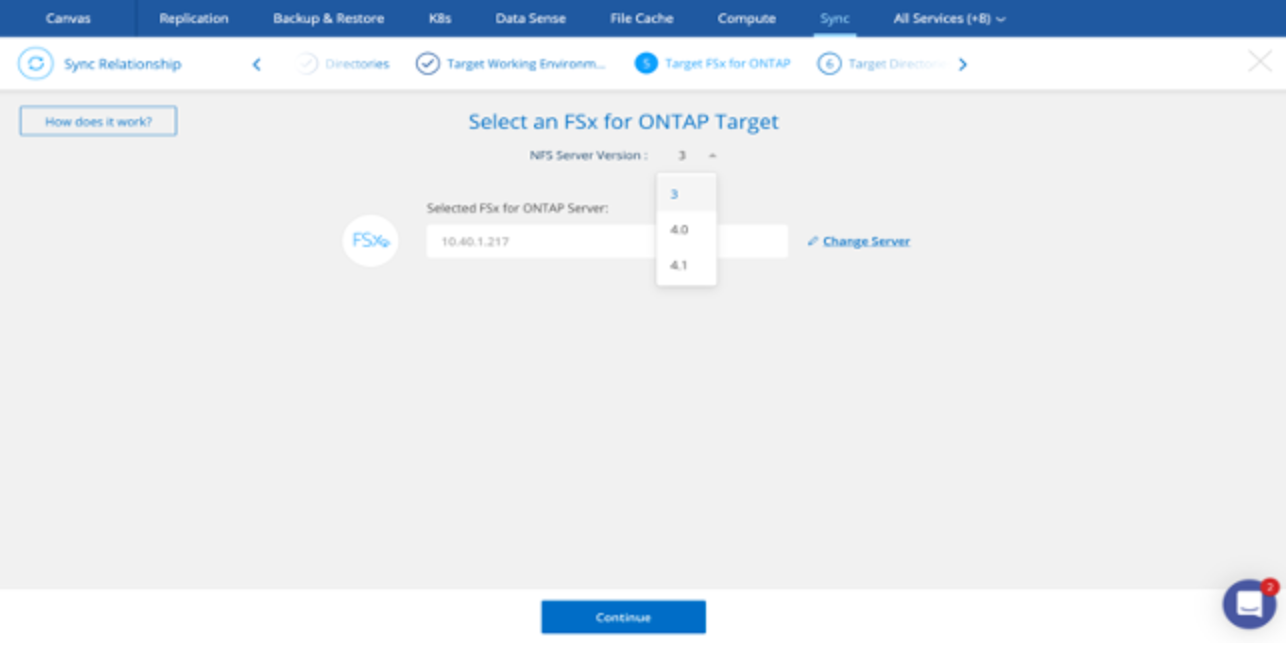
You can change the NFS version, if needed (v3, v4.0, v4.1).
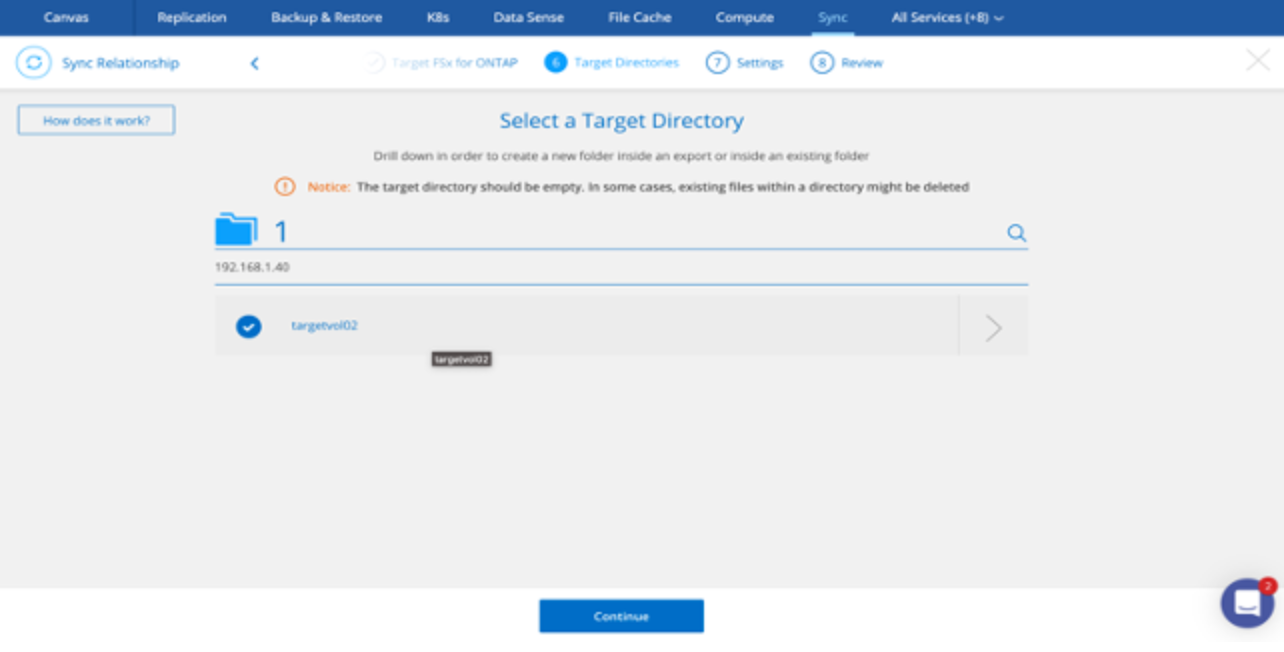
Select the target directory.
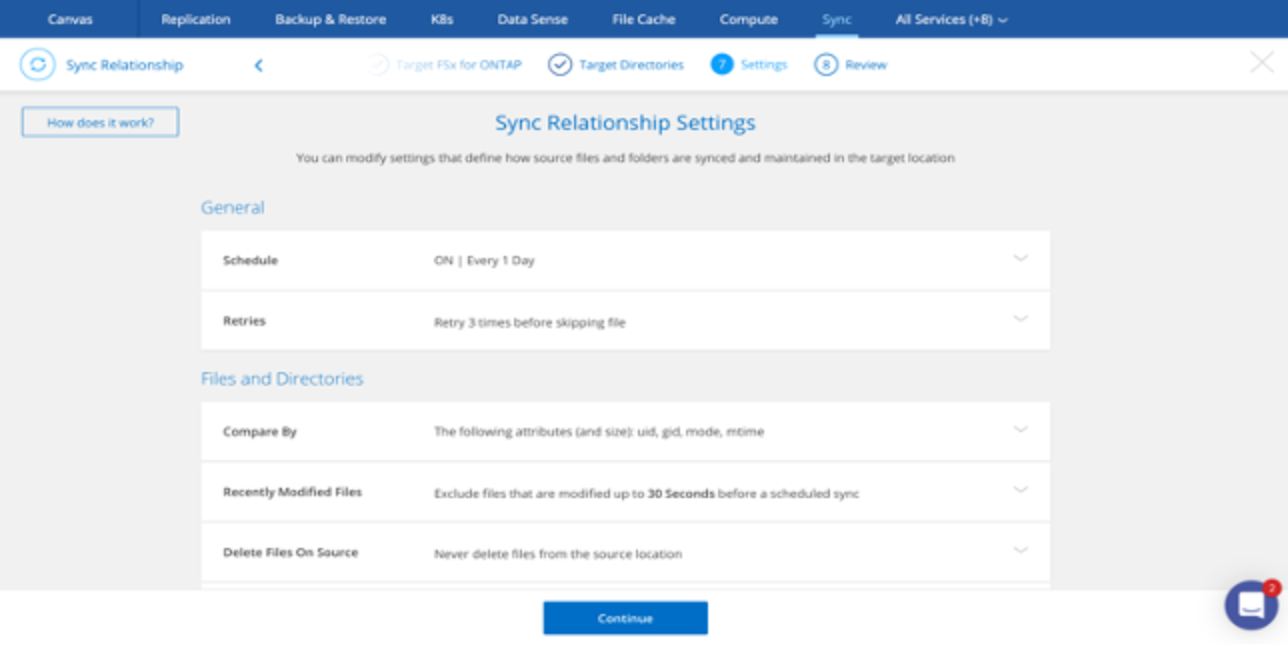
The select the desired properties for the sync relationship.
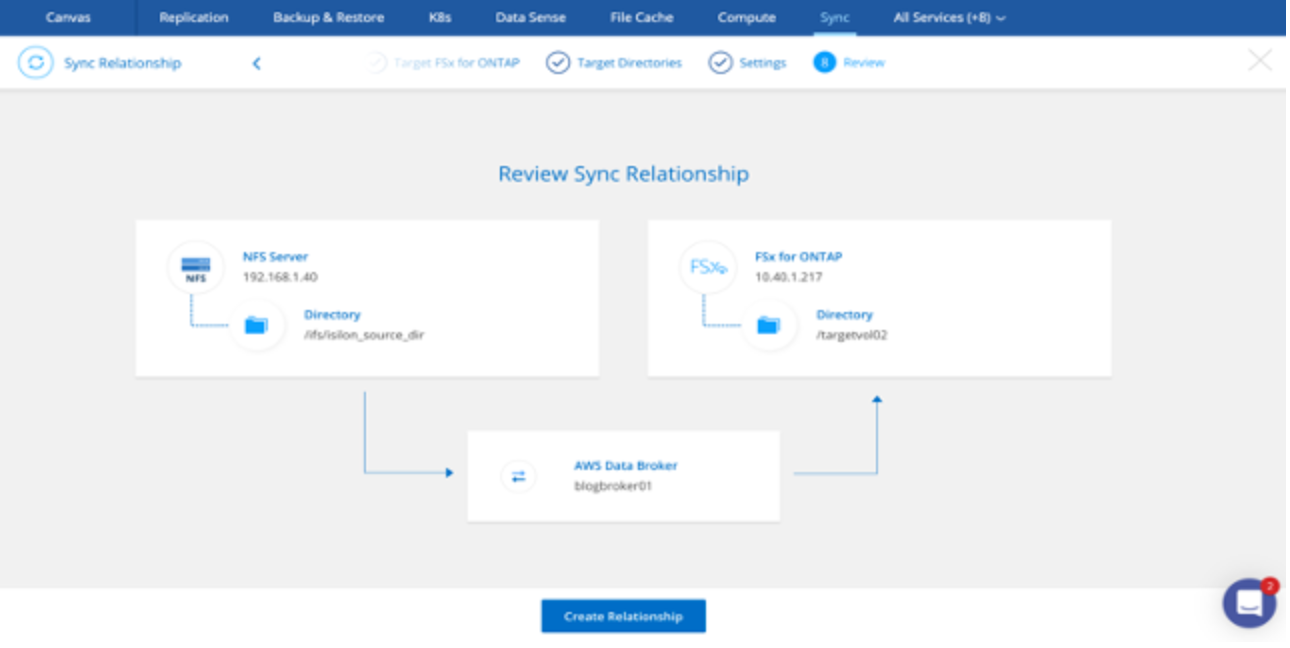
Finally, select “Create Relationship” when you’re ready to define the source/target in Cloud Sync and begin moving data.
The data copy process starts! You can monitor progress on the Sync dashboard.
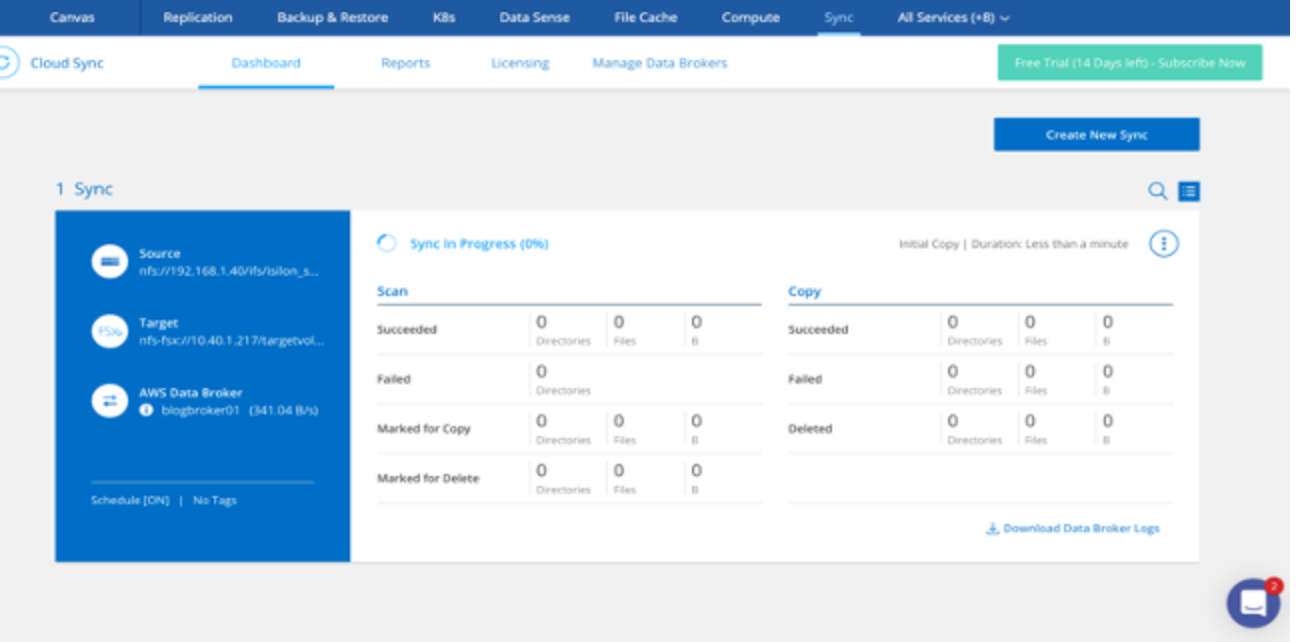
Again, monitor the progress of the data copy via the dashboard. Once complete, you’re ready to mount the data from the FSx for NetApp ONTAP volume on an EC2 host in AWS.

Closing Thoughts
Amazon FSx for NetApp ONTAP is a highly available (active/passive across Availability Zones in an AWS region), high performance storage solution that provides rich data management features. It allows for a wide range of critical enterprise workloads to be easily migrated to an AWS native service without compromise.
Getting started with Amazon FSx for NetApp ONTAP is simple. If you’re looking for additional information on NetApp solutions please visit NetApp Cloud Central.
