Share
Organizations are increasingly adopting Azure storage for long-term and short-term retention of backup data as a low-cost and secure alternative to on-premises backup storage solutions. One example of this approach is having an Azure database backup. Azure delivers scalable resources on demand in a pay-as-you-go model, which eliminates the need of large-scale capex investments in on-premises storage to store backup data.
Azure augments the on-prem investments already made by customers through hybrid integration capabilities; backing up an SQL Server is one scenario where this can be put into use. The backup data can be stored in Azure Blob storage through a few easy configuration steps. The back up to Azure Blob storage feature is available for SQL Server 2016 and above.
This blog will provide a step-by-step walkthrough on how to back up SQL Server to Azure storage, from configuring the Azure storage to pointing SQL Server to the new storage target in the cloud. We’ll also see how backing up databases on Azure can be enhanced with Cloud Volumes ONTAP®.
Azure Storage Options for SQL Backup
When using Azure backup, Customers can choose from Azure page blob or Azure block blob while configuring backup for SQL Server. The choice of storage depends on the storage credentials configured in the TRANSACT-SQL statement used for configuring backups. These credentials can either be the storage key or a shared access token. While an Azure storage key can provide storage level access, a Shared Access Signature (SAS) can be used to restrict access to one of the storage services, i.e., blob, table, queue, or file service.
While using a storage key to create credentials in SQL, the backup will be stored in a page blob. The backup target can be Azure block storage when the credentials are created using Shared Access Signature. This approach is considered more secure since SAS can be used to fine tune access to the storage. It can be used to limit access to a blob where the backup will be uploaded and can also be configured with an expiry date. Block blobs are also cheaper than page blobs, so using block blob as a target for the SQL backup data is both secure and more economical.
Azure Storage Configuration for SQL Server Backup
Before you start to back up SQL Server to Azure, let’s create the Azure storage account and a container where the backups will be stored. A Shared Access Signature for authentication should also be created for authentication. We will be using Azure PowerShell commands for this example, and will execute them from Azure Cloud Shell.
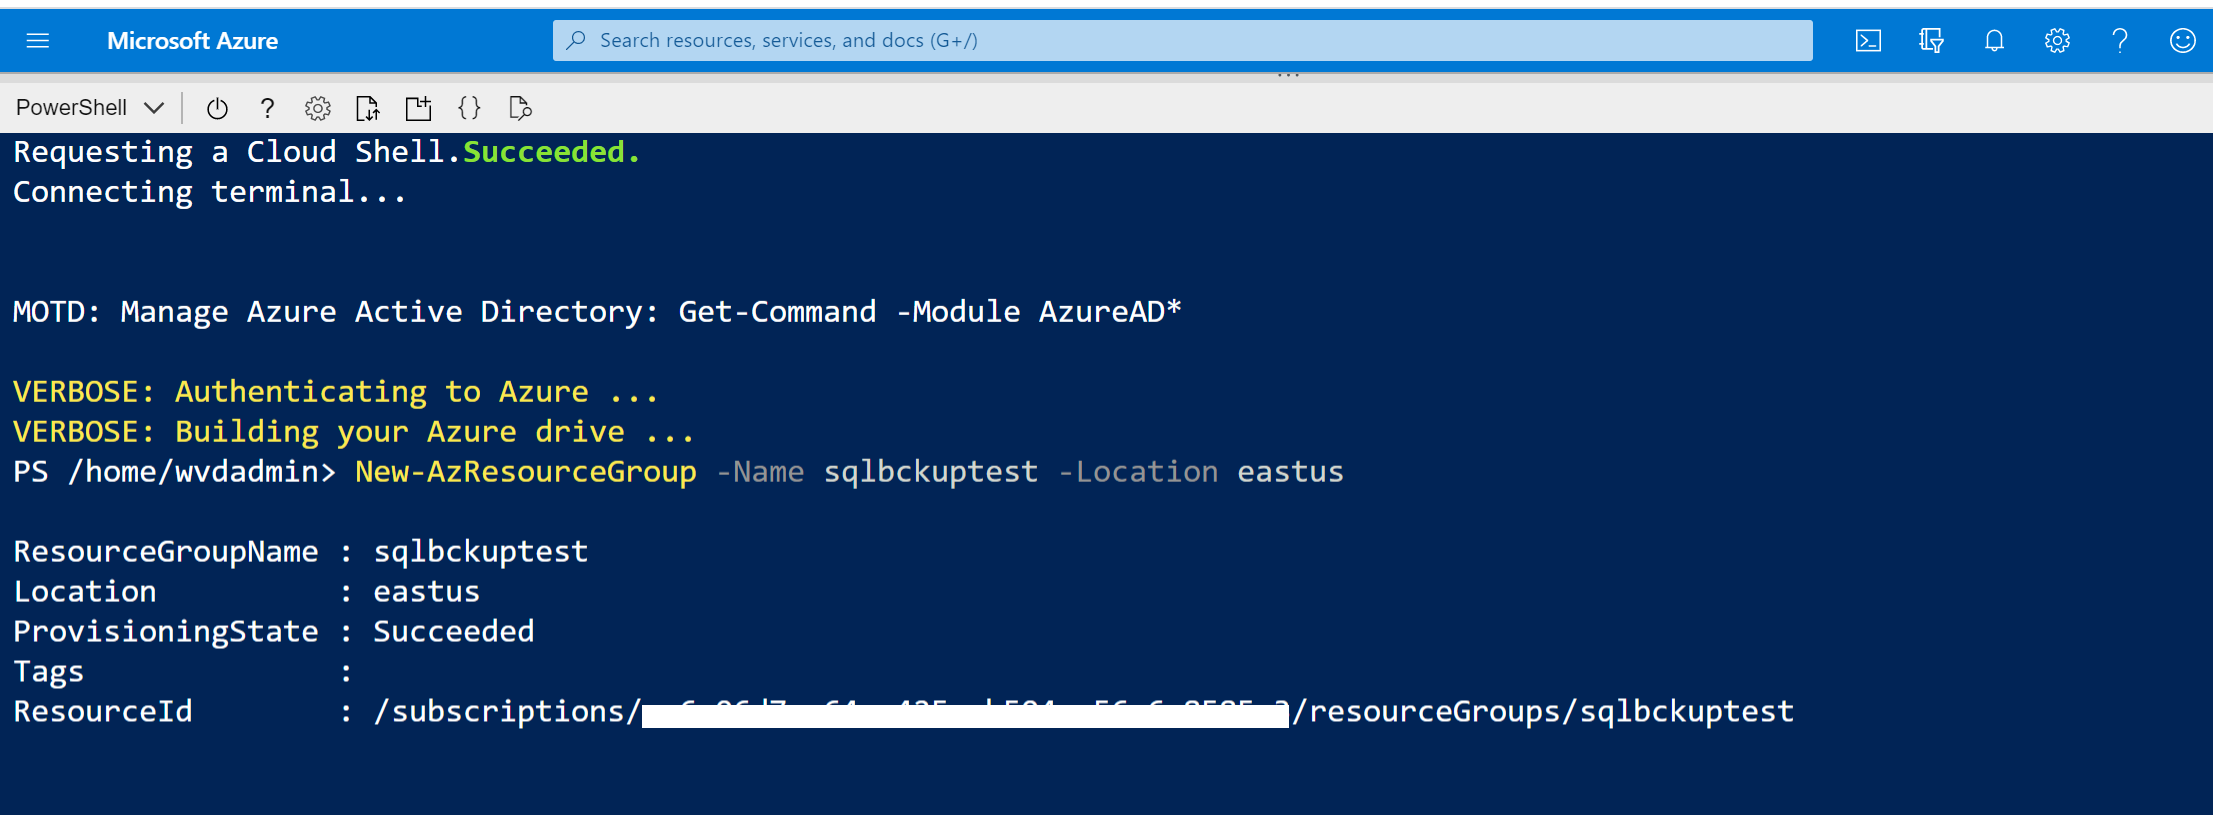
1. Create a new resource group for the storage account. You can skip this step if you are going to use an existing resource group.
New-AzResourceGroup -Name <resourceGroupName> -Location <locationName>
Update <resourceGroupName> and <locationName> values in the command with name of the resource group and the Azure region where the resource group will be created.
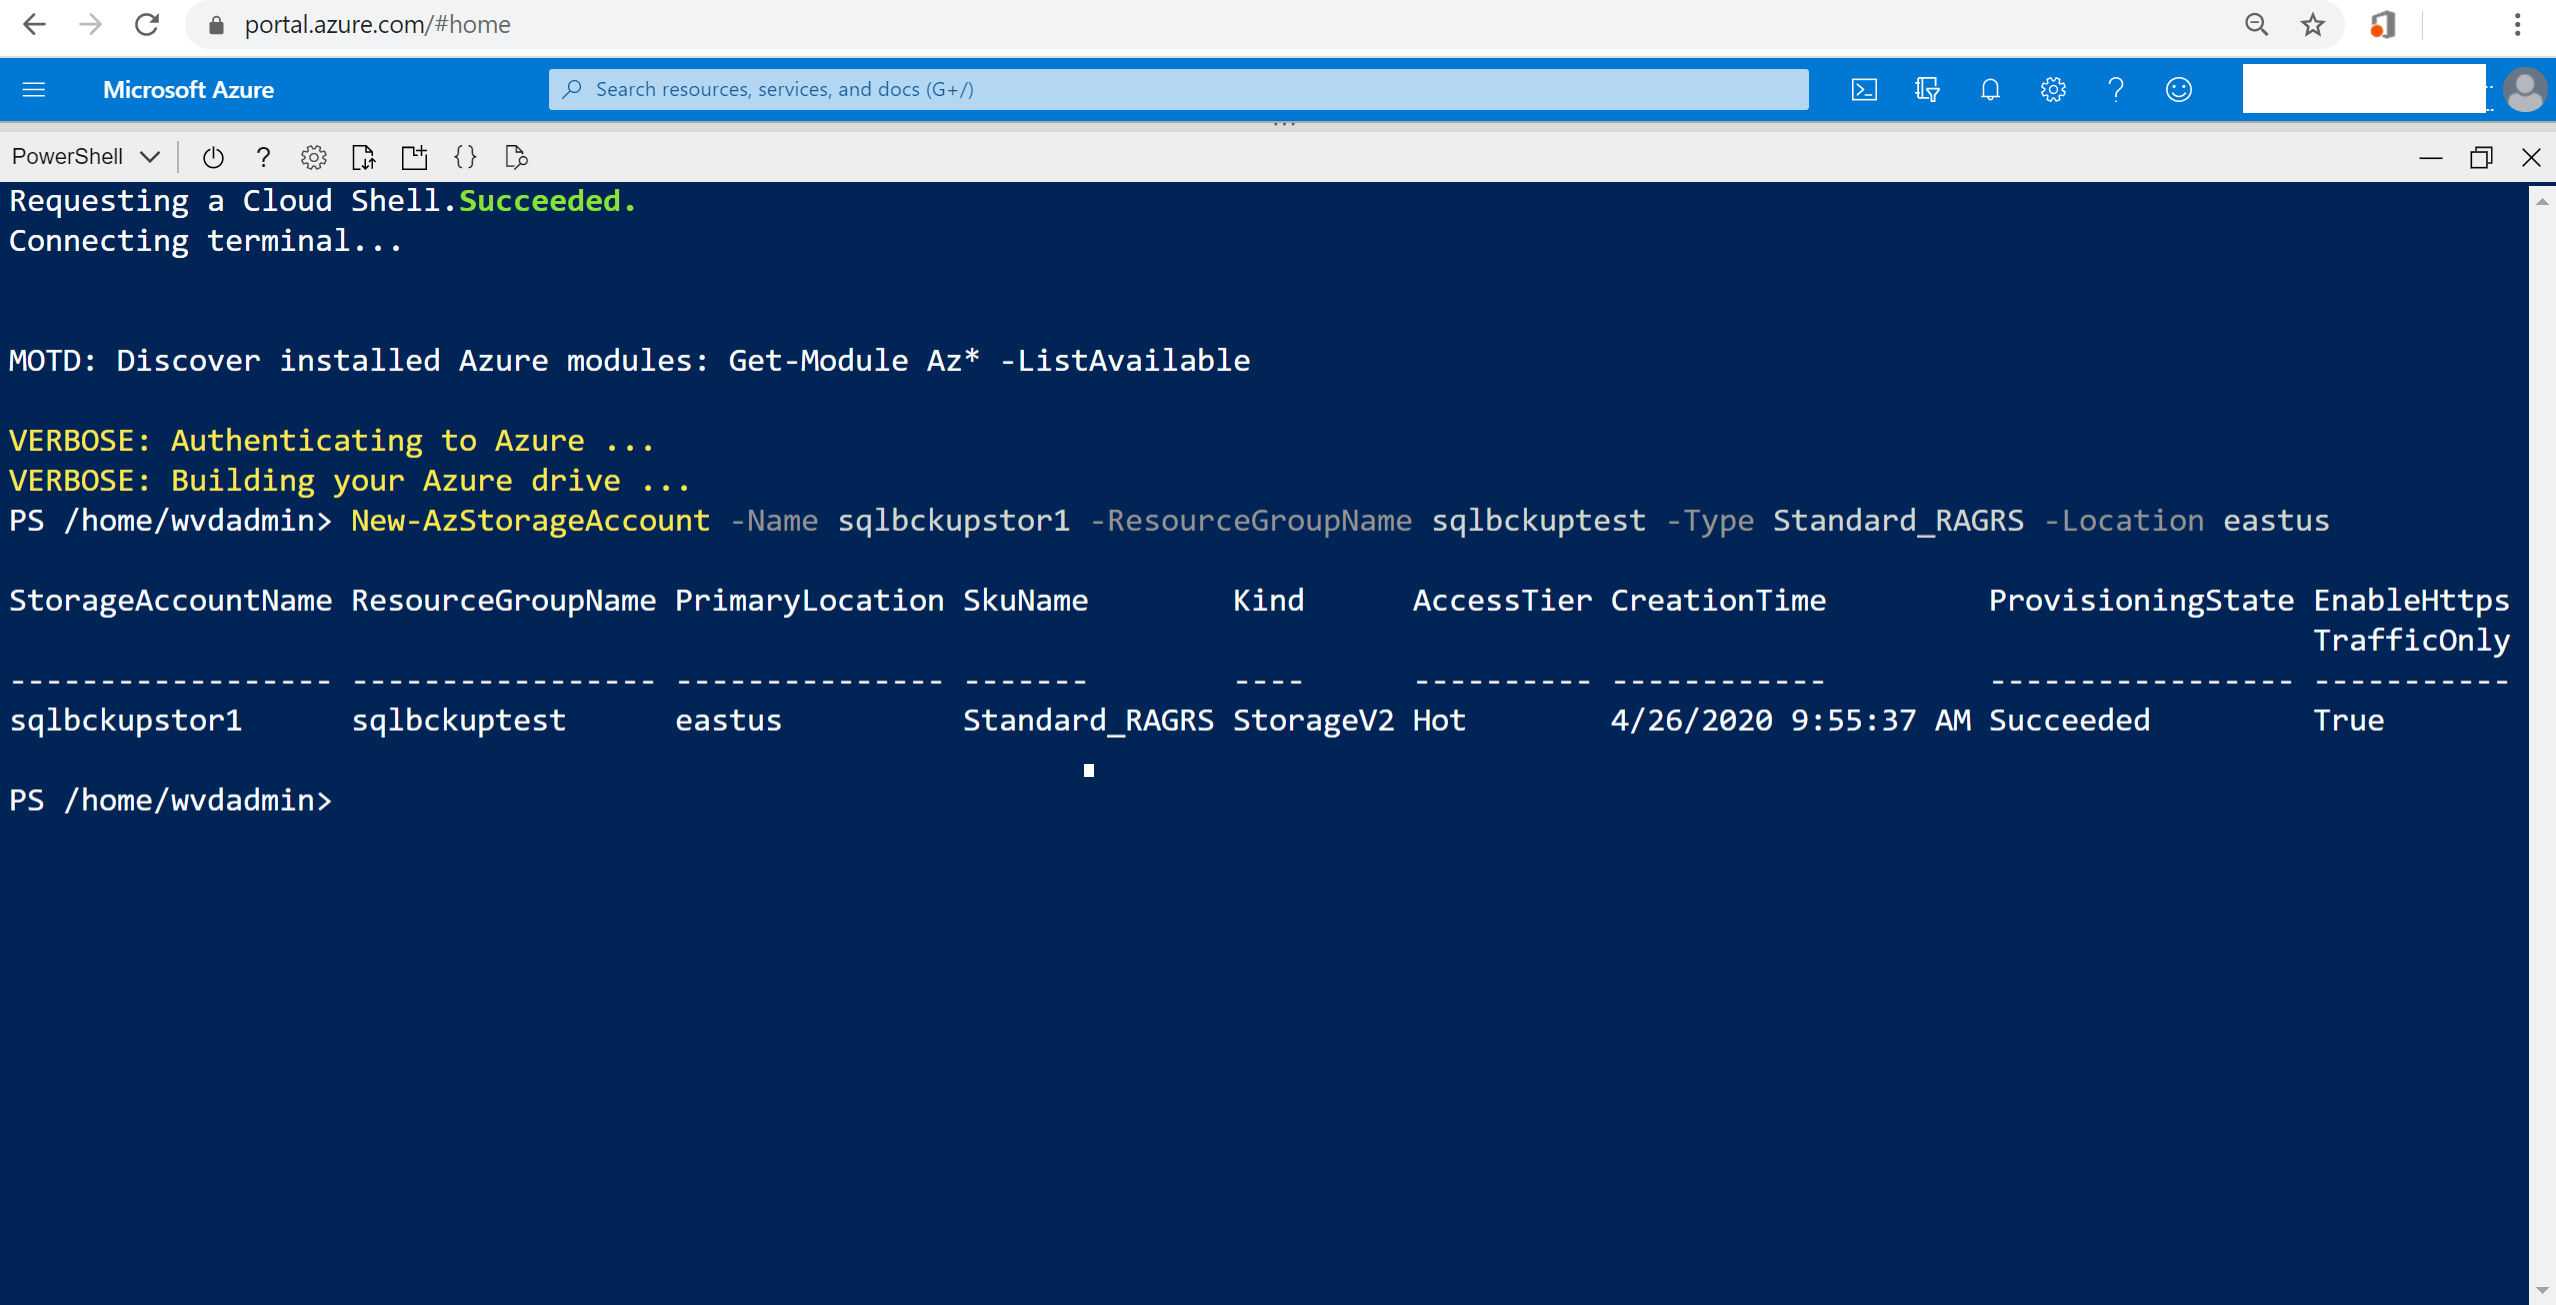
2. Create your storage account using the following Azure CLI commands:
New-AzStorageAccount -Name <storageAccountName> -ResourceGroupName <resourceGroupName> -Type Standard_RAGRS -Location <locationName>
Update <storageAccountName> , <resourceGroupName> , and <locationName> values in the command with the name of storage account, the resource group name (from step 1), and the Azure region.
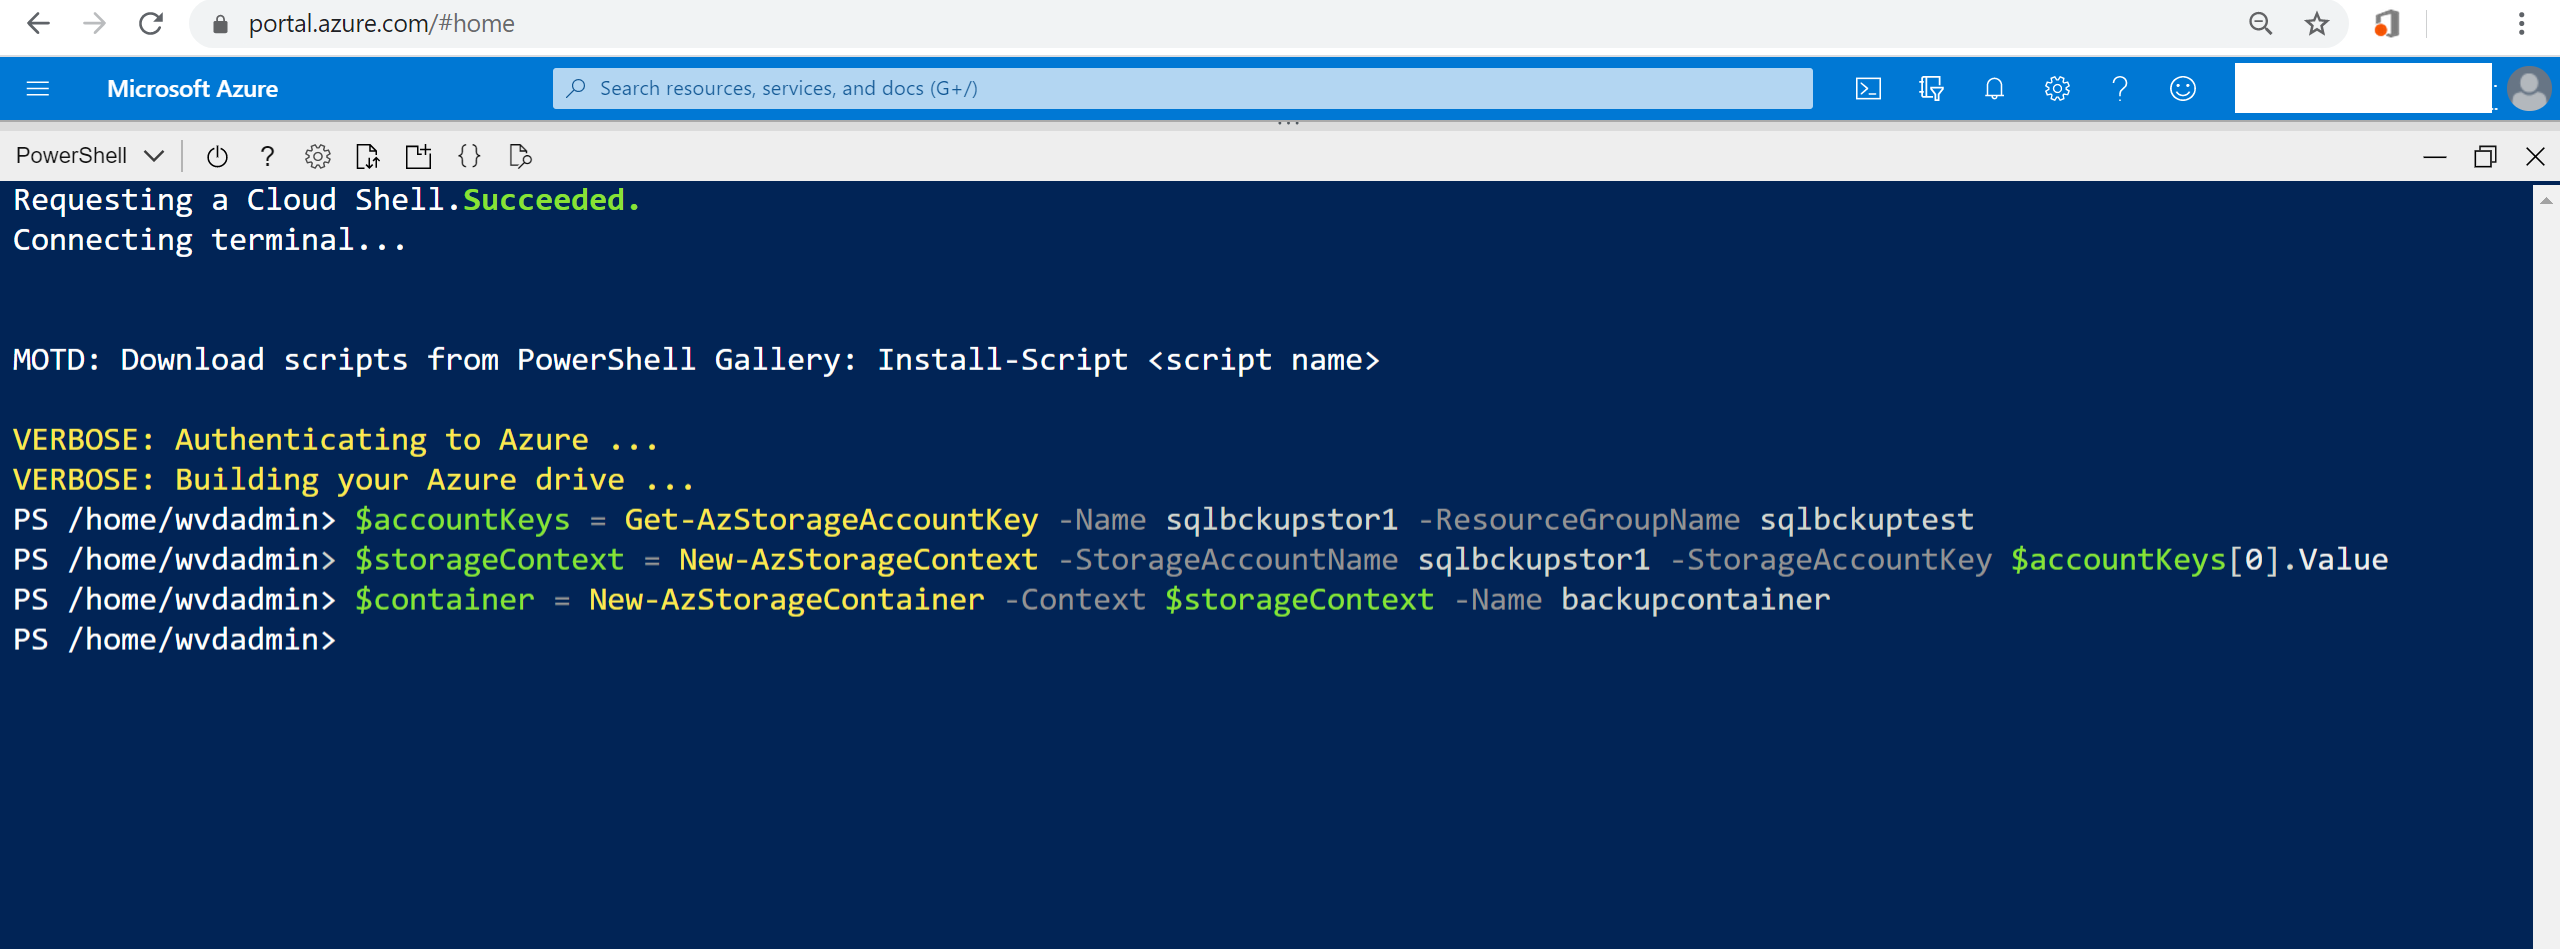
3. The next step is to create a container within the storage for the backups.
First, retrieve the storage keys of the storage account created in the previous step:
$accountKeys = Get-AzStorageAccountKey -Name <storageAccountName> -ResourceGroupName <resourceGroupName>
Now, create a storage context using the retrieved information:
$storageContext = New-AzStorageContext -StorageAccountName <storageAccountName> -StorageAccountKey $accountKeys[0].Value
The container can then be created using the following command:
$container = New-AzStorageContainer -Context $storageContext -Name <containerName>
Update the values in <> brackets in the above command with the name of storage account (created in step 2), the resource group name (from step 1), and the container name that you want to use to store the backup.
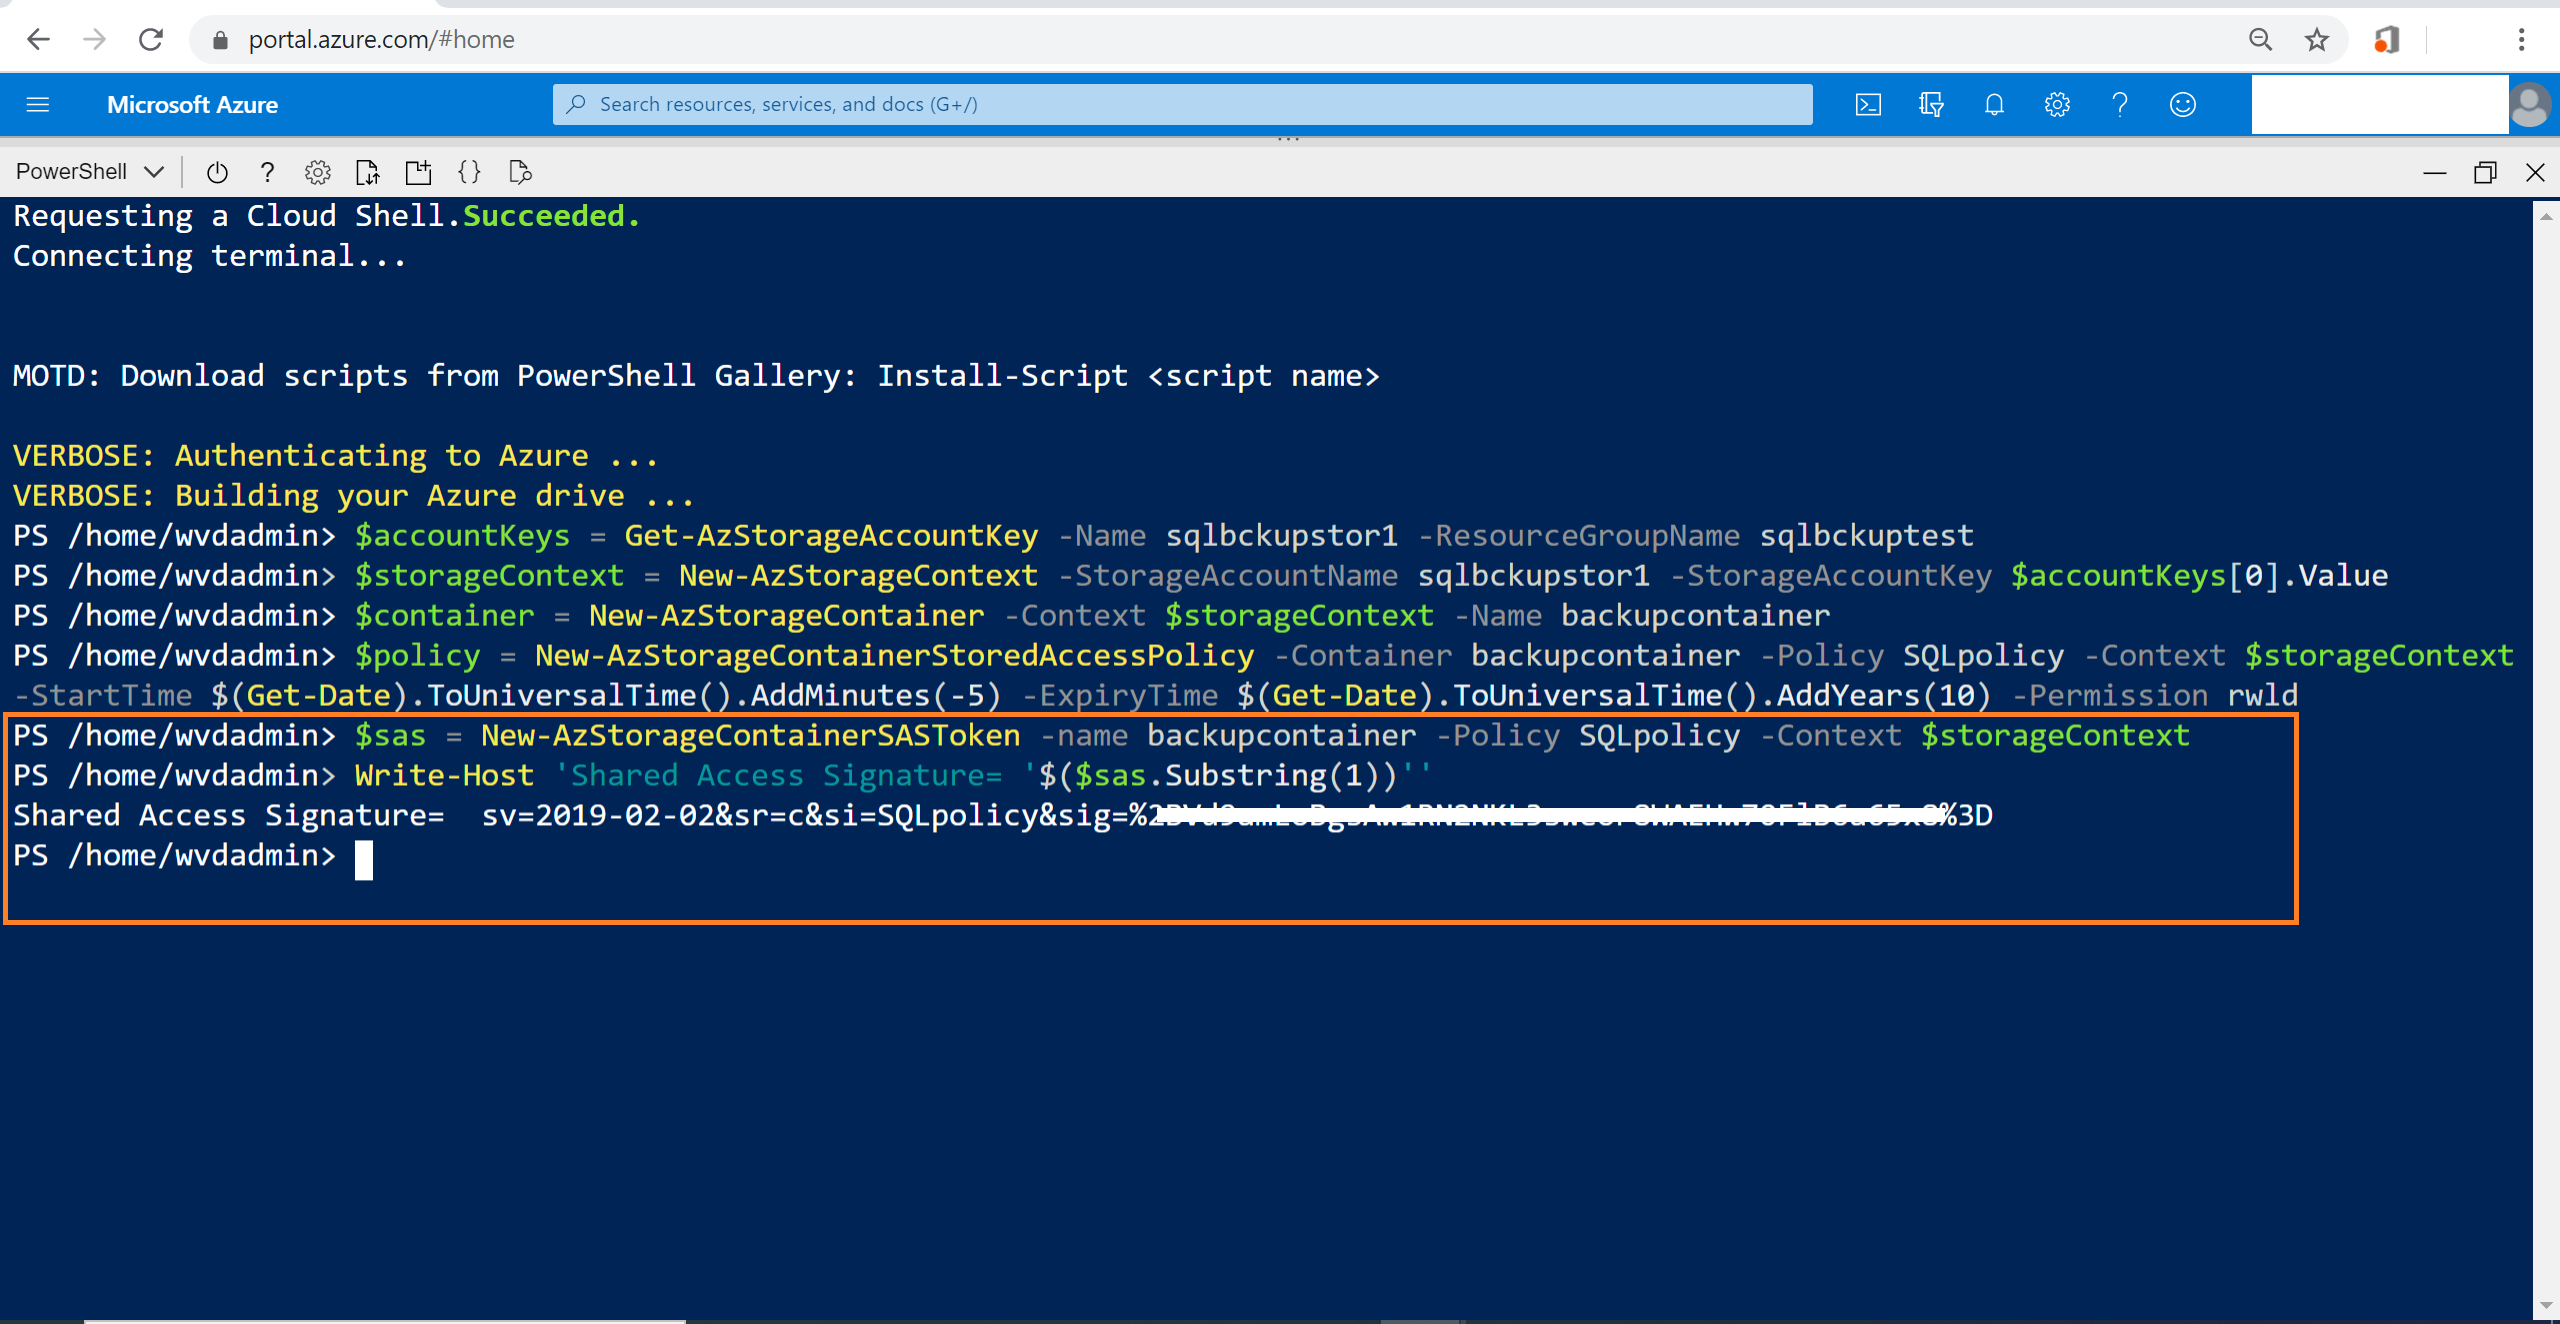
4. Create a stored access policy that will put in place additional restrictions on SAS by specifying the start time, expiry time, and permissions for the signature:
$policy = New-AzStorageContainerStoredAccessPolicy -Container <containerName> -Policy <policyName> -Context $storageContext -StartTime $(Get-Date).ToUniversalTime().AddMinutes(-5) -ExpiryTime $(Get-Date).ToUniversalTime().AddYears(10) -Permission rwld
Update the <containerName> and <policyName> values in the above command with the name of the container (created in step 3), and a name for the policy.

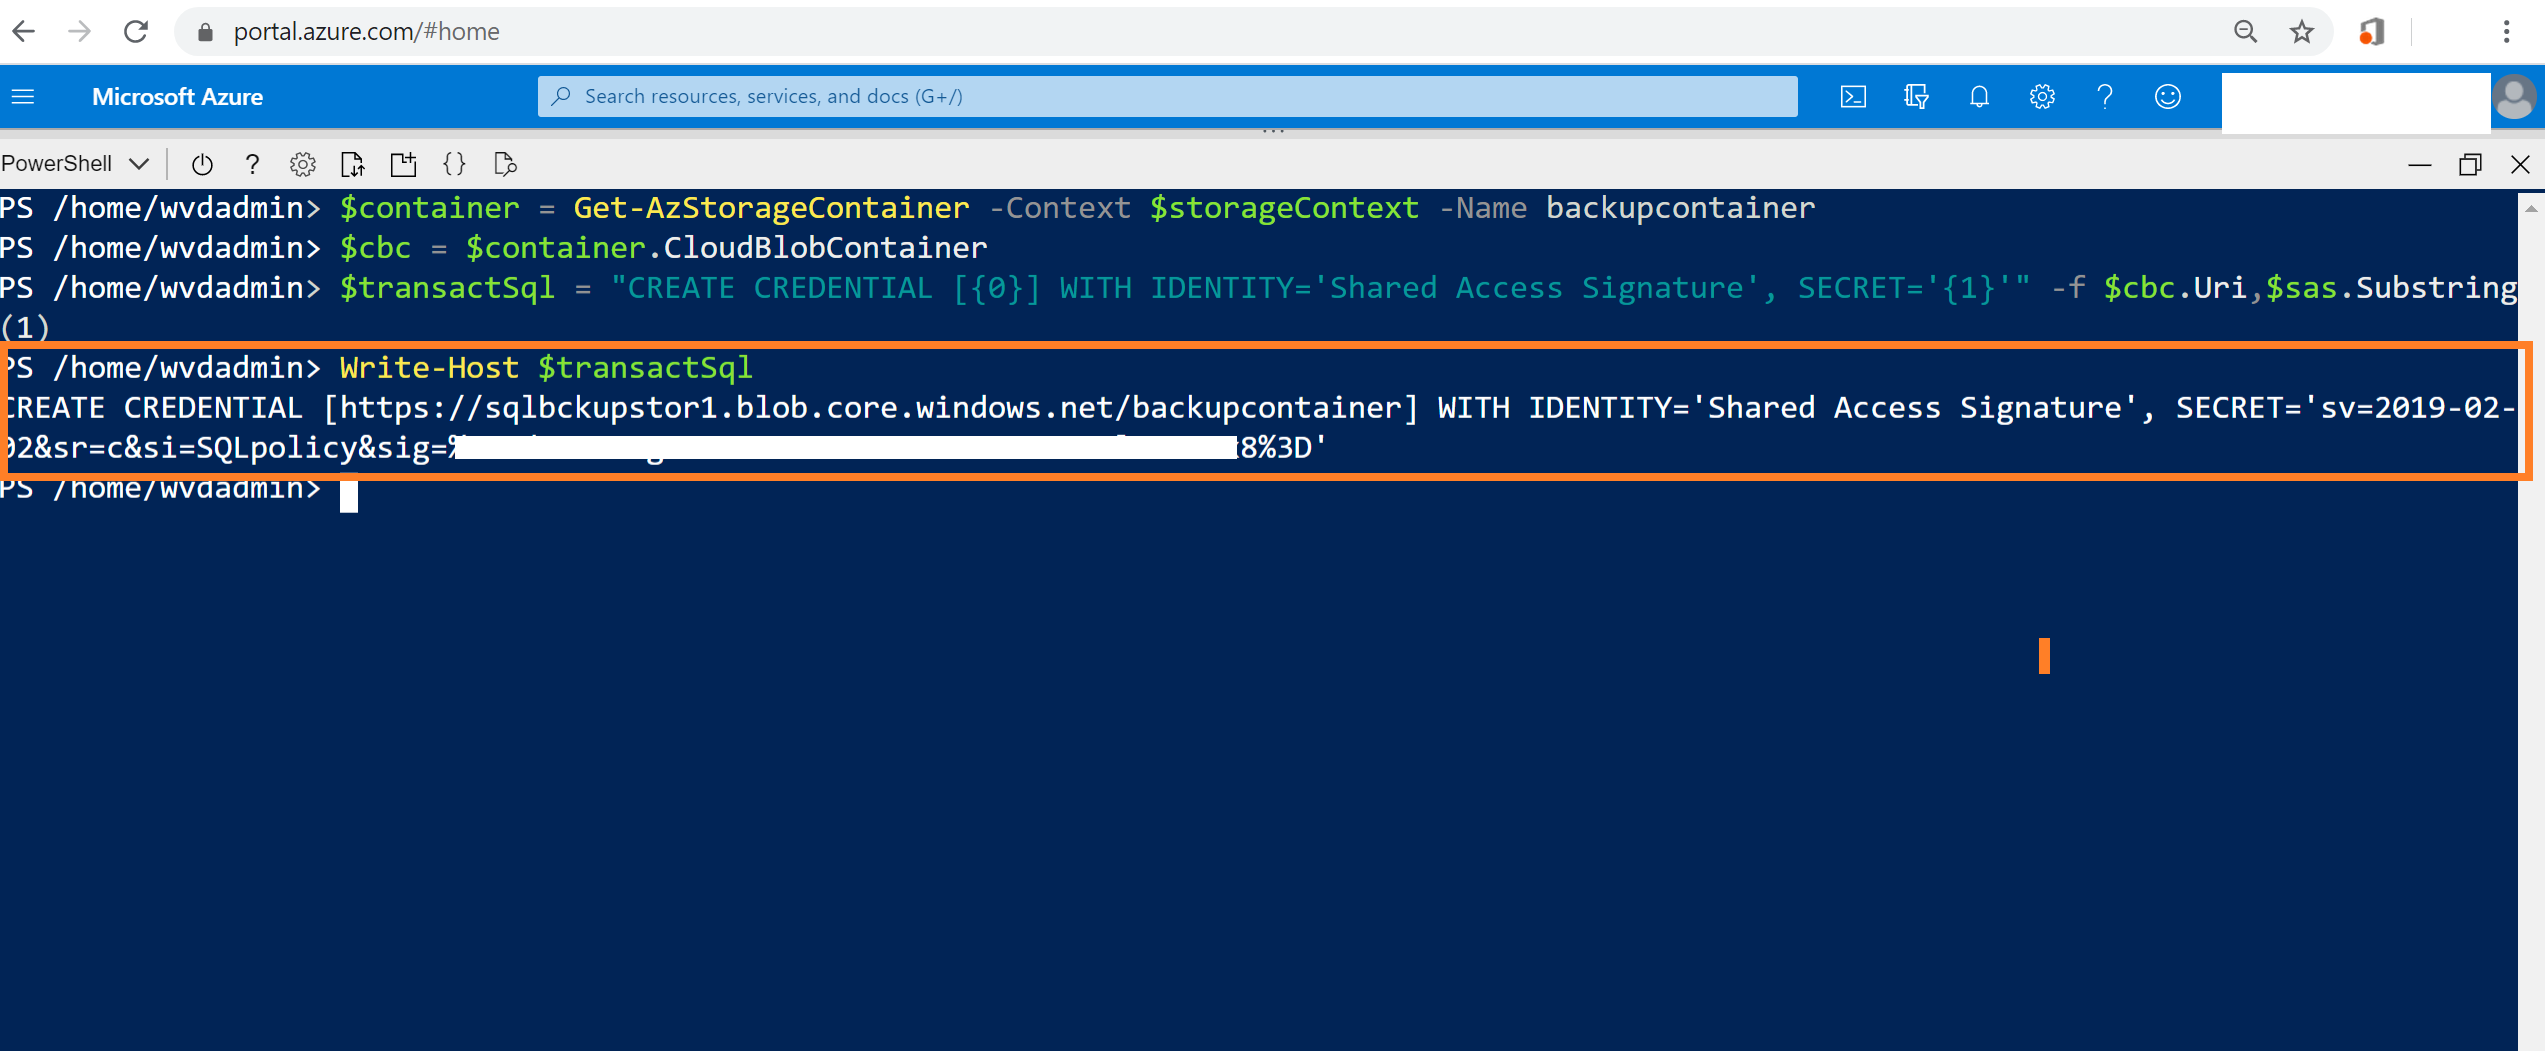
5. Generate and retrieve your Shared Access Signature using the following commands:
$sas = New-AzStorageContainerSASToken -name <containerName> -Policy <policyName> -Context $storageContext
Write-Host 'Shared Access Signature= $($sas.Substring(1))''
Update the <containerName> and <policyName> values in the above command with the name of container (created in step 3), and a name for the policy (created in step 4).
6. Set variables for the container so that it can be used to create the Transact-SQL statement.
$container = Get-AzStorageContainer -Context
$storageContext -Name <containerName>
$cbc = $container.CloudBlobContainer
Update <containerName> in the above command with the name of the container (created in step 3).
Create the transact-SQL that can be run in the SQL server to create credentials using the Shared Access Signature:
$transactSql = "CREATE CREDENTIAL [{0}] WITH
IDENTITY='Shared Access Signature', SECRET='{1}'" -f
$cbc.Uri,$sas.Substring(1)
Write-Host $transactSql
7. Connect to the SQL server database engine in your on-premises environment using SQL Server Management Studio (SSMS). Execute the Transact-SQL command from above step to create the credential for backup in the following format.
Sample command given below:
USE master
CREATE CREDENTIAL [https://<storagename>.blob.core.windows.net/backupcontainer] WITH IDENTITY='Shared Access Signature', SECRET='<secret value>'
GO
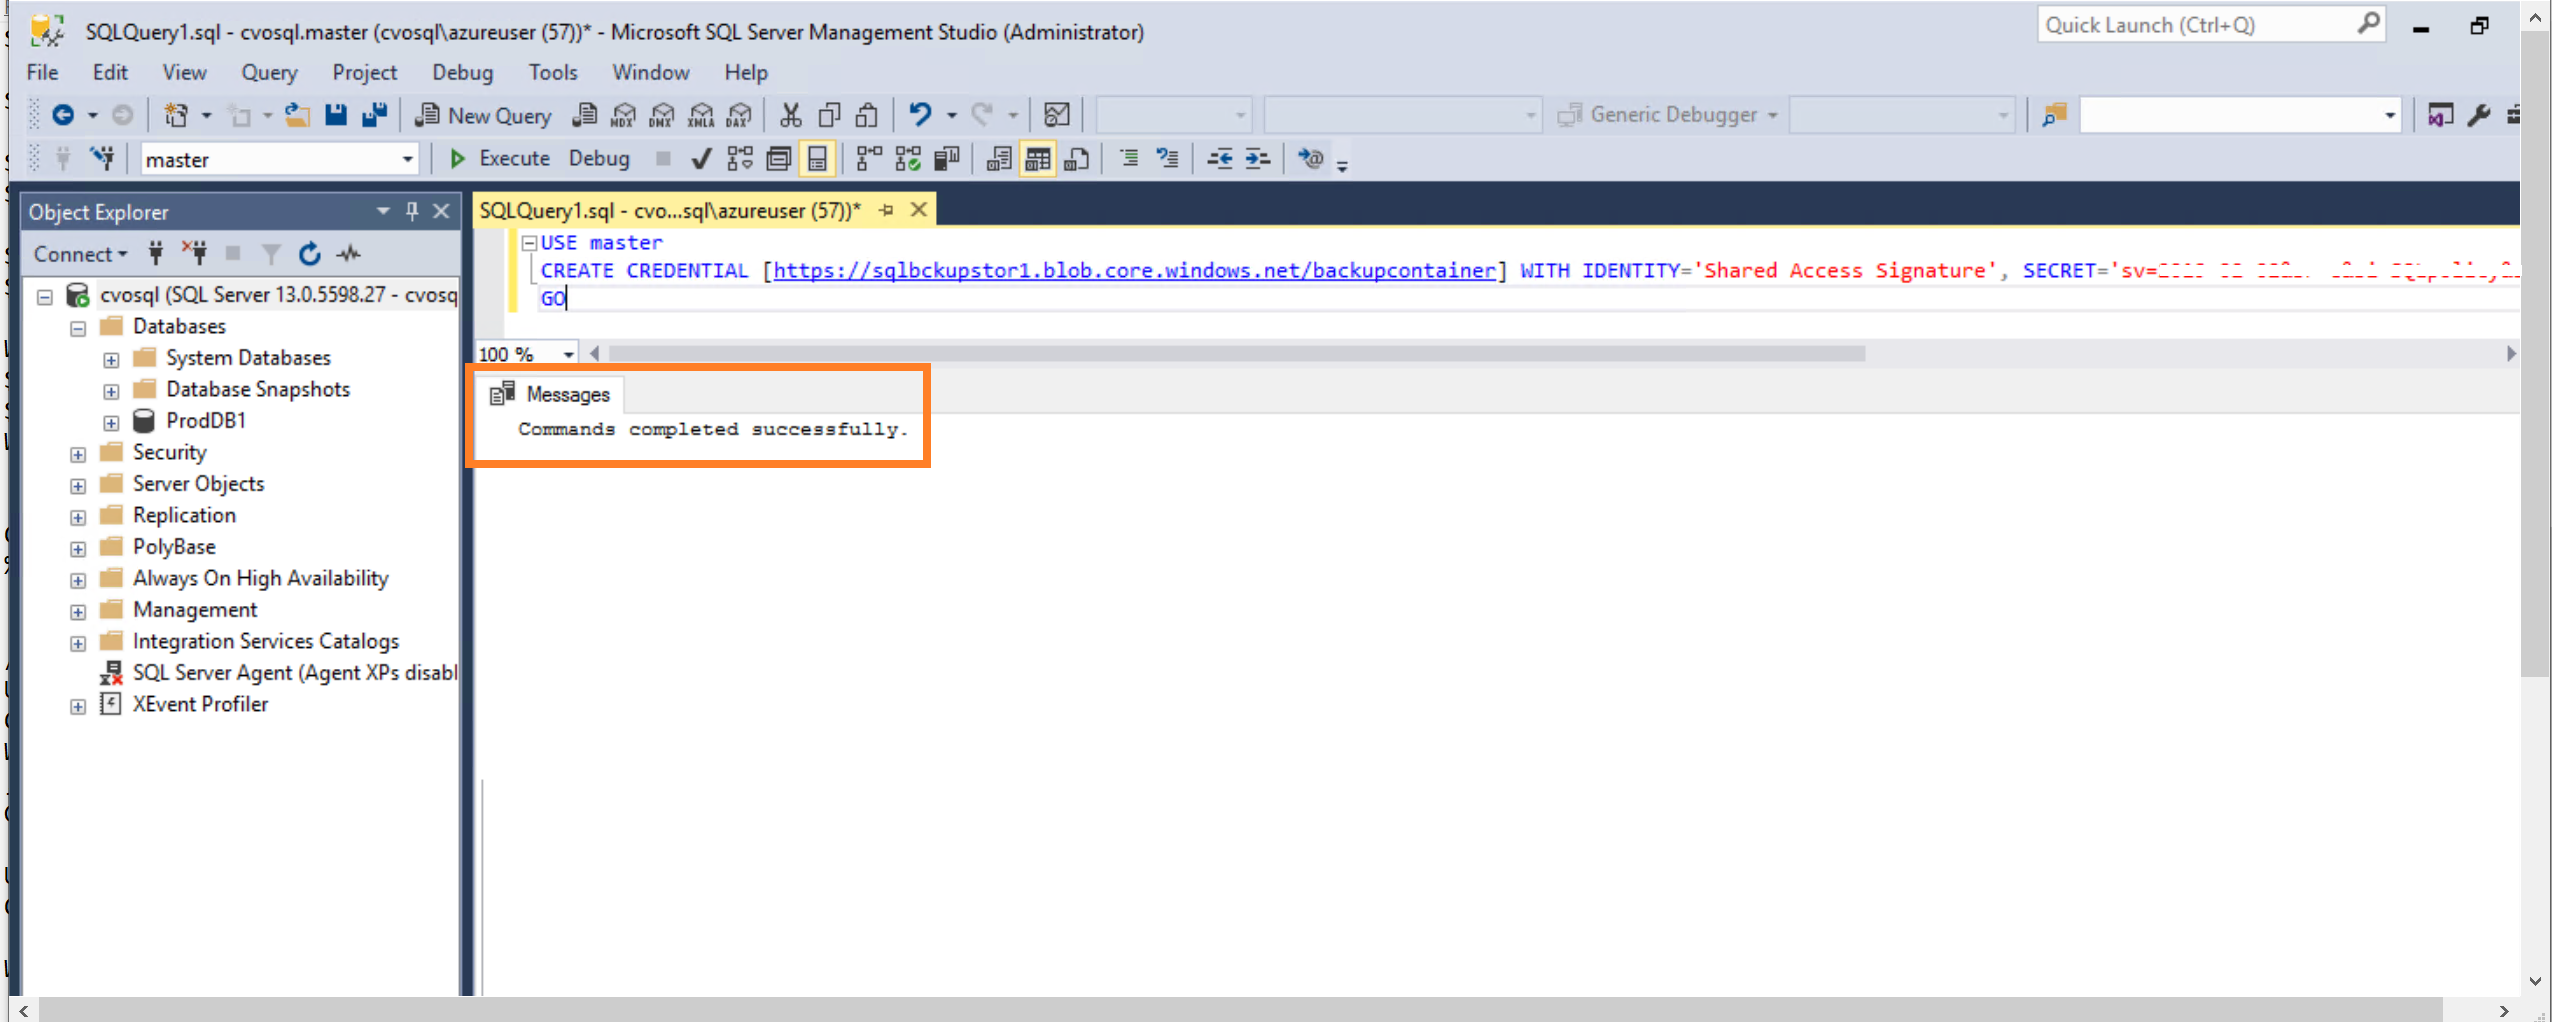
When you’re done, make sure that the command is executed successfully.
How to Configure the SQL Server Backup to Azure Storage
Now that we have the Azure storage container ready and your Shared Access Signature is configured to store the backup, we will point the on-premises SQL backup target to this container.
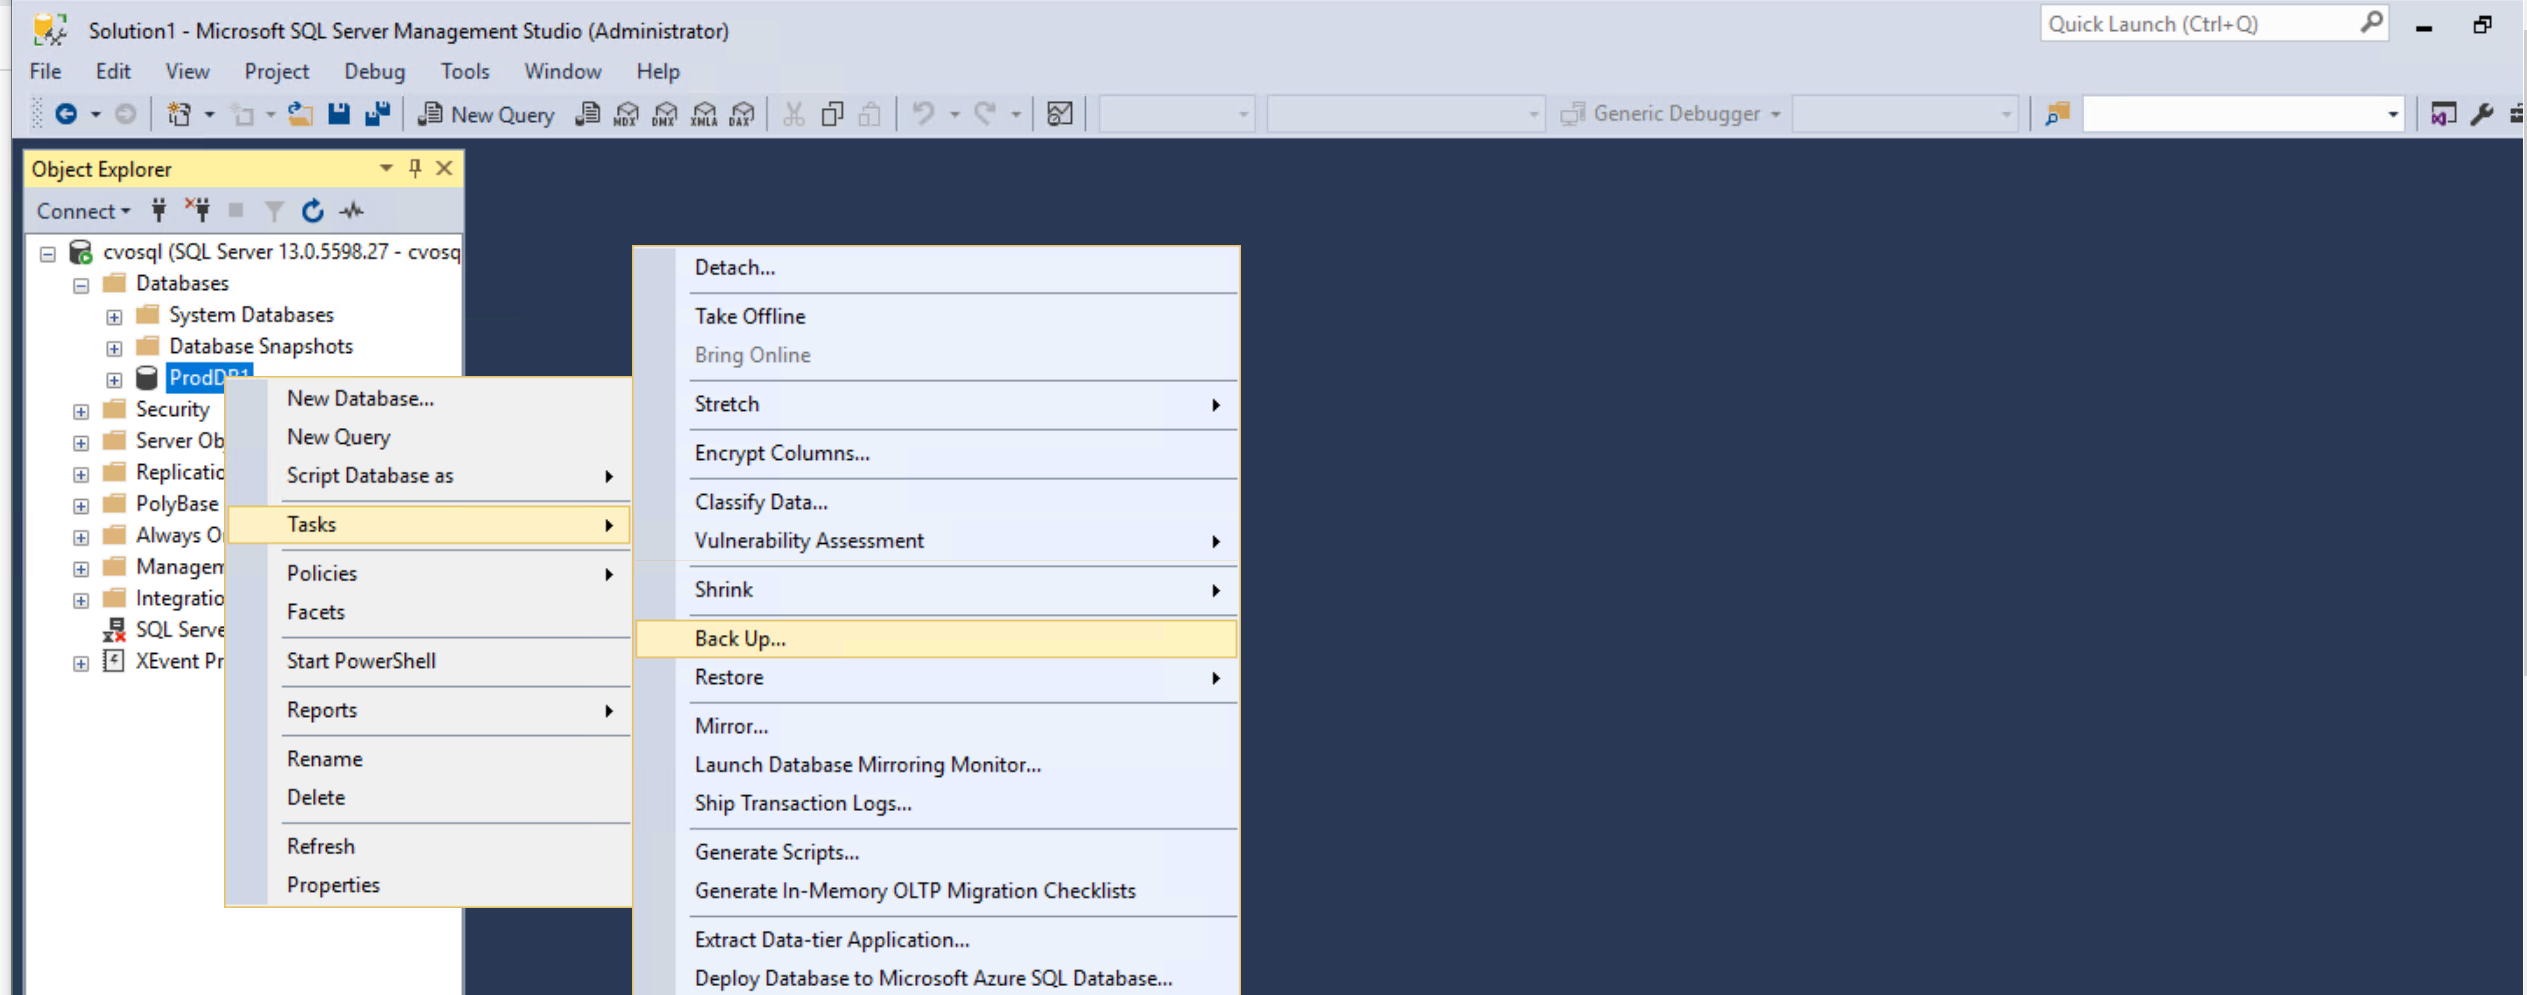
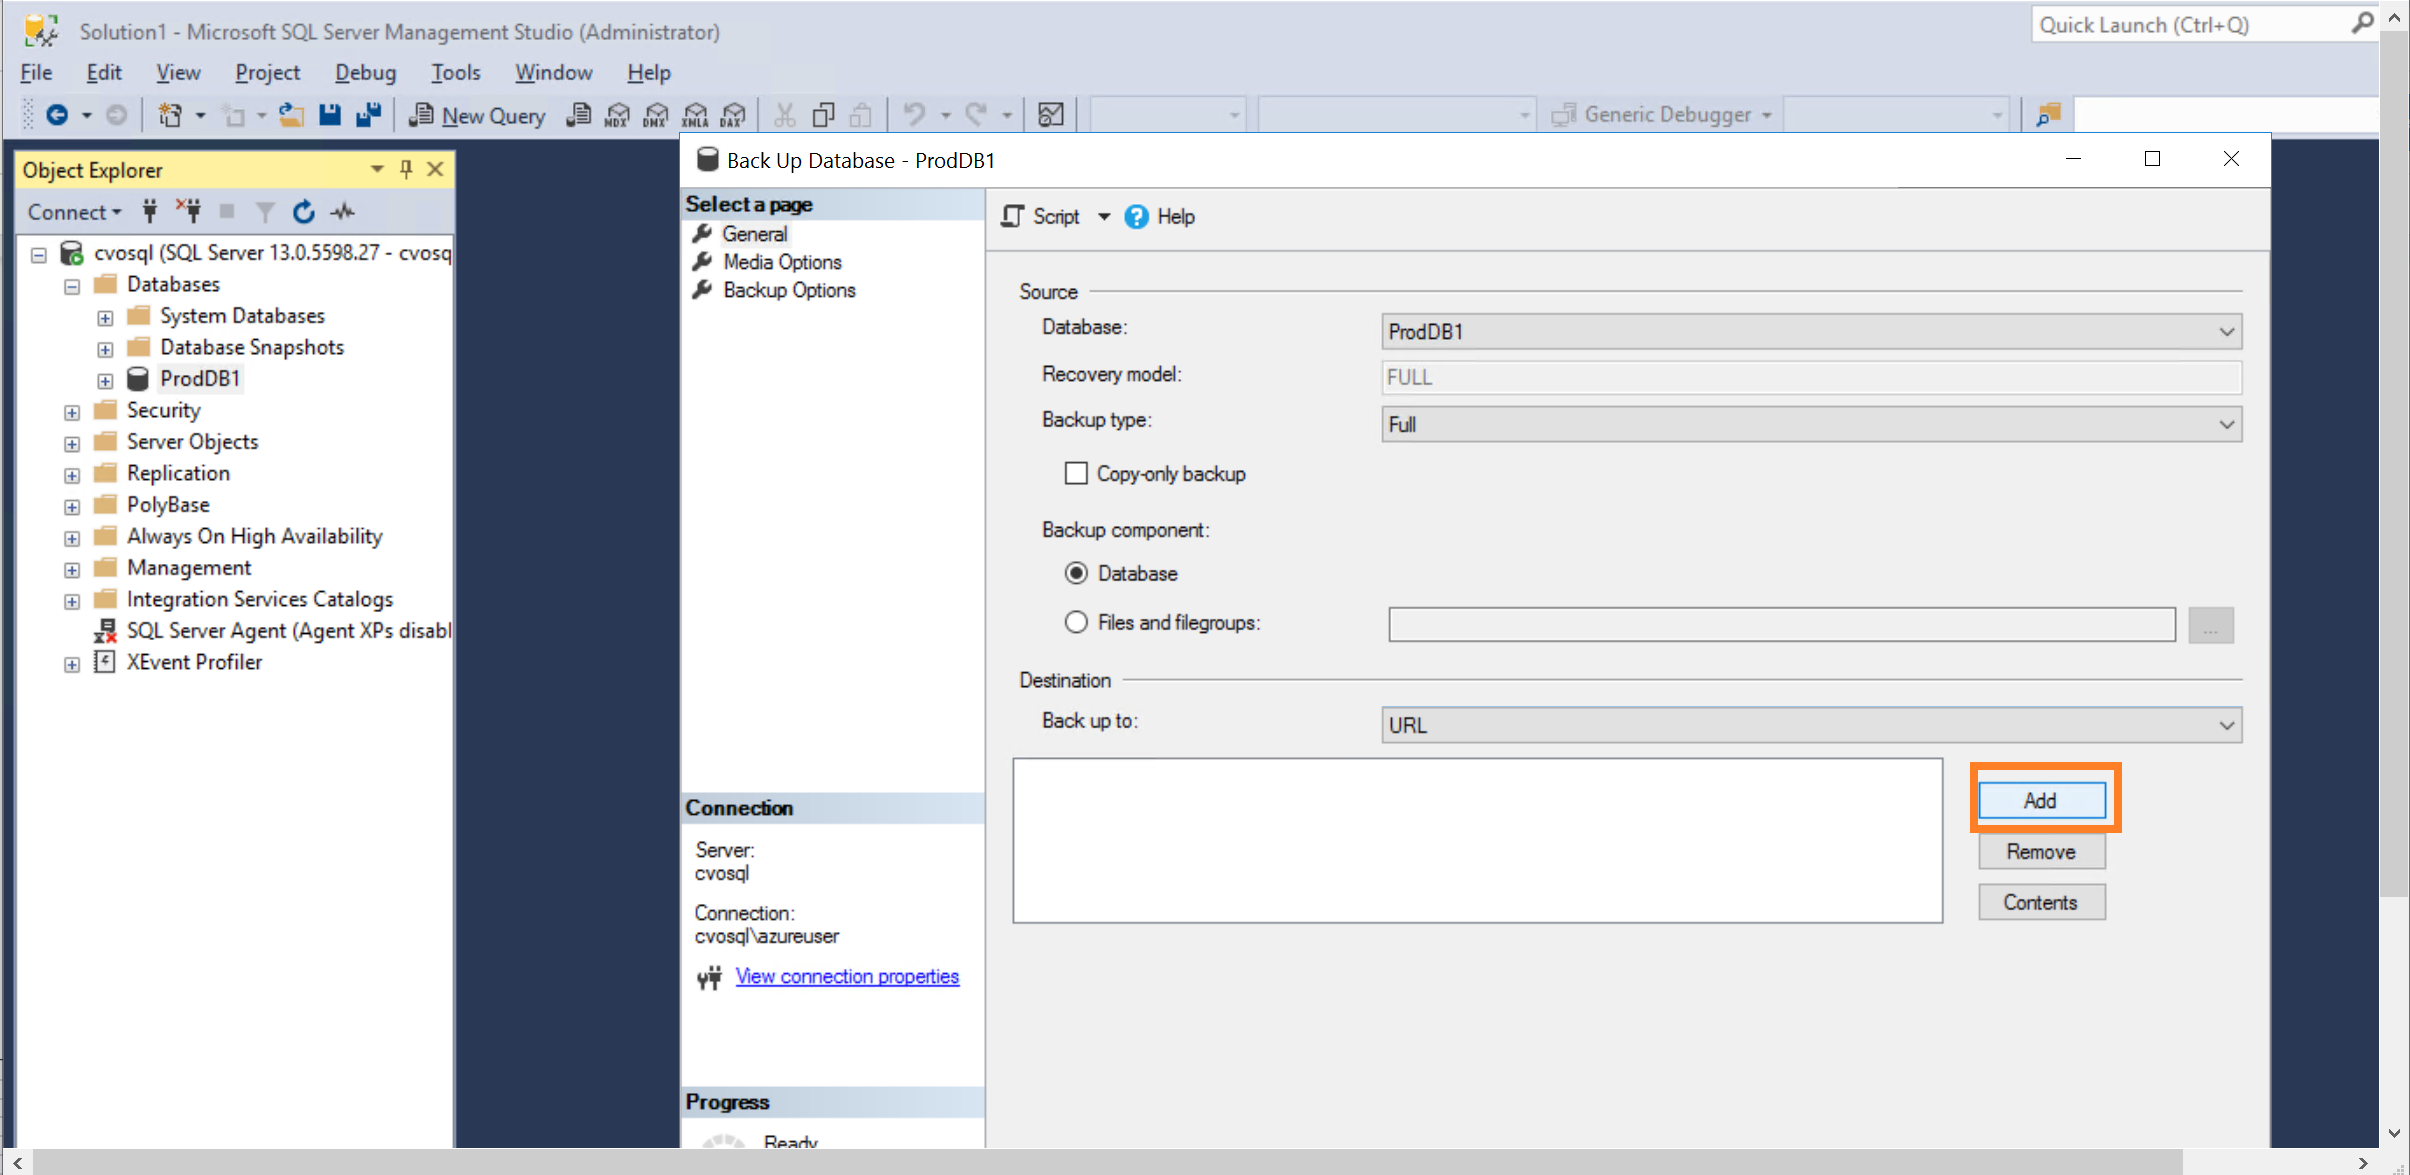
1. Connect to the SQL server database engine using SQL Server Management Studio. Expand the databases view and select the database that you wish to back up. Right click the DB->select tasks->backup.
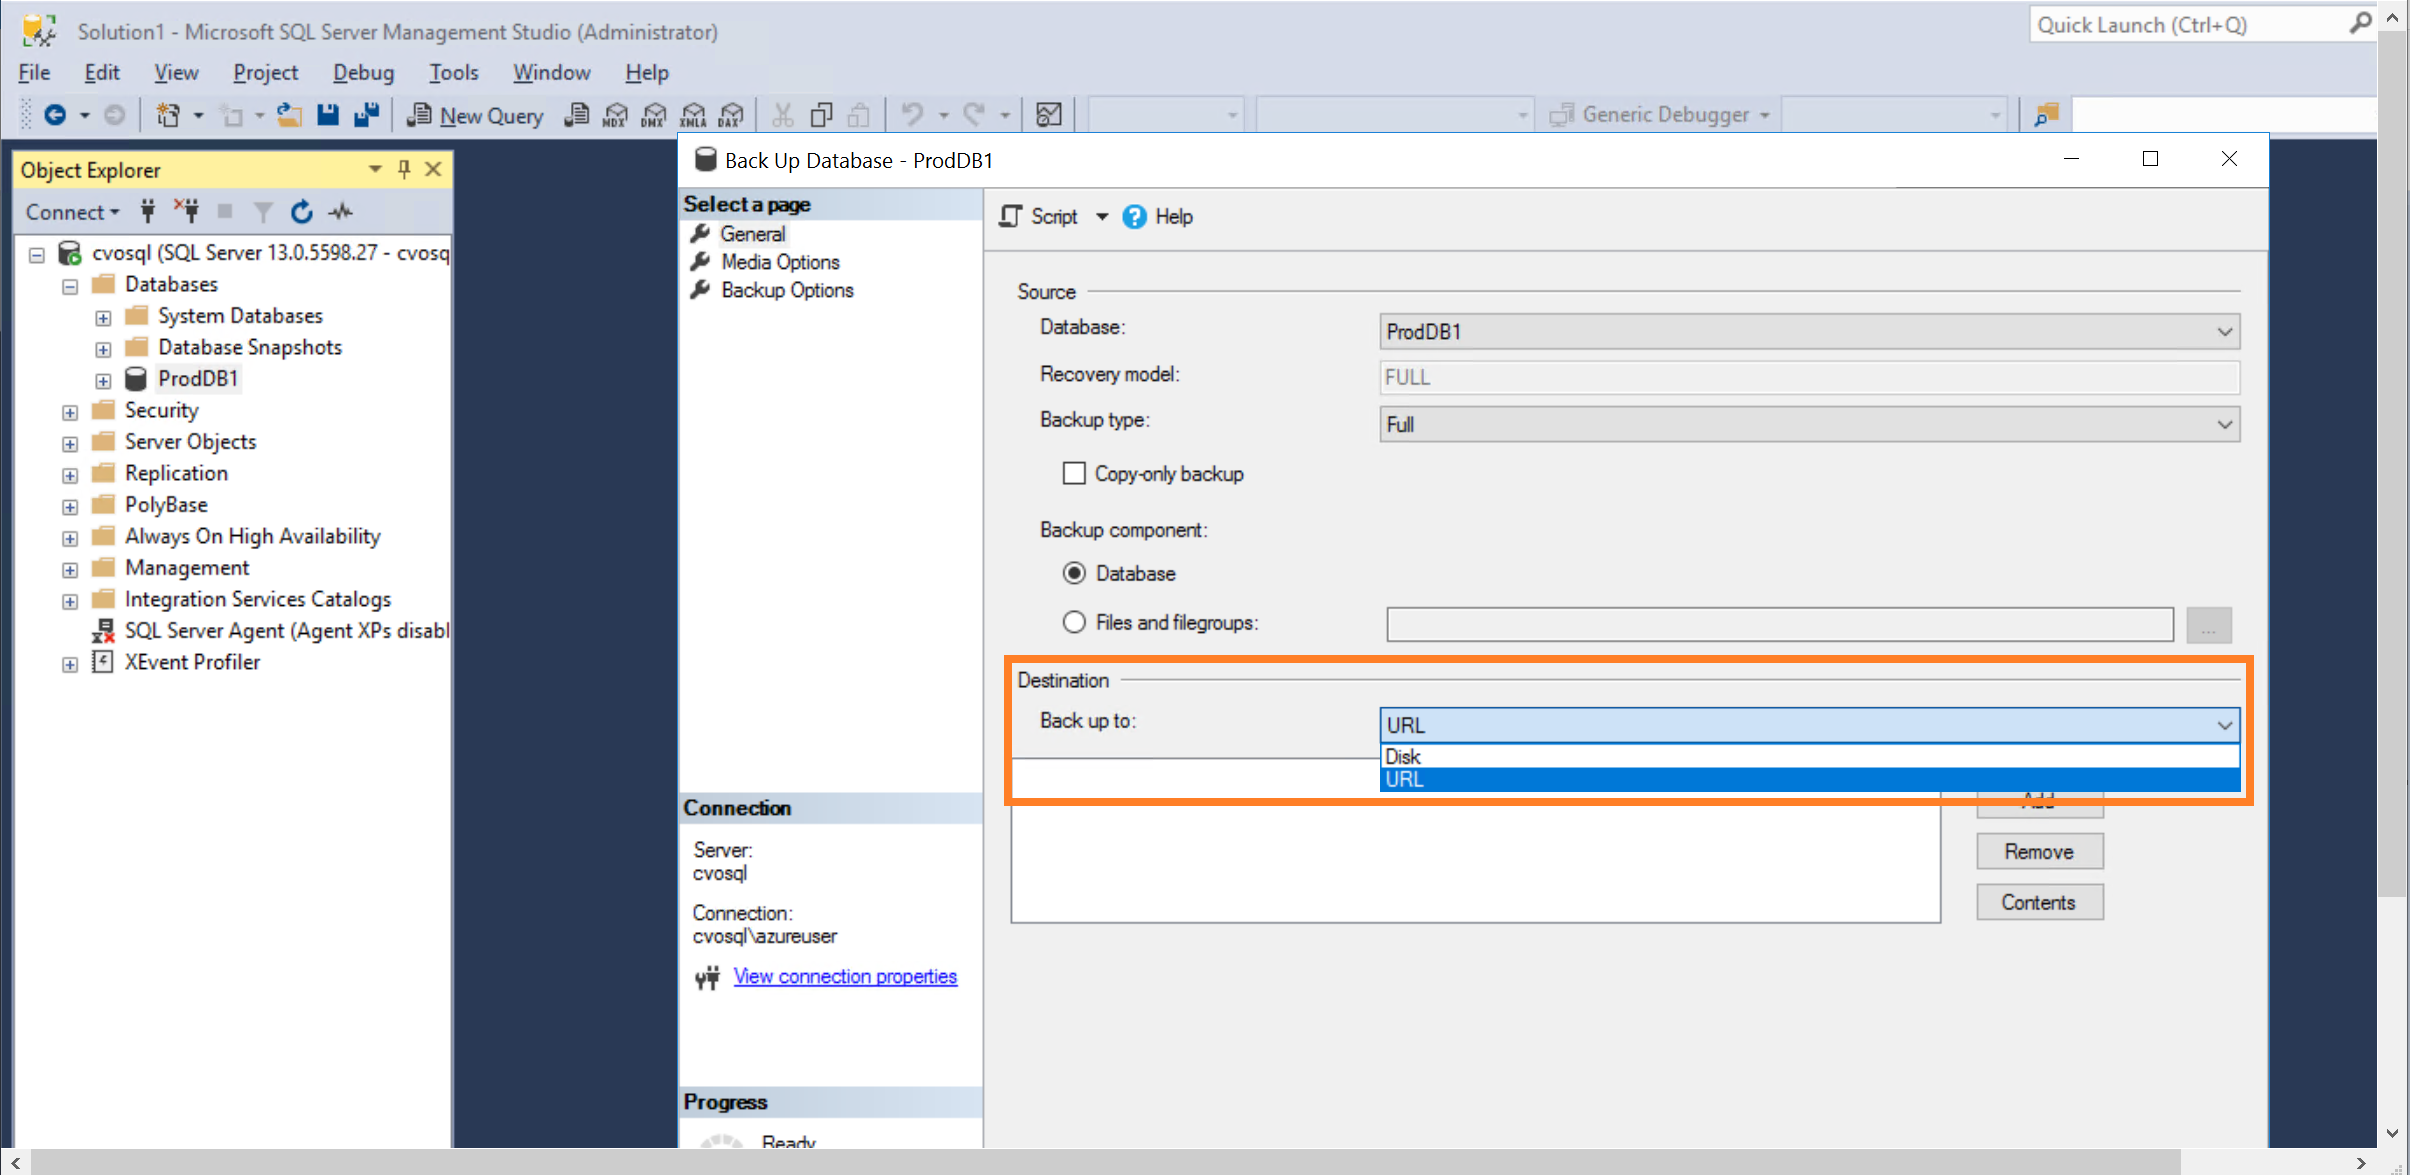
2. In the backup configuration wizard, select the destination as “URL” from the dropdown menu.
3. Click on “Add” to select the target storage container.
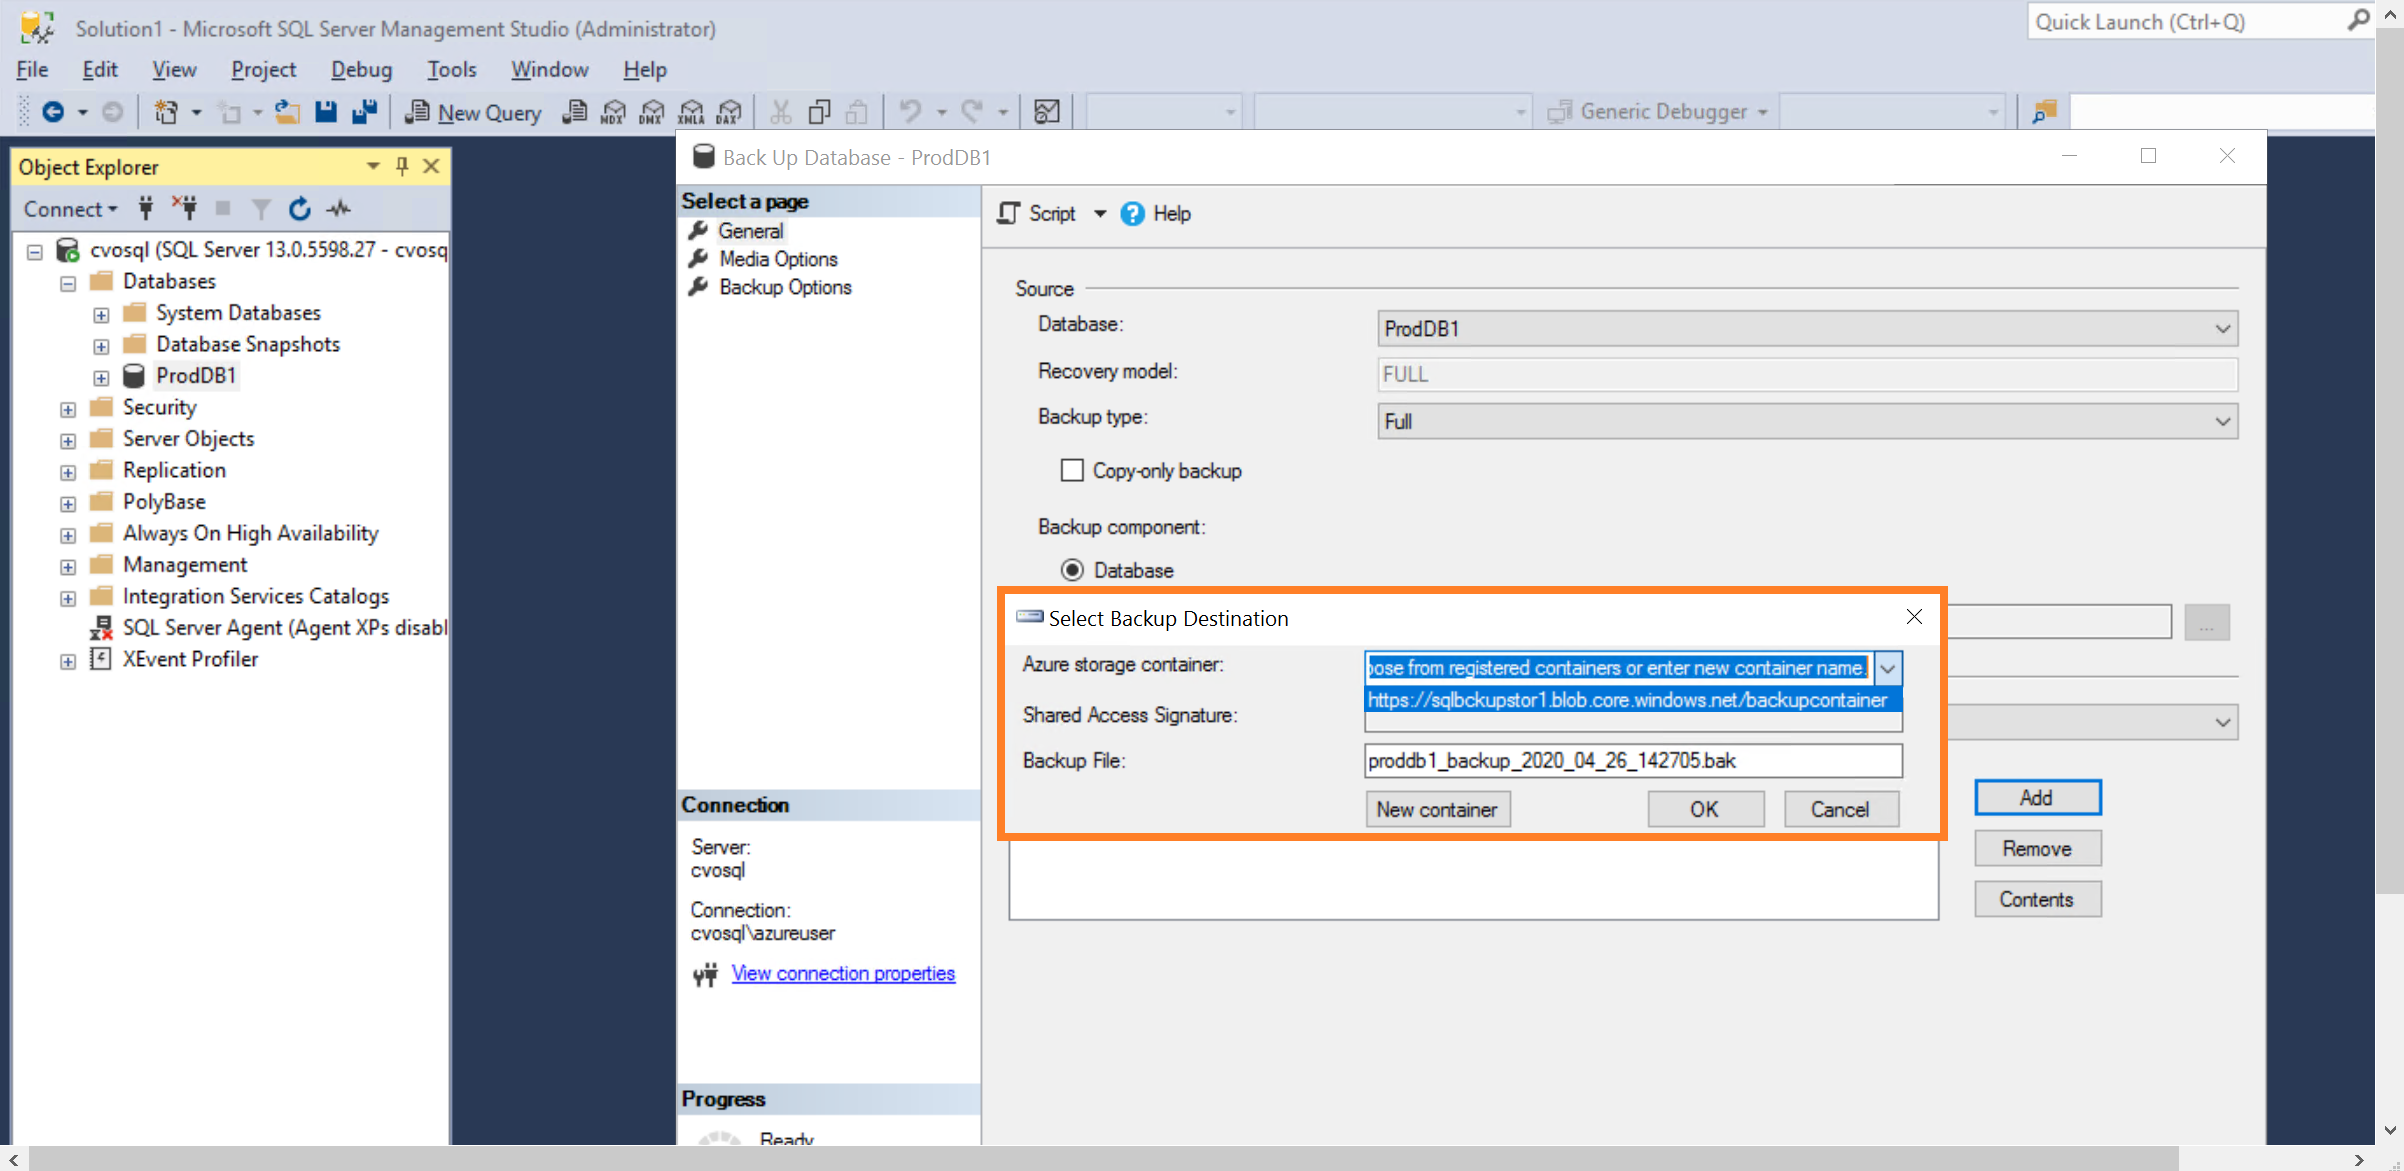
4. Select the target storage container from the dropdown list and provide a name for the backup file.
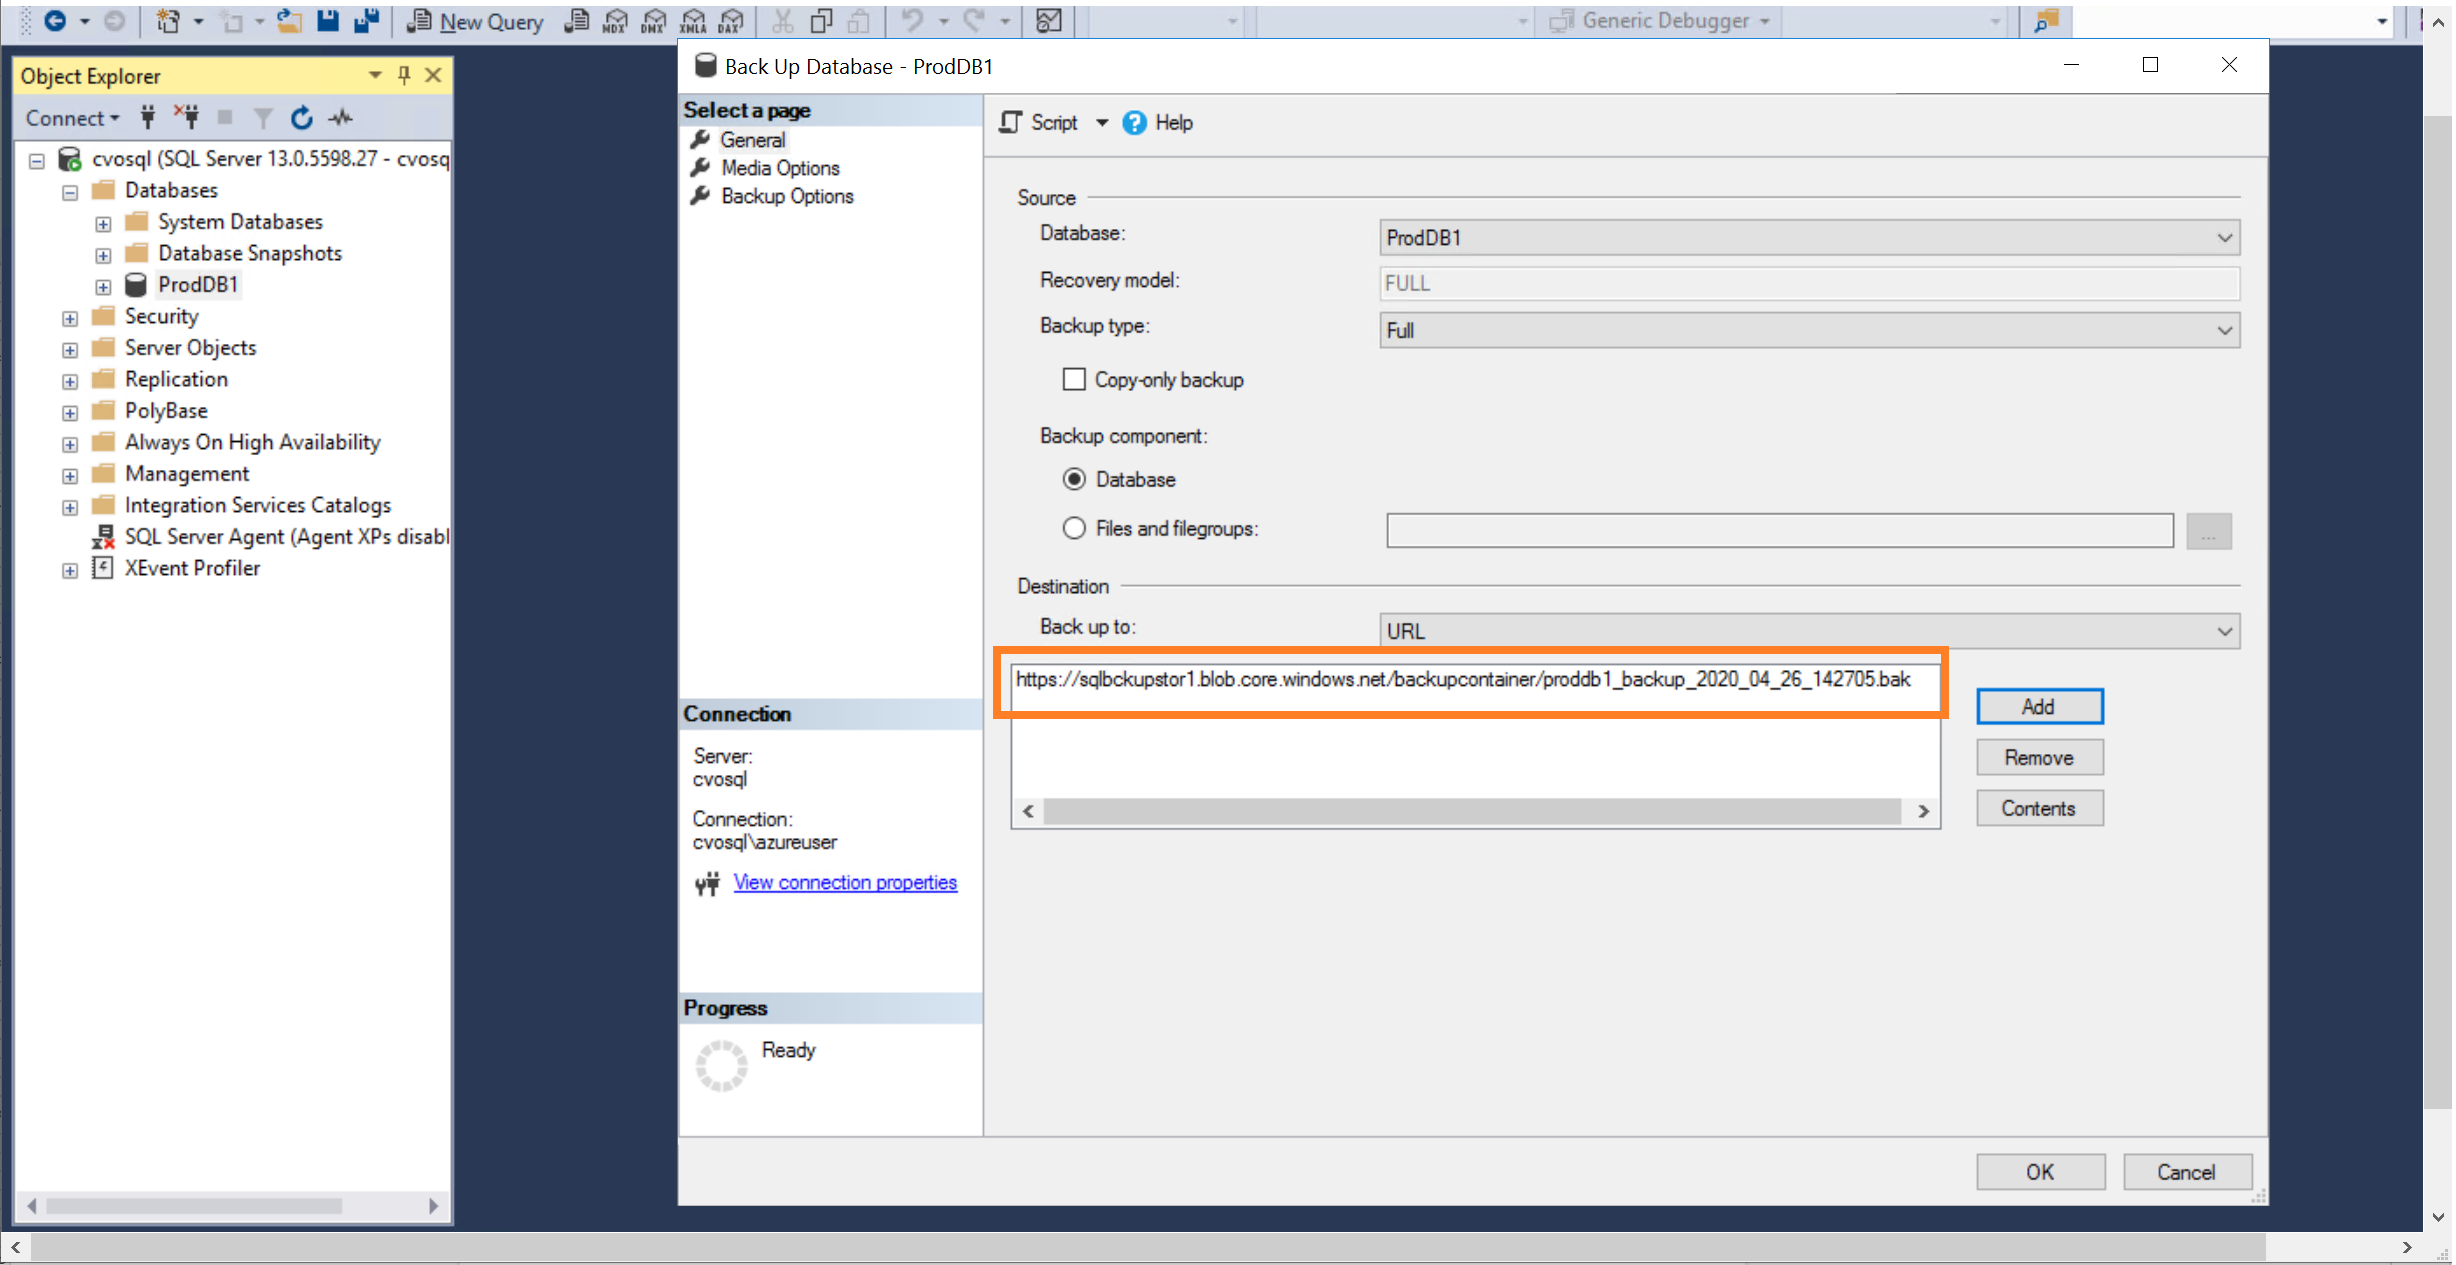
5. Now the Azure storage container location for the backup file is listed in the wizard. Click on “OK” to complete the configuration.
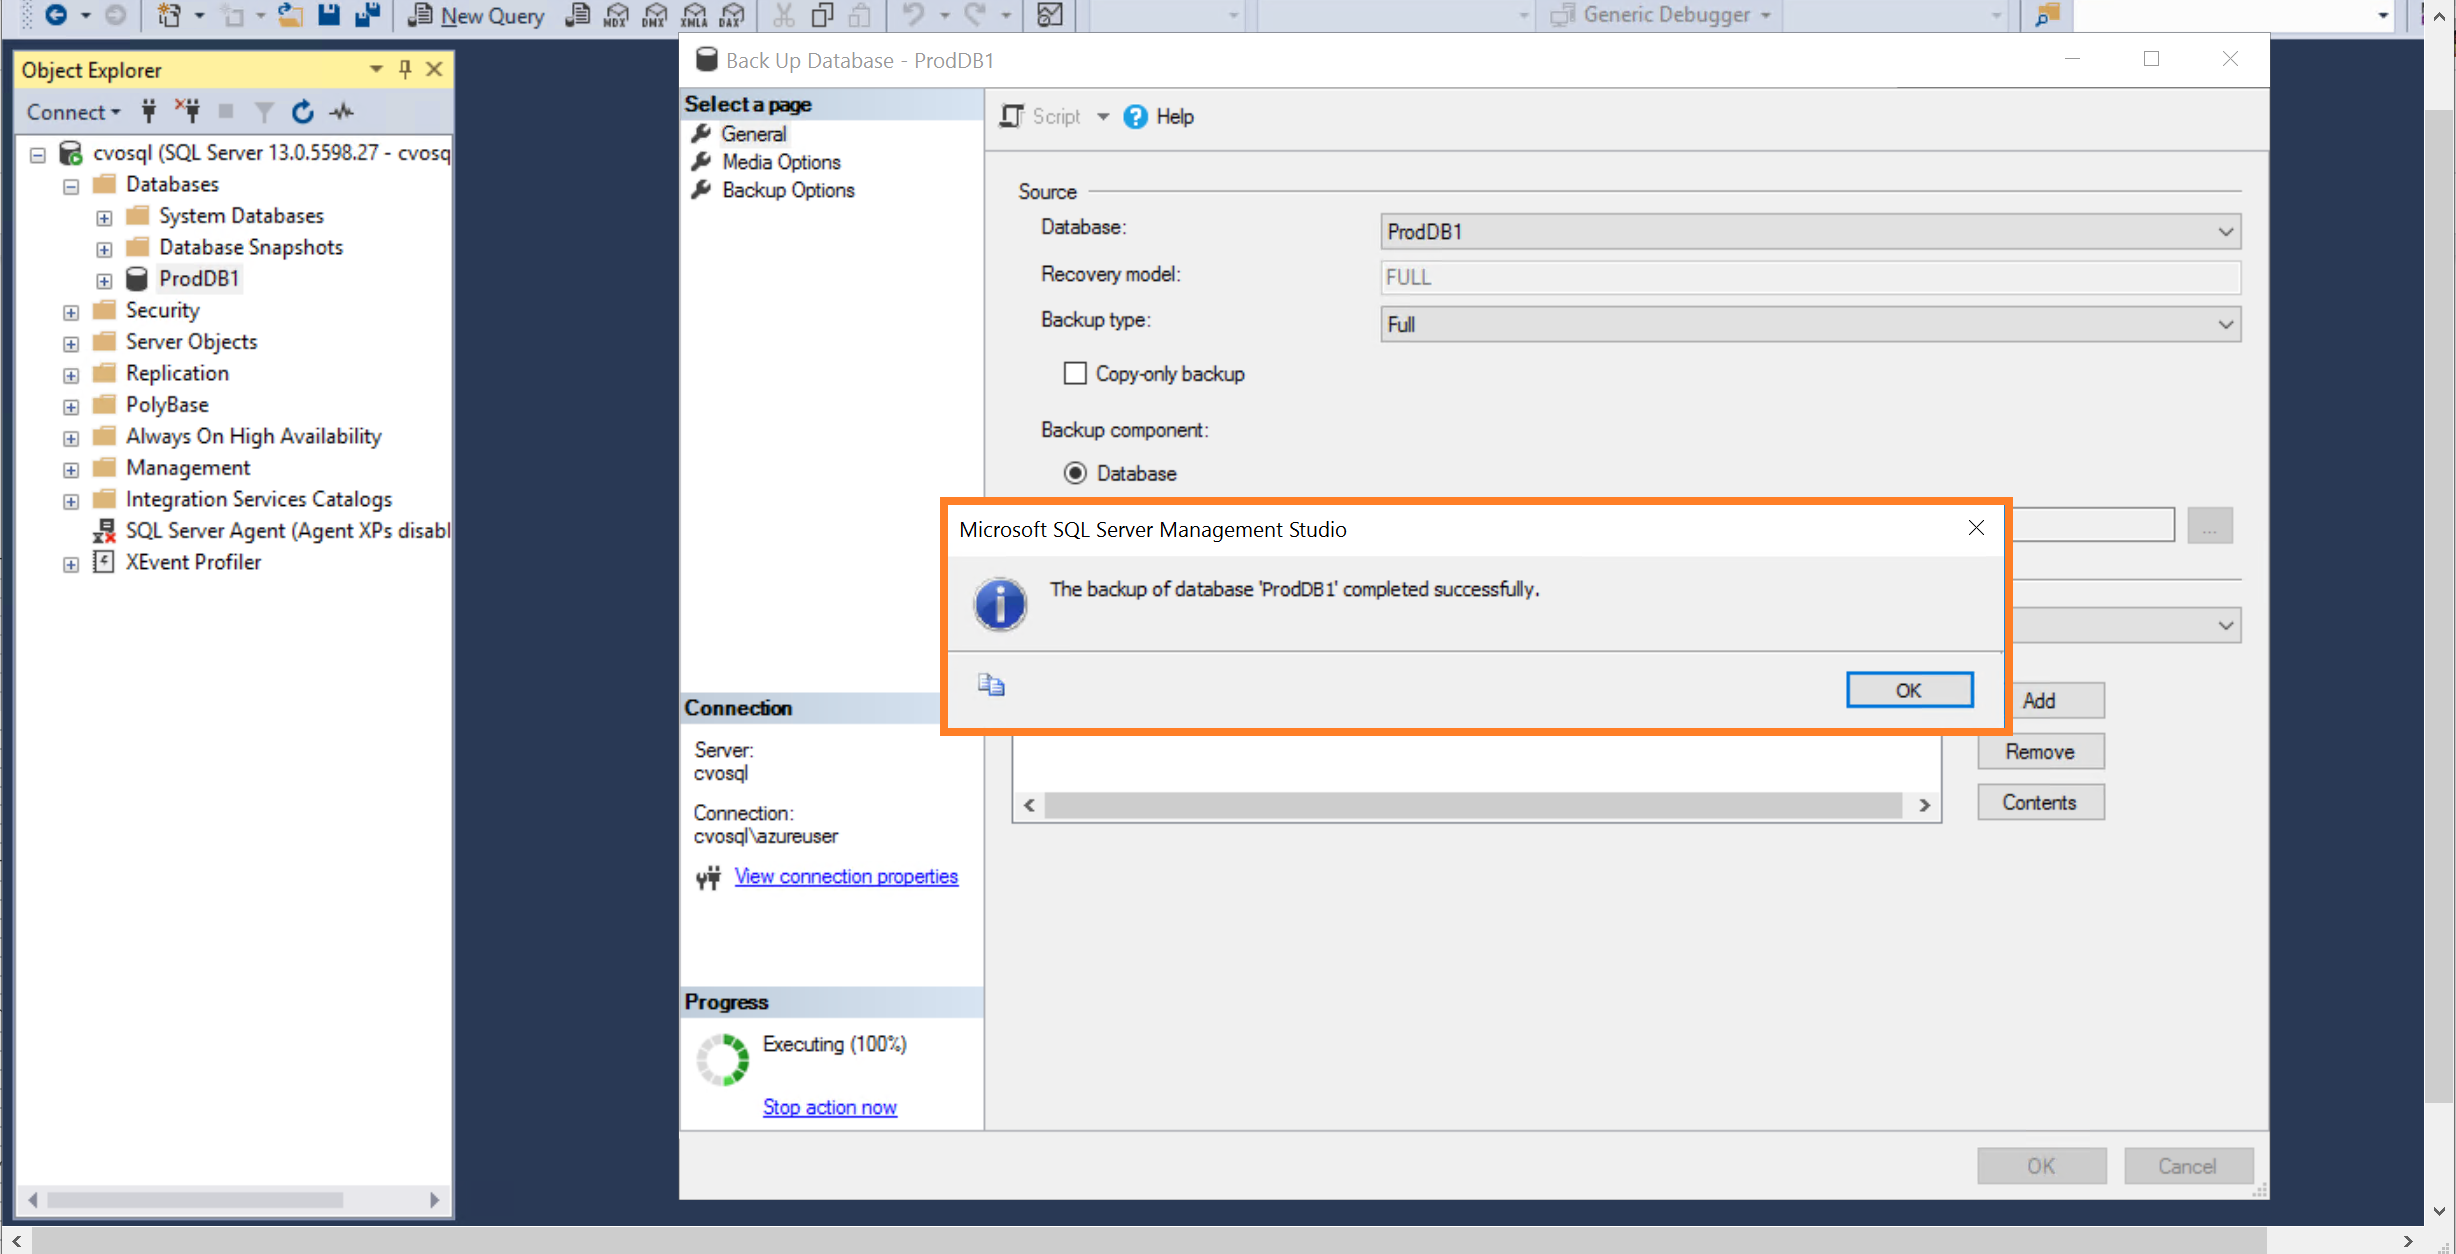
6. The wizard will show a message indicating that the backup has been successful.
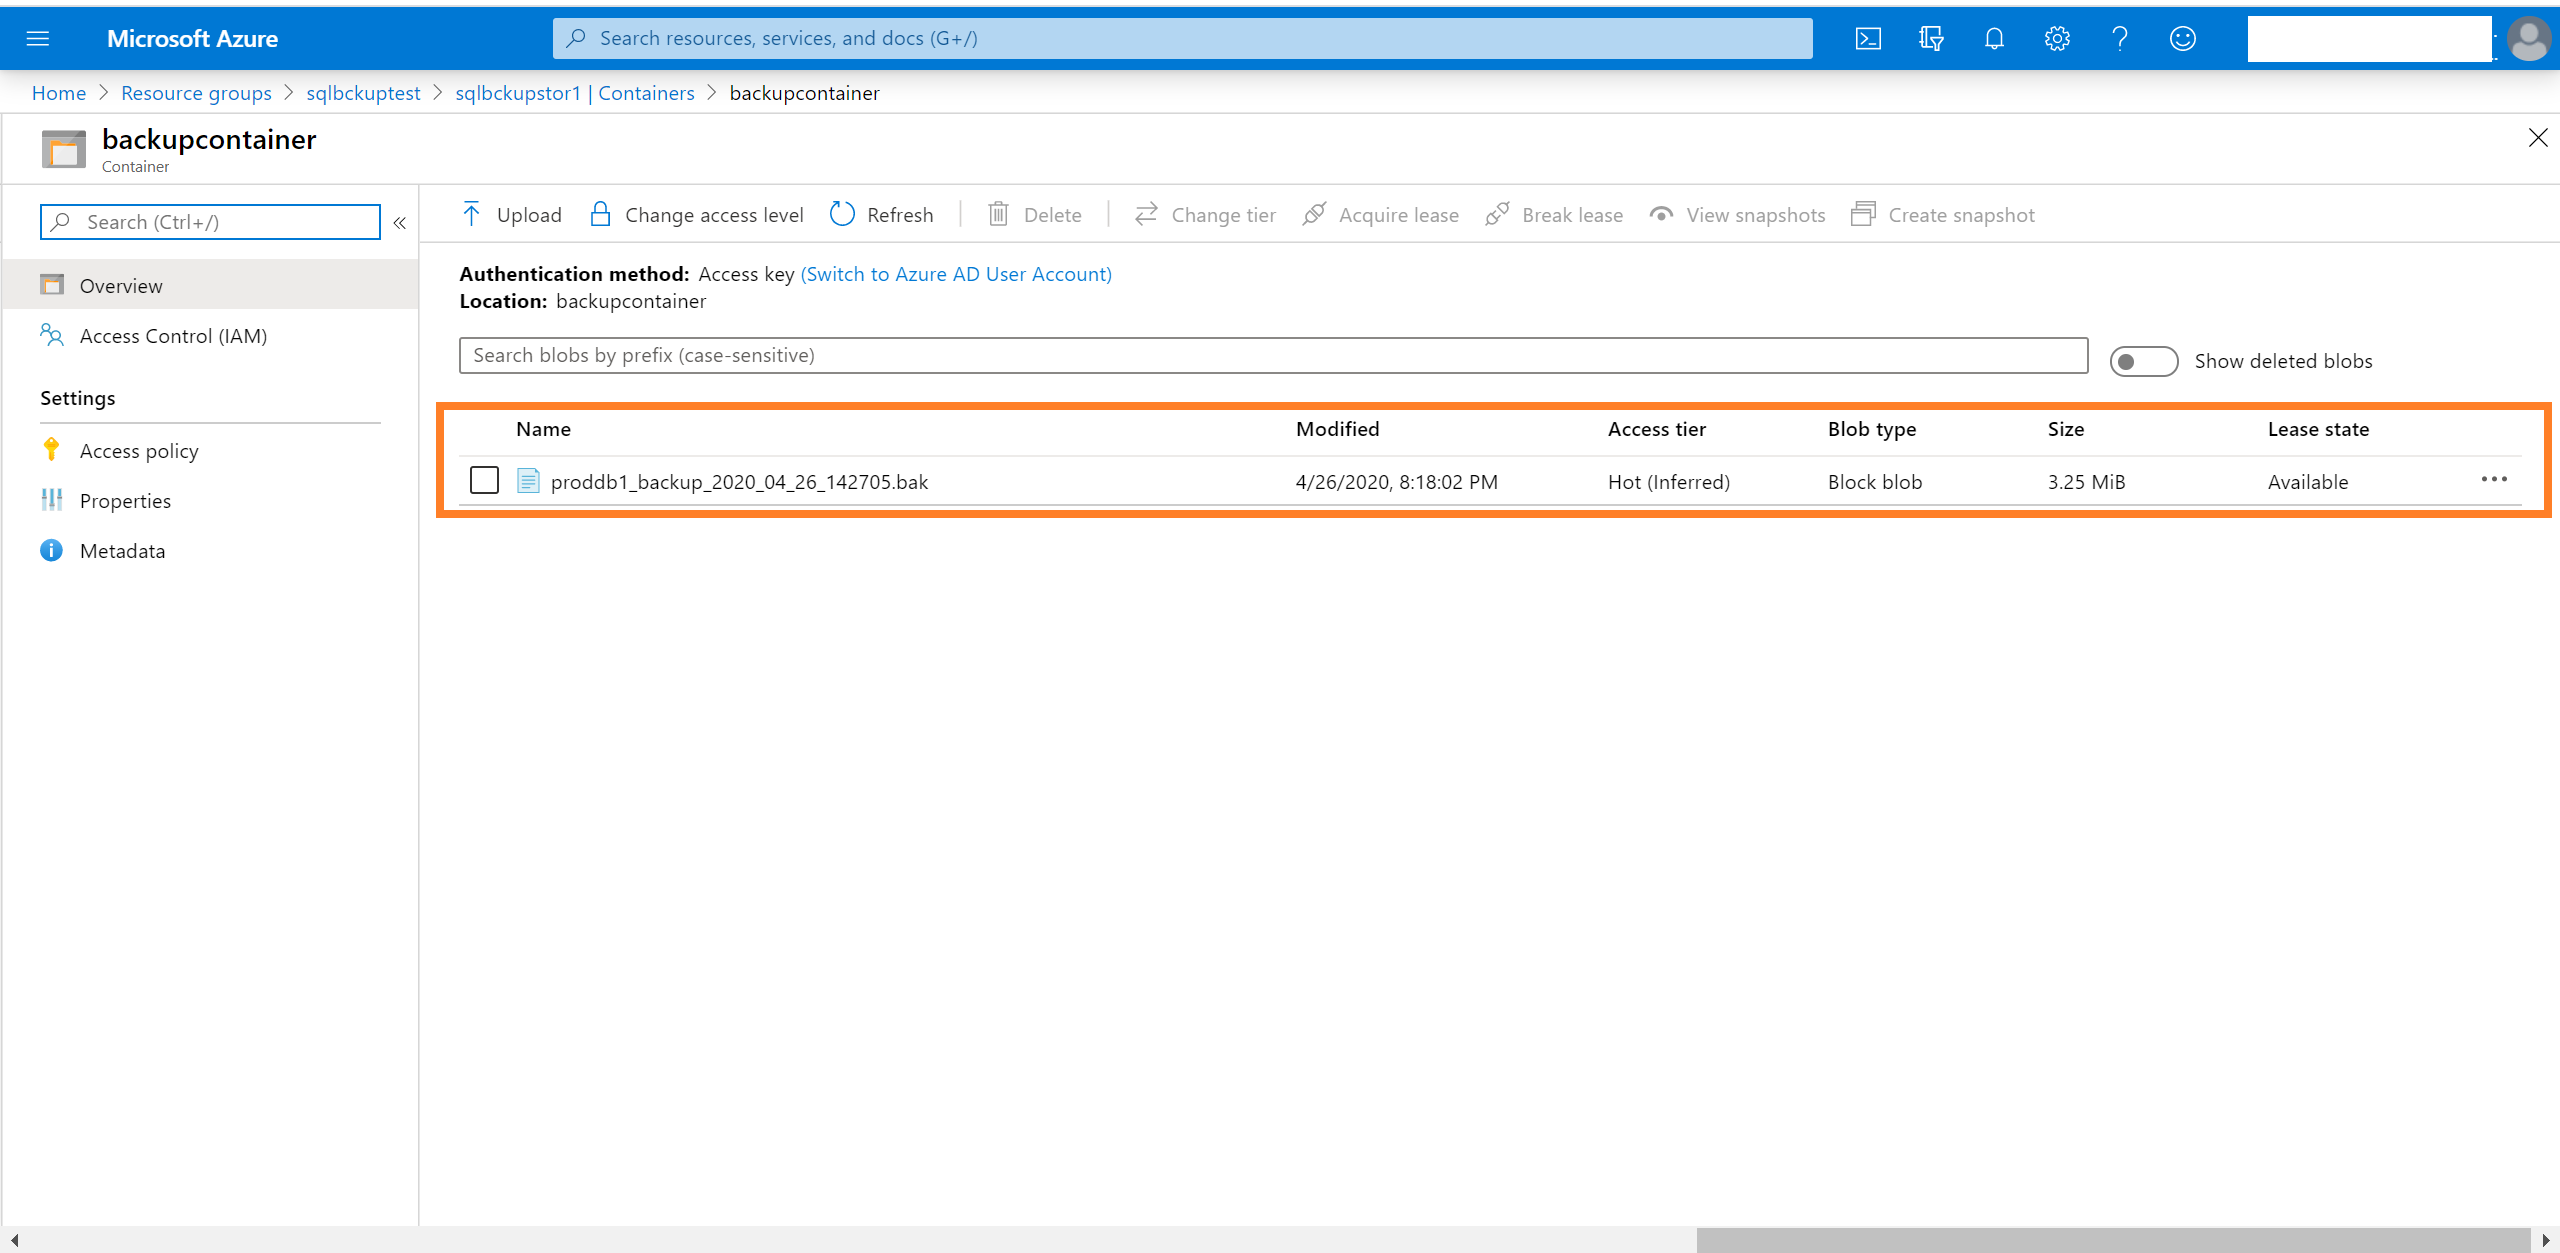
7. To verify that backup is stored in Azure, head to the storage section in the Azure portal. From the storage overview page, click on containers and select the target container. The backup file will be listed in the portal.
Reinforce Business Continuity with NetApp Cloud Volumes ONTAP
Now that you know how to back up SQL Server to Azure, let’s take a look at how NetApp Cloud Volumes ONTAP augments the capabilities of Azure cloud storage. By delivering enterprise class data management features in an evolving cloud landscape where hybrid architectures are being widely used, Cloud Volumes ONTAP delivers a single management pane for managing storage on-premises and in multiple clouds. This simplifies how storage is provisioned and managed across hybrid environments for complex workloads that depend on SQL databases. Cloud Volumes ONTAP volumes can be accessed by VMs in Azure over network using SMB /NFS protocols or mounted to machines as drives over iSCSI.
When used for SQL databases, Cloud Volumes ONTAP high availability, data protection, and built-in storage efficiency features are added advantages. The adaptive compression process for Cloud Volumes ONTAP in Azure helps to reduce Azure storage costs and footprint in cloud by at least 50%. Deduplication reduces storage usage by saving pointers to existing data blocks than rewriting them multiple times. The thin provisioning feature dynamically allocates storage when data is written rather than pre-provisioning storage, which might end up going unused.
Cloud Volumes ONTAP can also be integrated with on-premises SQL for enhanced disaster recovery and business continuity using proprietary NetApp Snapshot™ technology. This point-in-time backup and restore solution is space efficient and does not incur any performance overhead that could impact database operations. FlexClone® data cloning technology can be used for creating instant clones with near-zero capacity, irrespective of source database size. These clones can then be leveraged to create new copies of your databases, thereby enabling customers to do end to end testing of SQL dependent workloads non-disruptively. NetApp’s Snapshot and FlexClone technologies also simplify the migration of such workloads to Azure through the NetApp Cloud Manager unified pane.
Overall, Cloud Volumes ONTAP allows SQL users to get better Azure cost management and a higher return on investment while delivering an ironclad business continuity capabilities for critical database workloads. Read more about how Azure databases can be backed up with Cloud Volumes ONTAP.
Sign up for a 30-day free trial of Cloud Volumes ONTAP to learn more hands on.

