Share
With hybrid and cloud-only architectures taking center stage in today’s IT landscape, Azure storage has gained significance as the cloud storage of choice for enterprises. It offers a cost-effective storage alternative catering to both block and object storage requirements. The service is easy to onboard and configure with minimal learning curve for storage administrators.
How can you start using Azure storage? In this blog, we will explore the onboarding process for Azure storage, starting with how to create Azure storage accounts and then the methods for uploading data to blobs in Azure storage.
Azure Storage Basics
Azure storage is a highly available, durable and scalable cloud-based storage service from Microsoft that can be used by customers for multiple use cases including storing large data sets, application messaging, static website hosting, file shares, etc. It consists of the following data services to cater to different application requirements: Blobs, Files, Queues, and Tables.
Azure storage service is resilient by design as the data can be replicated across data centers (Locally Redundant storage), across availability zones (zone-redundant storage), or across geographies (geo-redundant storage). The service is scalable to store petabytes of data and customers need to pay only for the data being stored. Security is ensured by encryption of data in transit and data at rest in Azure storage. All these capabilities are available in a managed service model so that it is easy for the customer to deploy and start using the service.
How to Create Azure Storage Accounts
There are multiple ways to provision and manage Azure storage. It can be done directly from Azure Portal or automated through ARM templates, Azure CLI, Azure PowerShell, Terraform, etc. Below we’ll show two different methods for how to create Azure storage accounts: one with the Azure Portal GUI, and the other using scripted commands in the Azure CLI.
Deployment Using the Azure Portal
For storage administrators new to Azure, provisioning the storage from the Azure Portal is the easiest approach. The Azure Portal is the GUI console that gives Azure users an easy way to perform multiple actions in their accounts. In the steps below, we’ll show you how to provision Azure storage from Azure Portal.
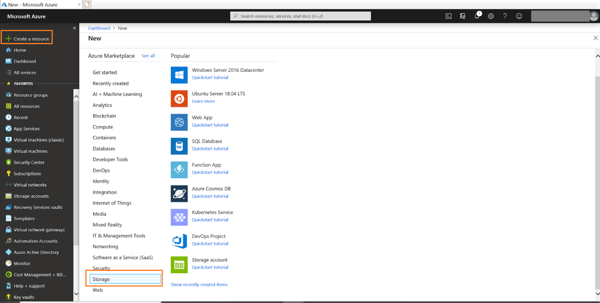
1. Start by going to the Azure Portal. Here, click on “+ Create a resource” in the left-hand panel and from the list provided choose “Storage.”
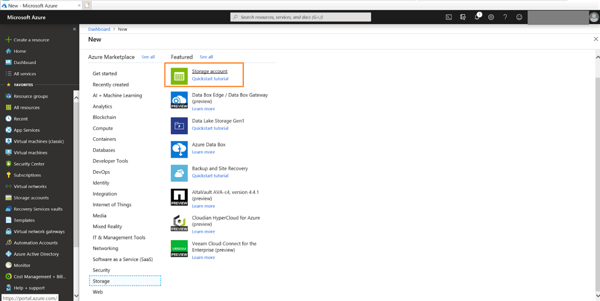
2. A list of storage related items will now appear. From these options, click on the first choice, “Storage Account.”
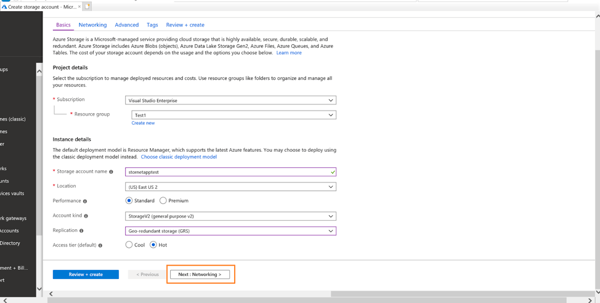
3. You’ll see that the storage account creation window has now opened up. In the Basics tab, you’ll now have to enter some information in order to set up your account. Provide the following information:
A. Subscription: Select the Azure subscription where the storage account is to be created.
B. Resource group: Select the resource group or create a new resource group to which the storage will be added.
C. Storage account name: Give a name to storage account, per organization’s naming standards.
D. Location: Select the Azure region in which the storage account will be deployed
E. Performance: Select between the Premium and Standard options. Standard accounts use HDD in the backend and Premium accounts use SSD. Standard can be used for normal workloads, while Premium should be selected for performance-intensive, low-latency workloads.
F. Account kind: Select from StorageV2, StorageV1, and Blob storage. Select Blob storage if the primary purpose is only object storage. Select StorageV2 or StorageV1 for blobs, files, tables, and queues in single account. StorageV2 is the latest generation and is recommended for all new workloads.
G. Replication: Select the replication option for the storage account based on durability requirements. You can choose from between locally-redundant storage (LRS), geo-redundant storage (GRS), zone-redundant storage (ZRS), or read-access geo-redundant storage (RA-GRS) which are all in GA for production systems.
H. Tier: Choose the Hot Access tier for frequently accessed data and the Cold Access tier for infrequently accessed, stale data.
Once the details are updated, continue by clicking on “Next: Networking” to configure the network settings.
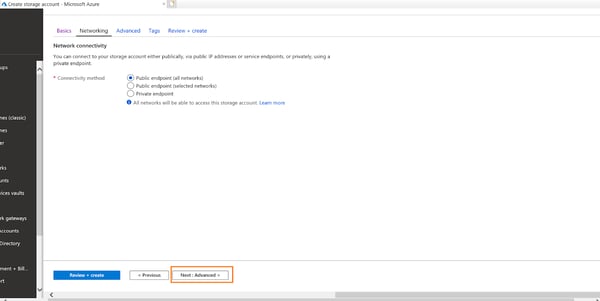
4. You’ll now work on configuring your network settings. Select the level of network restriction that you want to apply to the storage. It can be configured to allow access from all public IP networks, restrict to specific Public IP, or service endpoints.
When you’re done, click on “Next: Advanced” to configure the advanced settings.
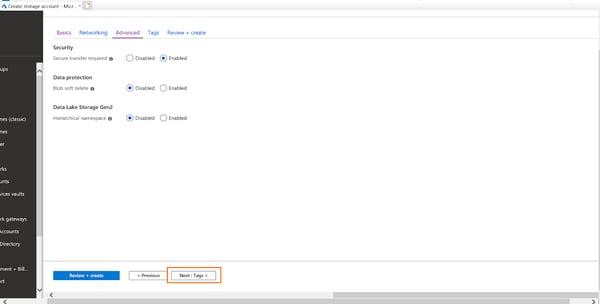
5. In the advanced settings, select the following options:
A. Secure transfer required: Enabling this option ensures that only secure connections, such as API calls over HTTPS and encrypted Azure file share connections over SMB, are allowed access to the storage.
B. Blob soft delete: If enabled, any deleted blobs from the account will not be permanently deleted, but rather stored in a soft delete stage for a user-defined period of time between 1–365 days. Note that soft deleted data would still incur data charges, so this option should be enabled only if required.
C. Hierarchical namespace: With this option enabled, if you want to use the storage to be accessible using Azure Data Lake Storage Gen2 hierarchical namespace capability
Click on “Next: Tags” to move to the Tags configuration.
6. In this step you’ll add any tags that applicable to the environment. Make sure to follow your organizational conventions for tag use, if you have them. Click on “Next: Review+Create” to continue.

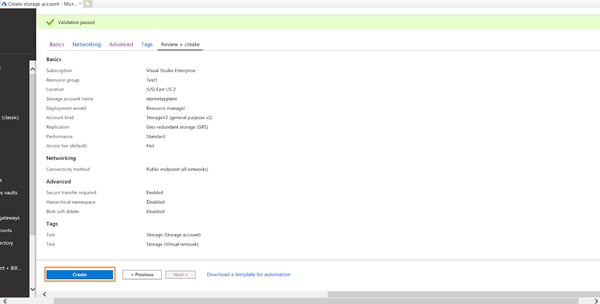
7. In the next step, you’re going to validate all the inputs you’ve given so far. Review the configurations and once it all checks out, click on “Create” to provision the storage.
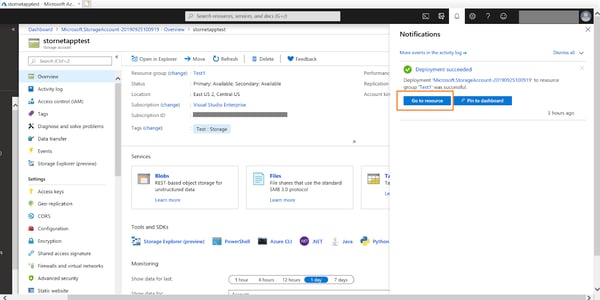
8. Once the provisioning is completed, the notification would show up in the Azure Portal telling you you’re all set. You can click on “Go to resource” to access the storage and begin using it.
Deploy Using Azure CLI Commands
For more experienced, developer-minded users, you can deploy Azure storage using the Azure CLI. You can install Azure CLI in a Windows/Linux/macOS machine by following the instructions here. You can also access Azure CLI from Azure Cloud Shell in the Azure Portal. For this demo, we will use the Cloud Shell approach.
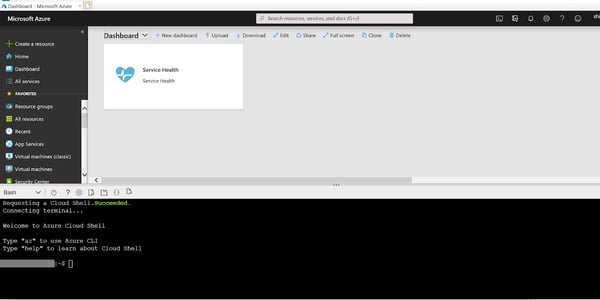
1. Open Cloud Shell by clicking the Cloud Shell icon in the upper-righthand corner of the Azure Portal.
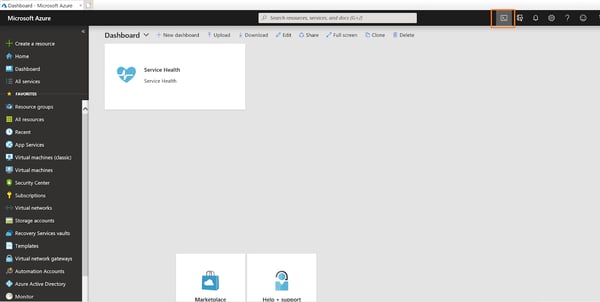
2. The Cloud Shell opens in the bottom pane of the screen.
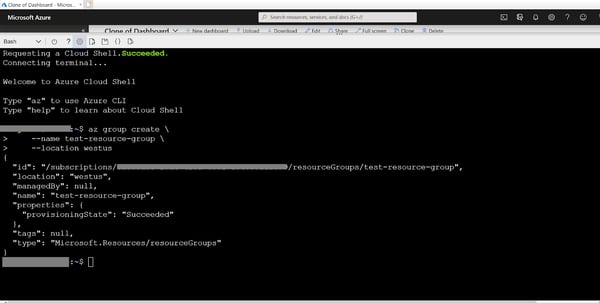
3. Create a resource group using the following command. Make sure to replace the highlighted resource group name and location with your deployment preference.
az group create \
--name <resource group name>
--location <azure region>
Replace the highlighted values as follows
- Name: Add the name of the resource group.
- Location: Update with name of the Azure region you are using. Output values from the following command can be used here: #az account list-locations
4. Create Azure storage account using the following command:
az storage account create \

    --name <account-name> \

    --resource-group <resource group name>\

   --location <azure region>\

    --sku <storage account sku> \

    --kind <storage account sku>
5. Update the values as follows
- Name: Name of the storage account
- Resource group: Give the name of resource group created above in Step 2.
- Location: Update with the name of the Azure region. Output values from the following command can be used here #az account list-locations
- SKU: Select from the following SKUs based on storage replication requirements: Premium_LRS, Premium_ZRS, Standard_GRS, Standard_GZRS, Standard_LRS, Standard_RAGRS, Standard_RAGZRS, Standard_ZRS
- Kind: Select the storage account type from the following options: BlobStorage, BlockBlobStorage, FileStorage, Storage, StorageV2

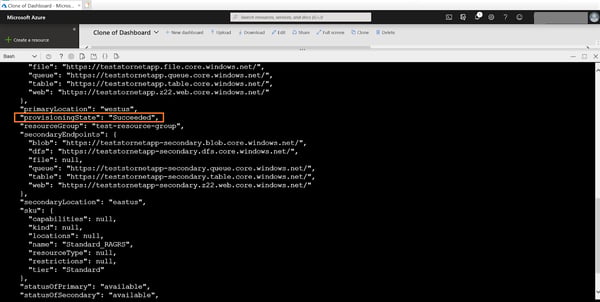
6. You can list the storage accounts in the resource group to view the newly provisioned storage using the following command:
#az storage account list -g <resource group name> The storage account provisioning state will be listed as “Succeeded” in the output.
Blob Uploading to Azure Storage
Now that storage account is provisioned, let’s explore the different options for uploading data using Azure Portal, Azure CLI, and the data copying tool AzCopy, which is used for bulk data uploads/transfers.
Blob Uploading Using the Azure Portal
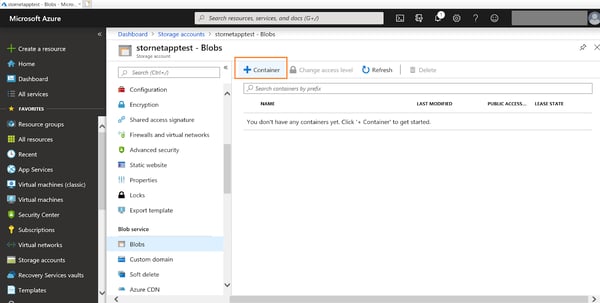
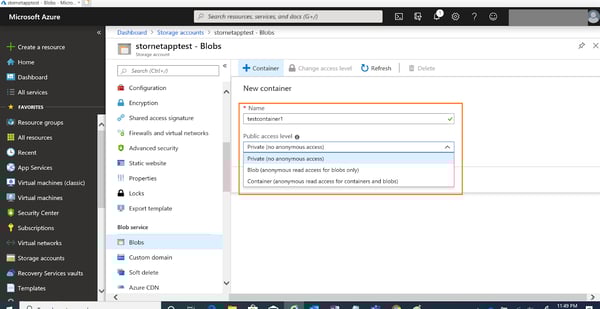
1. Open the already provisioned storage account from the Azure Portal. Go to Blob Service->Blobs. Click on “+ Container” to create a container within which the blob will be stored.
2. Provide the name of the container and choose the public access level. You can configure the settings as “Private” with no anonymous access, “Blob” with anonymous read access for blobs only, or “Container” where anonymous access is given to that container and all the blobs in it.
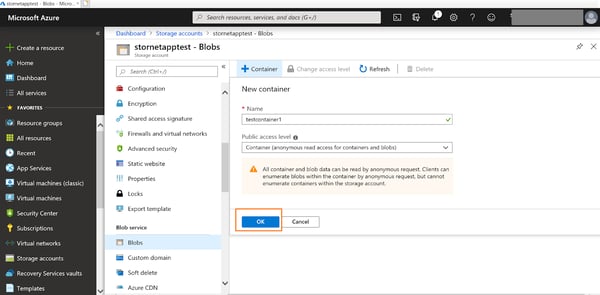
3. For the purpose of this demo, we will choose “Container” which will give the container and all blobs in it anonymous read access. Click on “Ok” to create the container.
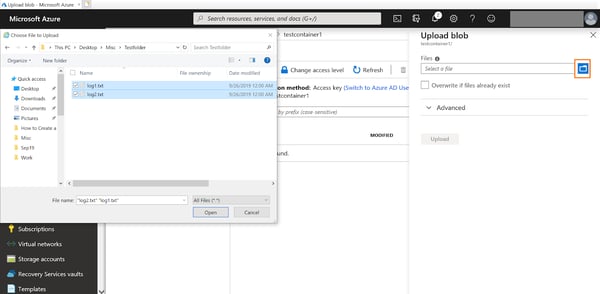
4. Once the container is created, double click on the container and then select “Upload.”

5. The Upload pane opens up. Click on the folder icon to browse for files to be uploaded from the local machine. Select all the files that you want to be uploaded to the container.
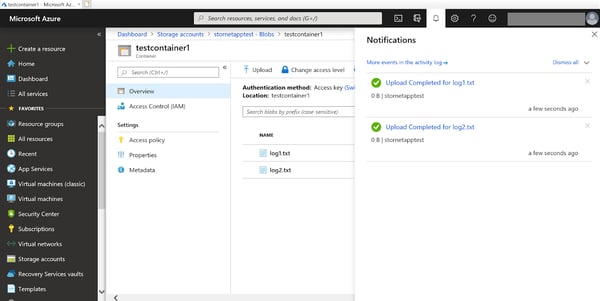
6. Click on “Upload” to initiate the data upload. You will get a notification as soon as the files have been successfully uploaded.
Blob Uploading Using Azure CLI
1. Create a container in the storage account created earlier using the following command. Replace the placeholder in the command with the name of the container and the storage account. Choose the public access from between blob, container, or off (for disabling public access).
#az storage container create --name<container name> --account-name<storage account name>--public-access<blob/container/off> 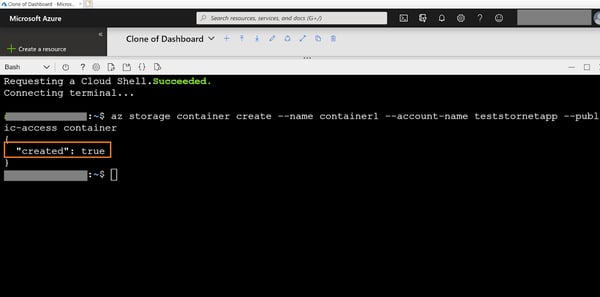
The command will return with the created state marked as true.
2. Upload data to the blob using the following command by replacing value of file path, container name, storage account name, and blob name.
# az storage blob upload --file <file path> --container-name <container name> --name <Blob name> --account-name <storage account name> 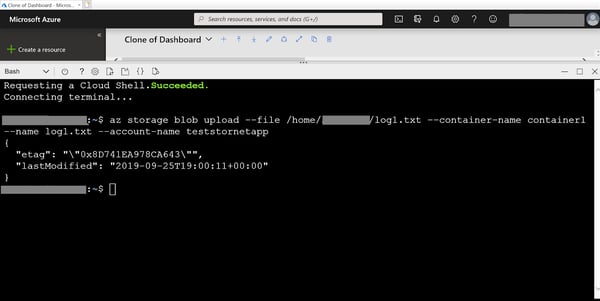
3. To see a list of the blobs in the container, use the following command:
#az storage blob list --container-name <container name> --account-name <storage account name> Blob Uploading Using AzCopy
AzCopy is a popular command-line tool used for uploading and downloading blobs or files to Azure storage accounts. The detailed installation and configuration instruction of the tool can be found here.
Azure Cloud Shell comes pre-installed with AzCopy and we will use the tool from Cloud Shell for this demo. Before uploading the data to storage, create a Shared Access Signature token to provide access to the container. Details on using this token can be found here.
1. To start, run the following command from Cloud Shell to upload data from local storage to a container in Azure storage. Replacing the values of local file path, storage account name, container name, and the SAS token:
# azcopy copy "<local-file-path>" "https:/<storage-account-name>.blob.windows.net/<container-name>/<SAS token>
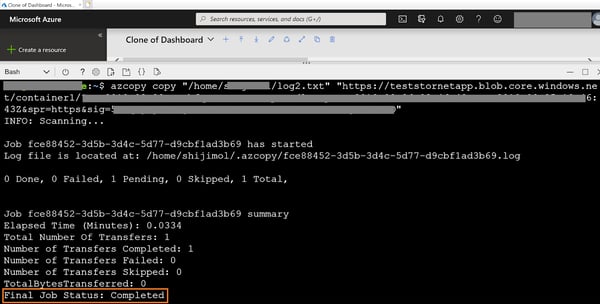
Once the blob upload is done, the job status will be shown as completed.
Get More from Azure Storage Using Cloud Volumes ONTAP
Now that you can check “create Azure storage account” off your list and are able to upload files to it, find a way to manage that data more efficiently and at a lower cost. Cloud Volumes ONTAP brings NetApp’s trusted enterprise storage management solution to Azure. By leveraging Azure storage in the backend, Cloud Volumes ONTAP adds on to the native capabilities by offering fileshare and block-level storage through NAS and SAN protocols (NFS, SMB / CIFS, and iSCSI).
Cloud Volumes ONTAP comes in a highly available configuration, thus catering to use cases with stringent RPO (RPO=0) and RTO (RTO<60 secs) requirements. It enables customers to leverage proprietary NetApp storage capabilities like Flexclone data cloning, thin provisioning, deduplication, compression, NetApp Snapshot™ data copies, SnapMirror® data replication etc in Azure with minimal configuration and operational overhead.

