Share
Anyone who’s ever worked with virtual machines (or cloud instances) understands the importance of safekeeping the information of persistent storage and the ability to recover when something goes wrong. In Google Cloud, backup options like these are just as important.
Google Cloud Compute Engine is a very powerful and full-featured computing service that includes a full complement of persistent storage management capabilities. In Google Cloud there are different strategies one can use to keep data safe and enable point in time recovery. One common practice to create a Google Cloud backup is to leverage the Snapshot functionality of Compute Engine.
In this post we’ll take a closer look at how to schedule snapshots to achieve Google Cloud automatic backup for persistent disks.
Steps to Create Snapshot Schedules with Google Cloud Persistent Disks
Google Cloud automatic backup is incredibly valuable. Manually creating snapshots isn’t sufficient to protect data—they simply can’t be created quickly and often enough to ensure data won’t be lost. If a failure occurs, a manual snapshot will most likely be too old, unless the snapshot happened to be created just before the failure occurred. Using the native features of Google Cloud Compute Engine, storage admins can solve this challenge by automating the entire snapshot creation process. With just a few clicks in the Google console, admins can define the storage location, frequency of snapshot creation, and the snapshot retention policy.
To see the snapshot scheduling feature in action, we need to start by creating a cloud instance in Google Cloud Compute Engine. The instance has a persistent disk that will be the target of our scheduling. The creation process should be quite intuitive and identical to the one described in this blog post.
With a cloud instance created and successfully launched, details such as the name and instance IPs will be visible in the VM instance list.
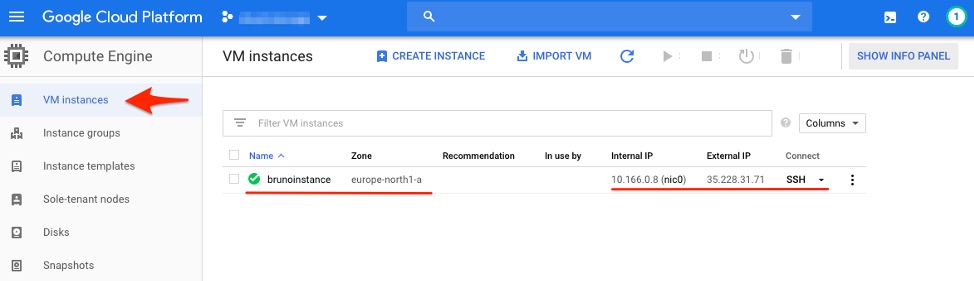 Compute Engine VM instance list
Creating a Snapshot Schedule
1. Navigate to the Snapshots section on the left-hand panel and find the “Snapshot schedules” tab. Press the “Create snapshot schedule” button to initiate the scheduling creation process.
 Snapshot schedules panel
2. Provide a name for this snapshot schedule that is descriptive enough about the process. As a suggestion, you can name it based on the snapshot schedule frequency, such as the name used in this example, brunoinstance-daily-snapshot.
3. The region where the snapshot will be stored and the storage availability (multi-region or regional) are also possible to be customized. This is particularly useful if you want to have Snapshots backup in a different region than the one where the instance persistent disk is located.
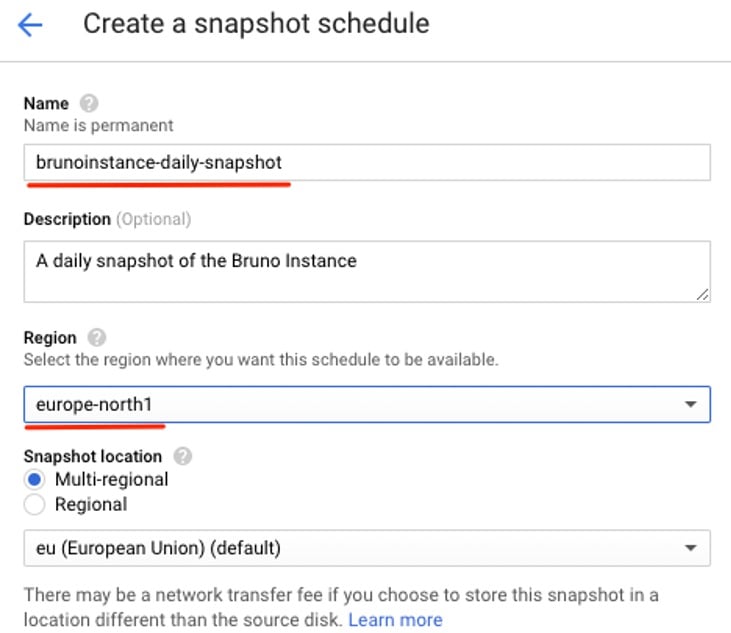 Snapshot schedule creation panel (name and region)
4. One of the most important aspects to configure is the frequency and retention required. The frequency can be either Hourly, Daily, or Weekly. As part of this setting, you can define an hourly time window for when those snapshots should take place.
5. The snapshot retention period can be adjusted to keep only the most recent ones, according to a desired number of days. If the instance is deleted in Google Cloud Compute Engine, you can choose to either keep the snapshots or delete them according to their age.
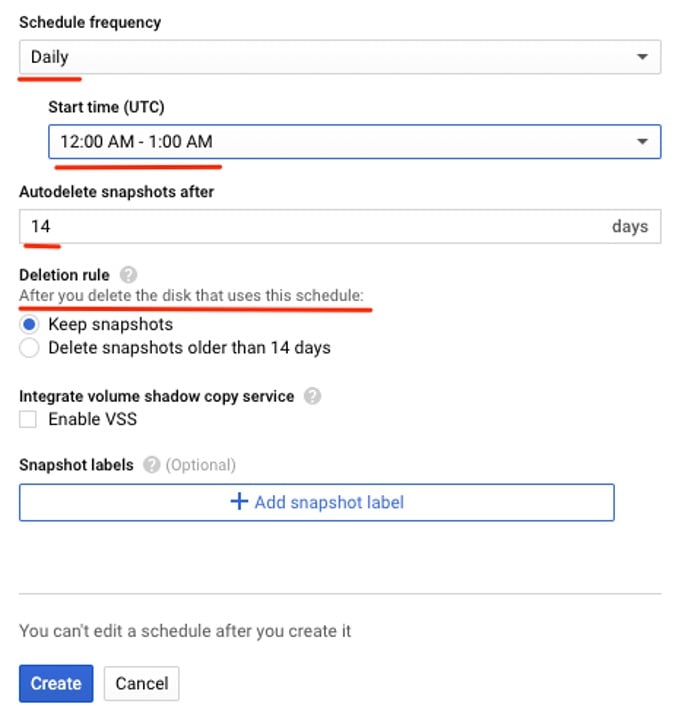 Snapshot schedule creation panel (frequency and retention)
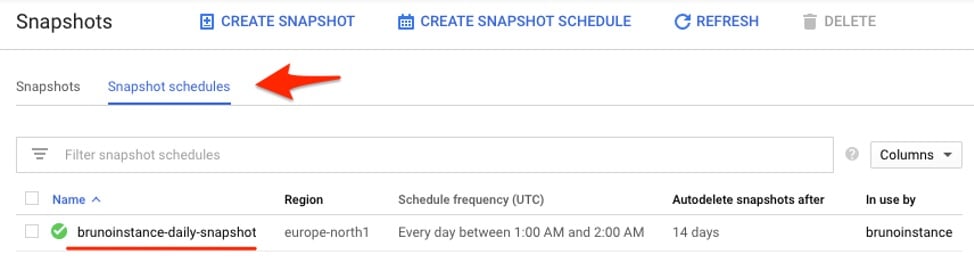
6. The snapshot schedule and its configuration will be visible in the Snapshot Schedules list. Note that even though it was created successfully, there is still no association with a particular instance.
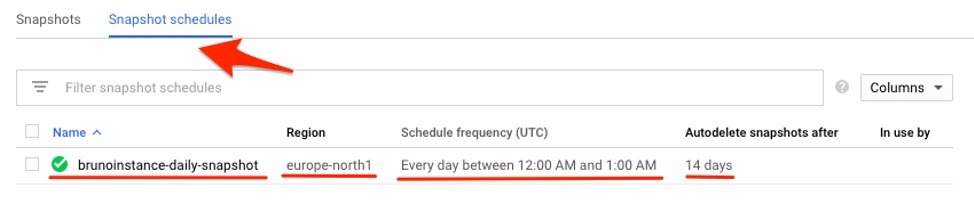 Snapshot schedules list panel
Attach a Schedule to a Persistent Disk
1. The snapshot schedule will need to be attached to the instance persistent disk. Head to the Disks section in the left-hand panel and enter your instance view details.
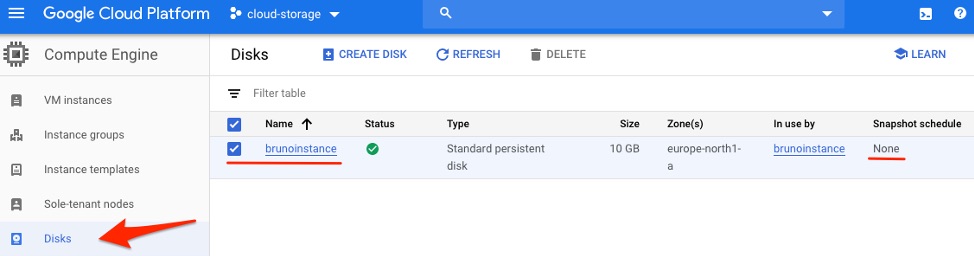 Persistent Disks list panel
2. Confirm that there is no snapshot schedule attached and then press “Edit.”
 Persistent Disk Configuration view
3. Select the schedule you previously created from the list. From this view you can also trigger the snapshot schedule creation process.
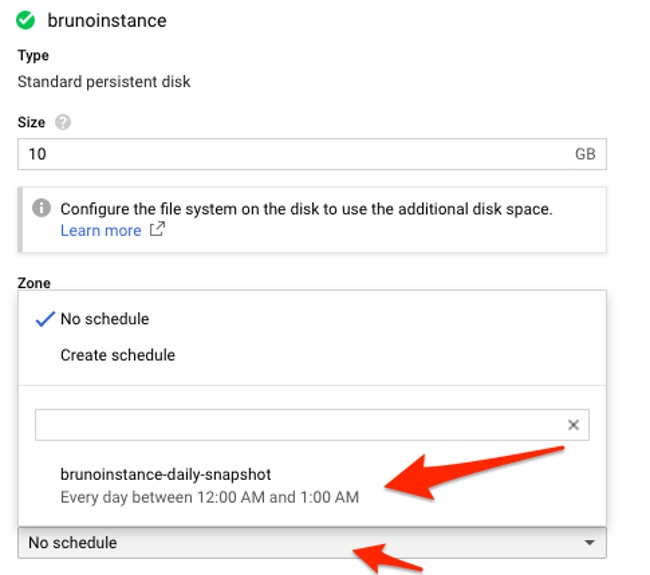 Snapshot schedule selection
4. After selecting the appropriate snapshot schedule, press “Save” to take the change into effect.
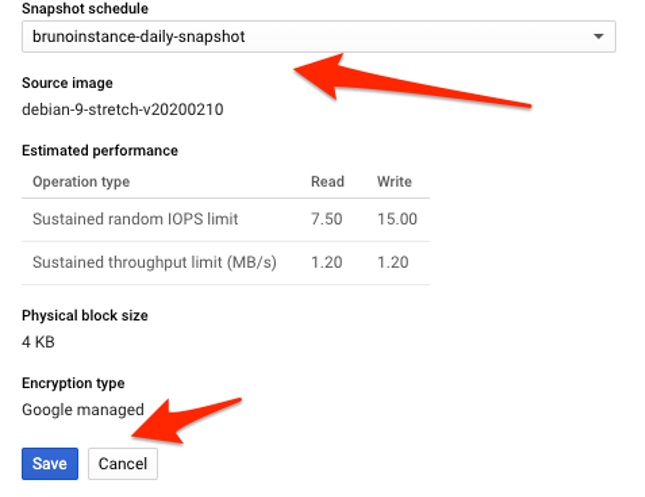 Persistent disk edit panel
5. The schedule is now attached to the persistent disk and the snapshot process will start according to the configuration you defined.
1. With the schedule running in the background, the newly created instance snapshots will appear under the Snapshots section as per the frequency and times of the configuration.View Defined Schedules and Snapshots
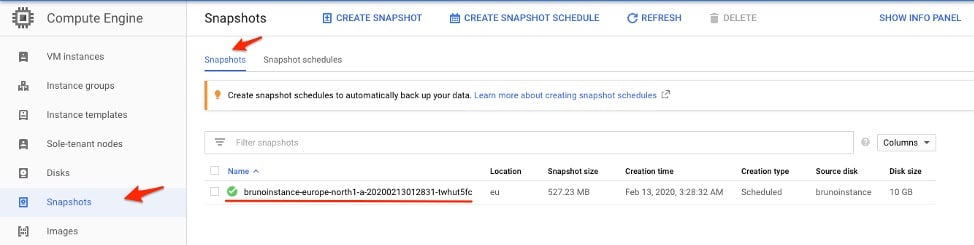 Snapshot list panel
2. All the snapshot schedules will also be listed in this section. However, keep in mind that a snapshot schedule can’t be modified, so if you need to apply changes the only course of action is to create a new schedule and attach it to the persistent disk.
 Snapshot schedules list panel
Also, it is important to notice that while the schedule is being used by the disk it can’t be deleted. Therefore, you need to always detach it from the persistent disk before deleting the snapshot schedule.
Conclusion
Using the snapshot schedule feature is a great way to leverage Google Cloud automatic backup.
The ability to customize settings such as frequency and retention are crucial and enable you to define according to your business needs. If you have intensive compute and storage periods, it enables a Backup Schedule to your instance at a time of the day that is less disruptive to your business operations, even though the instance does not have to be stopped during the process. The retention policy gives you highly specific point-in-time recovery capabilities and ensures you only pay for the snapshots that are important to you.
Another resource for snapshots and recovery in Google Cloud is deploying your workload with Cloud Volumes ONTAP. Cloud Volumes ONTAP uses NetApp Snapshot™ technology, where users are able to:
- Create snapshot copies in just seconds, faster than the native snapshot utility available in Google Cloud.
- Cut costs thanks to Cloud Volumes ONTAP’s cloud data storage cost-saving efficiencies.
- Schedule snapshot creation and retention policies with ease from NetApp Cloud Manager, the single-pane console that allows users to manage all their data, no matter where it’s stored—on-prem, Google Cloud, or in another cloud—all in one place.
- Keep snapshot data in sync using SnapMirror® data replication.
- Create clones from snapshot copies through FlexClone® data cloning.

