Share
Kubernetes persistent volumes are used to provide containers with durable storage without application developers needing to concern themselves about the underlying implementation details. Kubernetes storage creates a useful abstraction that is able to support an extensible set of different storage provisioners, such as Amazon EBS, Azure Managed Disks, or Google Cloud Persistent Disk.
But Kubernetes users can gain many more data management features for that persistent storage by using BlueXP Cloud Volumes ONTAP or FSx for ONTAP as the back-end storage service.
In this article, we will demonstrate how to use NetApp BlueXP console to leverage Cloud Volumes ONTAP and NetApp Astra Trident to dynamically provision persistent storage for your Kubernetes clusters.
Read on or use the links below to jump down to the sections on:
Persistent Storage Using Cloud Volumes ONTAP
Cloud Volumes ONTAP is NetApp’s enterprise data management platform for the cloud, and builds on cloud storage services such as Amazon EBS, Amazon S3, Azure Managed Disks, and Azure Blob to give users a complete solution for NFS, SMB, and iSCSI storage in cloud, hybrid and multi-cloud environments. Cloud Volumes ONTAP reduces cloud storage costs through a set of sophisticated storage efficiency features, helps to protect data with snapshots and high availability, and supports many other crucial features for managing data, such as BlueXP replication for highly-efficient data replication.
Deployments of Kubernetes on AWS/Azure/GCP or on-prem, can make use of Cloud Volumes ONTAP from directly within a cluster by using Astra Trident. Trident is the CSI-compliant storage provisioner that enables dynamic provisioning in Cloud Volumes ONTAP in response to Kubernetes persistent volume claims. Advanced storage features, such as cloning an existing persistent volume using NetApp FlexClone®, data protection for persistent volumes, and storage efficiency features for improving storage costs, are all available via standard Kubernetes manifests. BlueXP now makes Kubernetes deployment with Trident very easy to accomplish.
Using BlueXP for Kubernetes Deployment
In this section we’ll provide step-by-step instructions on using BlueXP to provision persistent volumes for Kubernetes.
BlueXP uses a graphical, web-based interface that makes it easy to set up Cloud Volumes ONTAP storage services and organize them across multiple tenants for better overall manageability. On-premises systems, Azure deployments, Google Cloud deployments, and AWS deployments can all be controlled from a single dashboard, and BlueXP replication relationships created between them with a simple drag and drop.
BlueXP also allows us to deploy Trident to a Kubernetes cluster and then relate the cluster to Cloud Volumes ONTAP instances.
Note that while this walkthrough will use Cloud Volumes ONTAP for AWS, the process shown here is similar when using Azure and GCP storage as the backend via Cloud Volumes ONTAP, when using the managed Kubernetes services Amazon EKS, AKS, and GKE, when using FSxN as the storage platform, and with bring-your-own-cluster software such as Red Hat OpenShift.
Prerequisites
Before you can start you should make sure that you have network access between BlueXP, the instances of Cloud Volumes ONTAP to be used, and the actual Kubernetes cluster. BlueXP will also require internet access in order to download the latest deployment packages for Trident. You should also have your kubeconfig file downloaded from Kubernetes.
Associating the Kubernetes Cluster with Cloud Volumes ONTAP
In this section we are going to show how to associate your Kubernetes cluster with Cloud Volumes ONTAP, connect with the Trident CSI provisioner, and define storage classes.
- Start by opening BlueXP, which will start you off on the Canvas page. This is where you will see all of your current working environments.
As you can see, our Cloud Volumes ONTAP storage system named cvoprod1 has already deployed and is shown on Canvas. For a detailed walkthrough on how to set up a Cloud Volumes ONTAP instance in AWS click here.
Our next step is to add a Kubernetes cluster. Click the “+ Add Working Environment” button.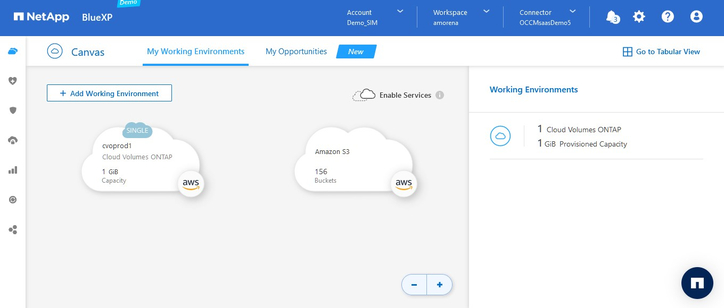
- We’re now going to create a new Kubernetes cluster that we can associate with our Cloud Volumes instance.
For this example we’ll be deploying an Amazon Elastic Kubernetes Service (Amazon EKS) cluster. (Note that we also have options to do this on Azure Kubernetes Service (AKS) and Google Kubernetes Engine (GKE)).
Start by selecting the AWS button.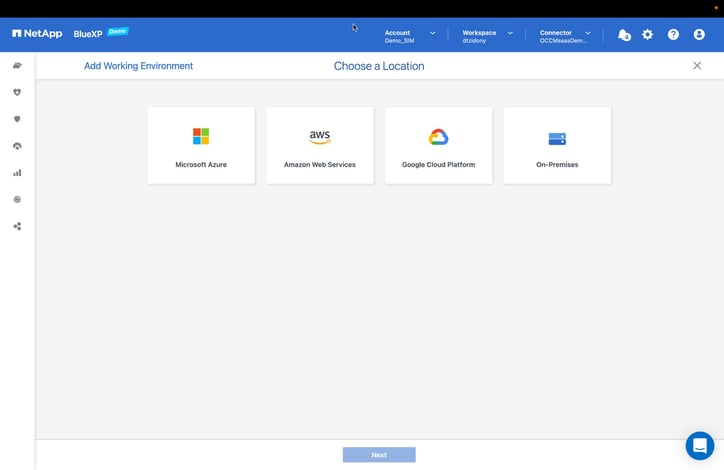
- Select the “Kubernetes Cluster” button.
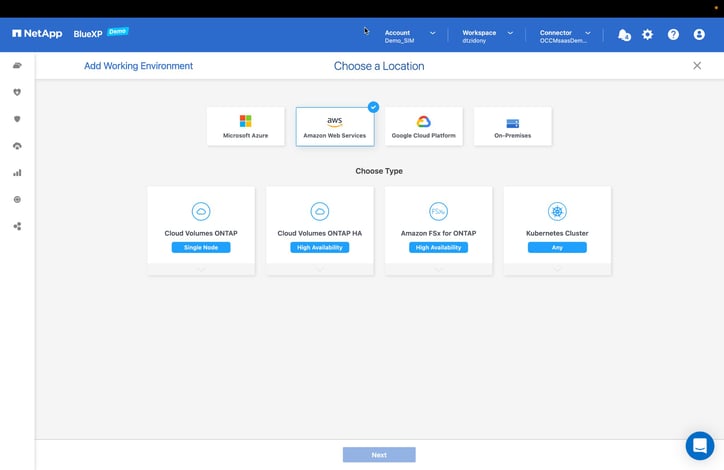 Then click “Next” to proceed.
 - BlueXP can discover your Kubernetes clusters automatically or manually. For this walkthrough, we are going to choose to discover them automatically.
With the “Import Cluster” you will be able to upload a Kubernetes configuration file; however, in our scenario will show the “Discover Cluster” that will automatically discover managed clusters.
Select the “Discover Cluster” button, then click “Next” to proceed.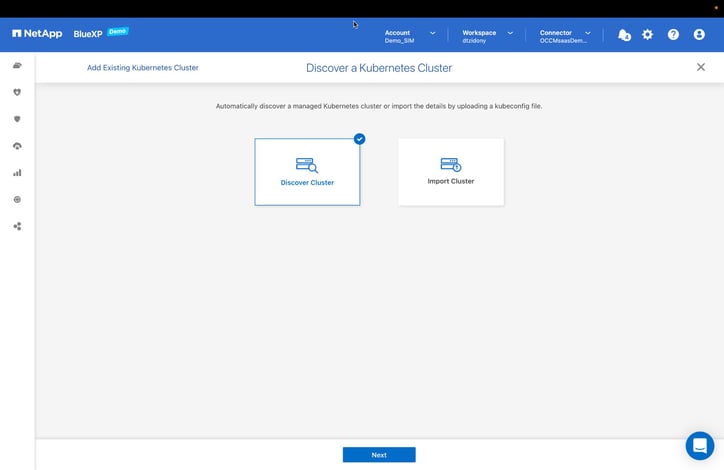
- Based on the selected AWS region (Ireland in this case), the available Kubernetes clusters will be displayed.
Here we are selecting the eks1 cluster and then clicking “Next” to continue.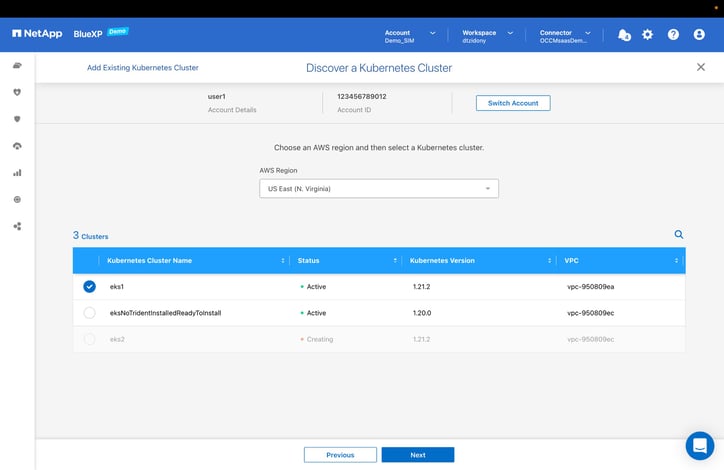
- The Kubernetes cluster you created will appear among the working environments on the Canvas. You can now proceed with installing Trident, NetApp's dynamic storage provisioner CSI, and define storage classes.
Click on the eks1 environment to see its details in the right panel.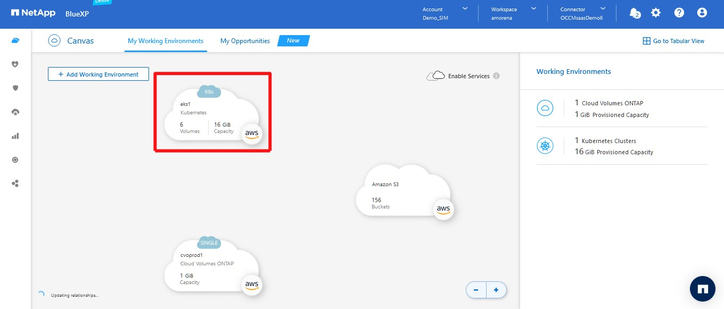
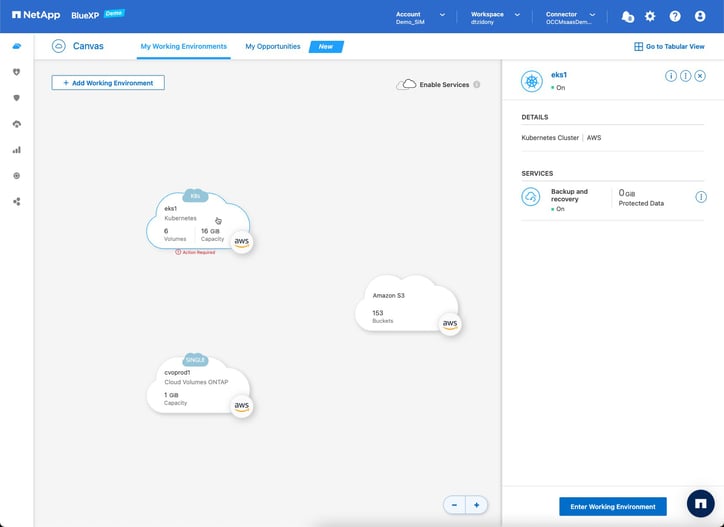
- The details of the cluster will appear in the right-side panel. To enter the cluster, click the “Enter Working Environment” button.
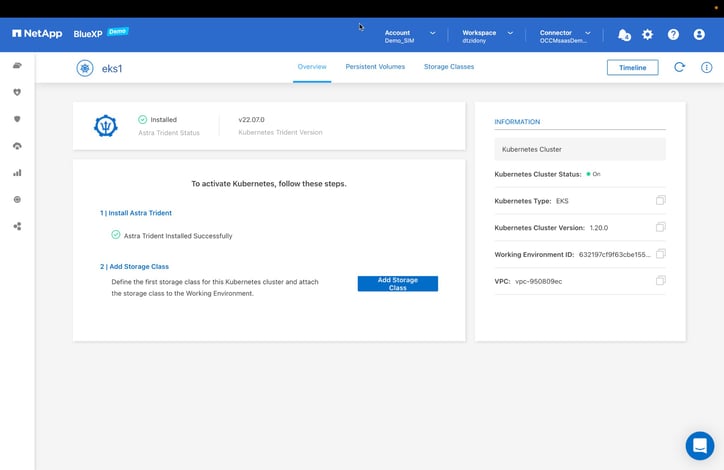
- The first step on this page is to install the Astra Trident CSI provisioner.
Click “Install Trident” to deploy Trident on the Kubernetes cluster.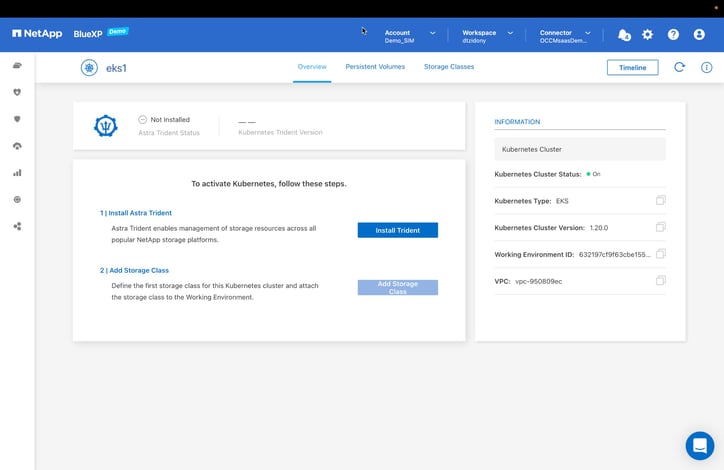
Installing Trident will take a moment. You’ll receive a message once the installation is complete, at which point you can proceed with adding a storage class for the cluster. - On the same page, click “Add Storage Class” to continue.
- Here you’ll need to provide the storage class with a name and define its other settings.
Enter a name in the Storage Class Name field. For this example, we used the name shared-nfs.cm and left all the default settings as is.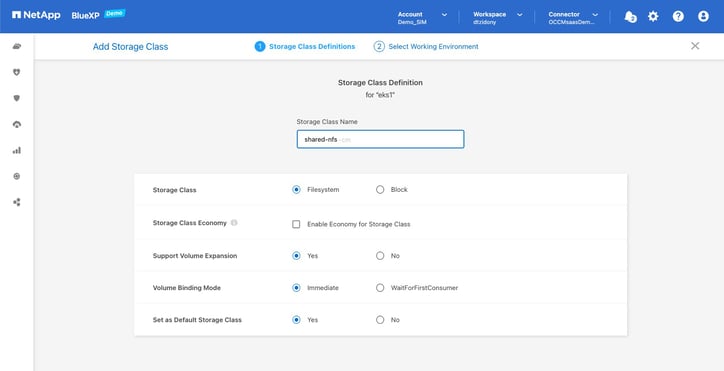
- Now, we'll select the Cloud Volumes ONTAP system to be configured as a Kubernetes persistent storage backend.
Select the checkbox for cvoprod1, then click “Add” to create the storage class and configure Cloud Volumes ONTAP as a storage backend.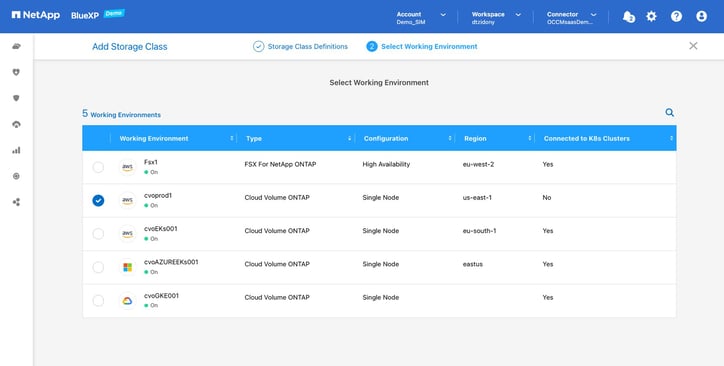
- Go back to the Canvas. You will now see a line connecting the Kubernetes cluster to the Cloud Volumes ONTAP instance where we set up the persistent storage backend. The line represents this relationship.
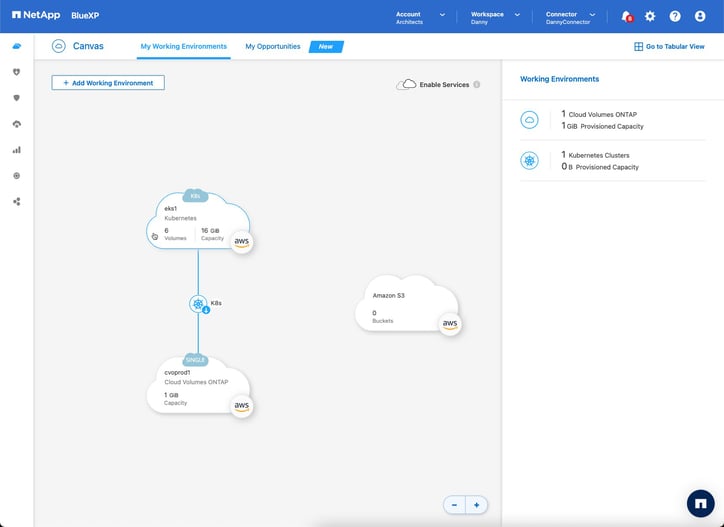
The connection between your Cloud Volumes ONTAP and Kubernetes cluster is now set up and verified.
Next, we will create a PVC through AWS CloudShell, and then validate it in order to test our new Kubernetes environment.
Creating a PVC on AWS CloudShell
Now we will walk through how to create a persistent volume claim that will be attached to the cluster we created in the previous section. This will be done using AWS CloudShell.
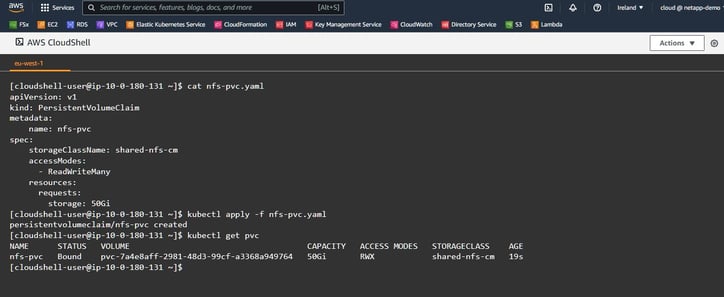
- First, let's run a cat to view the YAML file of the PVC.
Execute the cat command:[cloudshell-user@ip-10-0-180-131 ~]$ cat nfs-pvc.yaml - As you can see, with the nfs-pvc.yaml we are about to request 50G of NFS storage using the shared-nfs.cm storage class we created earlier.
apiVersion: v1
kind: PersistentVolumeClaim
metadata:
     name: nfs-pvc
spec:
     storageClassName: shared-nfs-cm
     accessModes:
    - ReadWriteMany
     resources:
    requests:
storage: 50Gi [cloudshell-user@ip-10-0-180-131 ~]$ - Enter the kubectl apply command to create the PVC and execute:
[cloudshell-user@ip-10-0-180-131 ~]$ kubectl apply -f nfs-pvc.yaml - You will receive a message that the PVC has been created. To verify the PVC creation, run the kubectl get pvc command:
[cloudshell-user@ip-10-0-180-131 ~]$ kubectl get pvc - You’ll now be presented with all the available information about the PVC, such as the volume's name, its capacity, access mode, storageclass, and age. You can also see that its status shows that it is bound to the persistent volume claim nfs-pvc.
You can now return to BlueXP to validate the PV there.
Validating the PV
In this step you’ll confirm that your volumes were set up and that Cloud Volumes ONTAP and your Kubernetes cluster are aligned.
- Return to the Canvas, and enter the eks1 environment, you can see there is one persistent volume present.
Click “View Volumes” to display the details.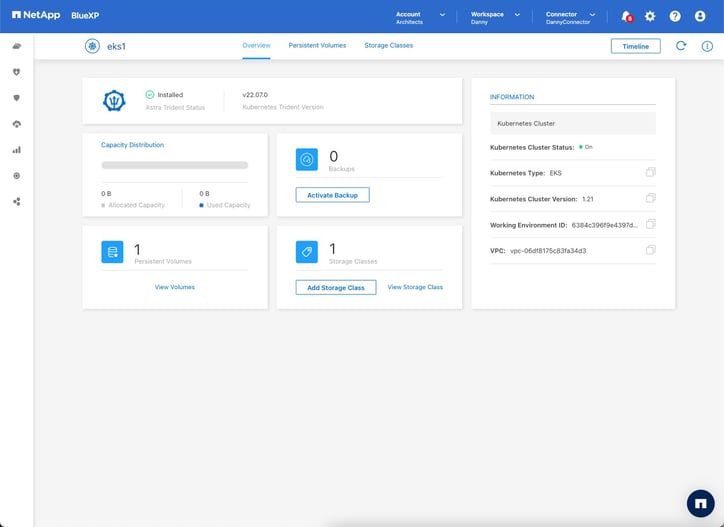
- Here you can verify all the details of the new volume.
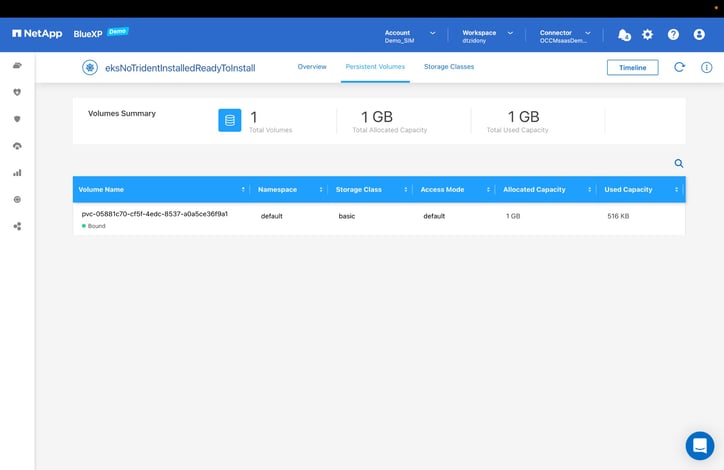
You can now begin using your Kubernetes cluster with Cloud Volumes ONTAP acting as persistent storage in the back end.
Conclusion
BlueXP gives NetApp users leveraging Kubernetes an easy way to provision persistent storage using Cloud Volumes ONTAP. Leveraging Astra Trident, volumes on AWS, Azure, or Google Cloud will be dynamically provisioned as your clusters require.
Once set up, all of Cloud Volumes ONTAP’s data management capabilities can now be applied to your Kubernetes persistent storage including, high availability, data protection, cost-reducing storage efficiencies and much more.

