Share
Every organization is on its transformation and modernization journey. As part of this process, companies are trying to continue using their existing VMware investments while leveraging cloud benefits and exploring how to make the migration process as seamless as possible. The easiest answer to this is VMware offerings in each hyperscaler. This approach would make an organization’s future modernization efforts very easy because the data is already in the cloud.
Although VMware in any cloud delivers unique hybrid capabilities to every customer, limited native storage options have restricted its usefulness for organizations with storage-heavy workloads. Because storage is directly tied to hosts, the only way to scale storage is to add more hosts — and that can increase costs by 35-40% or more for storage intensive workloads. These workloads just need additional storage, not additional horsepower, but that has meant paying for additional hosts.
Let's consider this scenario: A customer requires only six hosts for horsepower (virtual CPU (vCPU)/virtual memory) but has a lot of storage needs, and based on assessment, requires 12 hosts to meet the storage requirements. These storage requirements increase the overall TCO because the customer must buy additional horsepower even though they only need to increment the storage.
In this blog series, we provide insight into the capabilities of using Azure NetApp Files and NetApp® Cloud Volumes ONTAP® to provide optimized storage along with best-in-class data protection capabilities in Azure VMware Solution, enabling offload of the storage component from vSAN storage.
Azure VMware Solution
Azure VMware Solution (AVS) is a hybrid cloud service that allows for fully functioning VMware software-defined data centers (SDDCs) within the Microsoft Azure Public Cloud. AVS is a first-party solution fully managed and supported by Microsoft, verified by VMware leveraging Azure infrastructure. This means that when AVS is deployed, customers get VMware's ESXi for compute virtualization, vSAN for hyperconverged storage, and NSX for networking and security, all while taking advantage of Microsoft Azure's global presence, class-leading data center facilities, and proximity to the rich ecosystem of native Azure services and solutions.
Getting started
Deploy and configure Azure VMware Solution
Like on-premises, planning your Azure VMware Solution is critical for a successful production-ready environment for creating virtual machines (VMs) and migration.
Let’s look at how to set up and manage AVS and use it in combination with Azure NetApp Files and Cloud Volumes ONTAP on Azure with in-guest storage.
Note: It is important to note that in-guest storage is now the only method of connecting Azure NetApp Files and Cloud Volumes ONTAP to AVS. For datastore support with Azure NetApp Files, please refer to this link and talk to your Microsoft or NetApp sales teams.
The setup process can be broken down into 3 parts:
- Register the resource provider and create a private cloud
- Connect to a new or existing Azure ExpressRoute virtual network gateway
- Validate the network connectivity and access the private cloud
Register the resource provider and create a private cloud
To use Azure VMware Solution, first register the resource provider within the identified subscription.
- Sign into the Azure portal.
- On the Azure portal menu, select All Services.
- In the All Services field, enter the word “subscription”, and then select Subscriptions.
- To view the subscription, select the subscription from the Subscription list.
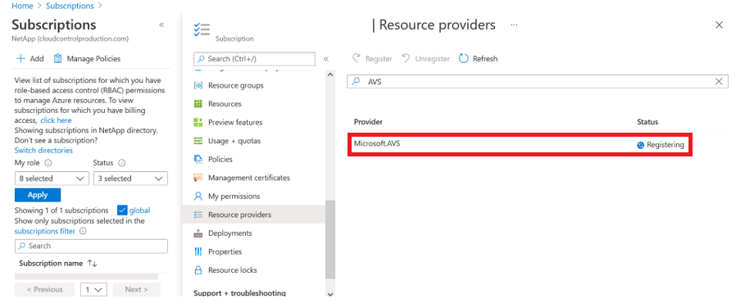
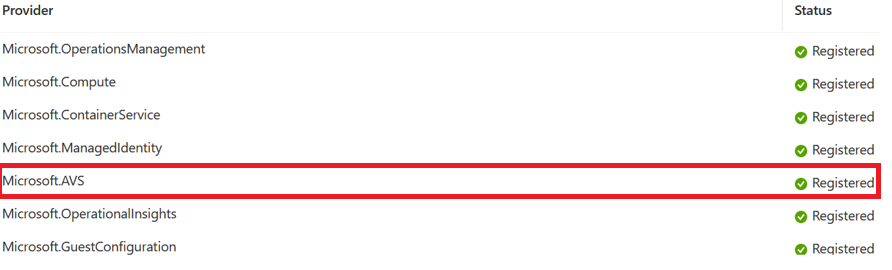
- Select Resource Providers and enter “Microsoft.AVS” in the search field.
- If the resource provider is not registered, select Register.
After you are registered, create an Azure VMware Solution private cloud using Azure.
- Login to the Azure portal.
- Search for Azure VMware Solution service in the search bar.
- In the Azure VMware Solution window, select Create.
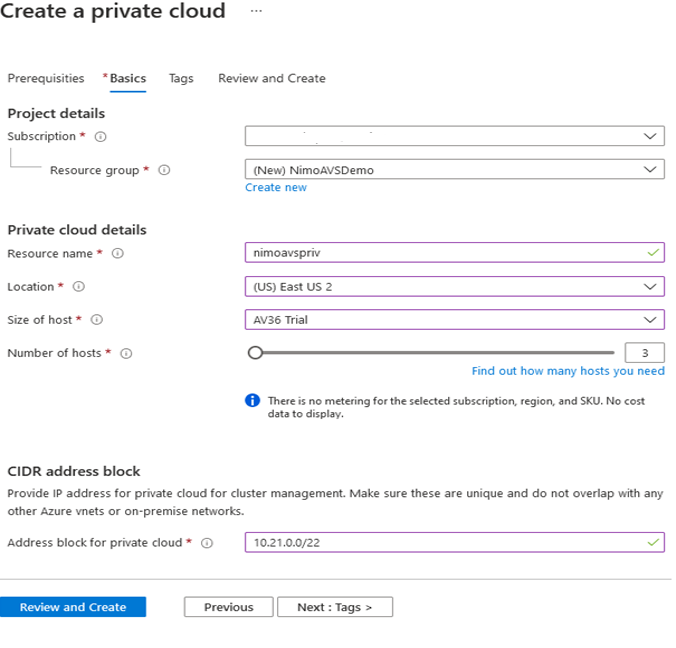
- On the Basics tab, enter values for the fields and then select Review + Create.
Note: Gather the required information during the planning phase itself for a quick start.
Note: Select an existing resource group or create a new resource group for the private cloud. Resource Group is a logical container into which Azure resources are deployed and managed.
Note: Ensure the CIDR address is unique and does not overlap with other Azure Virtual Networks and with on-premises network Classless Inter-Domain Routing (CIDR). The CIDR represents the private cloud management network and is used for the cluster management services, such as vCenter Server and NSX-T Manager. The recommendation is to use a /22 address space. In this blog, we used 10.21.0.0/22.
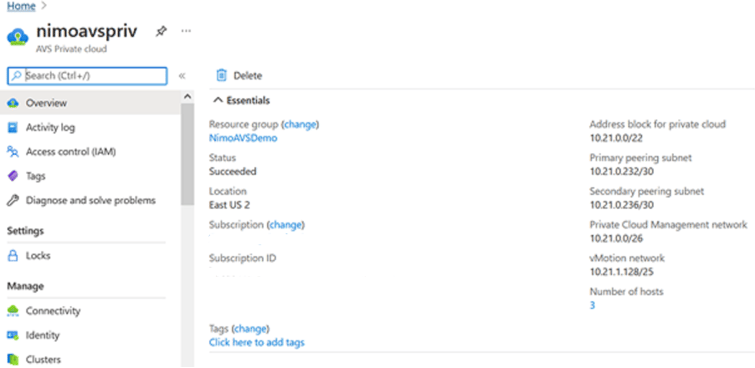
The provisioning process takes around 4-5 hours. After it is completed, verify the deployment is successful by accessing the private cloud from the Azure portal. A status of Succeeded shows the deployment is finished.
The next step is to ensure connectivity is in place. Because Azure VMware Solution doesn't support on-premises vCenter, additional steps are required to integrate with the existing on-premises environment. Setting up an ExpressRoute circuit and a virtual network gateway is also required. While waiting for the cluster provisioning to complete, create a new virtual network or use an existing one to connect to Azure VMware Solution.
Connect to a new or existing ExpressRoute virtual network gateway
To create a new vNet, use the Azure vNet connect tab, or alternatively, create one manually from the Azure portal by using the Create Virtual Network wizard.
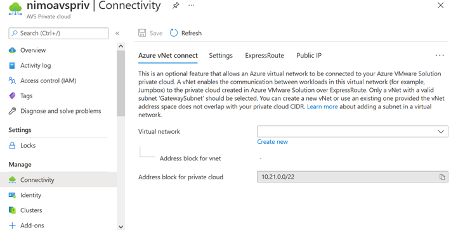
- Go to AVS Private Cloud and select Manage Connectivity.
- Select Azure vNET Connect.
- Select the Create New option to create a new vNET.
This feature allows an Azure virtual network to be connected to the Azure VMware Solution private cloud. The vNet enables communication between workloads in this virtual network by automatically creating the required components (for example, Jumpbox, and shared services such as Azure NetApp Files and Cloud Volumes ONTAP) to the private cloud created in Azure VMware Solution over ExpressRoute.
Note: The vNet address space must not overlap with private cloud CIDR.
4. Provide or update the information for the new vNet and then select OK.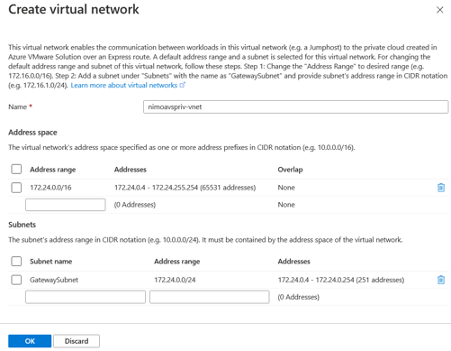
The vNet with the provided address range and GatewaySubnet is created in the designated subscription and resource group.
Note: If you choose to create vNET manually, create the virtual network gateway with the appropriate SKU and ExpressRoute as the gateway type. After the deployment completes, connect the ExpressRoute connection to the virtual network gateway containing the Azure VMware Solution private cloud by using the authorization key. For more information, see Configure networking for your VMware private cloud in Azure.
Validate the network connect and access to Azure VMware Solution private cloud
Azure VMware Solution doesn't allow you to manage a private cloud with on-premises vCenter. Instead, a jump host is required to connect to the Azure VMware Solution vCenter instance.
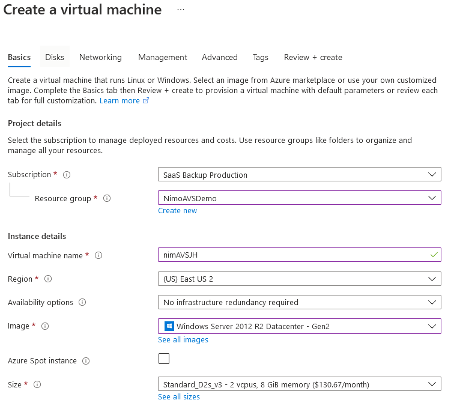
- Create a jump host in the designated resource group and sign in to the Azure VMware Solution vCenter.
This jump host must be a Windows VM on the same virtual network created for connectivity purposes and provide access to both vCenter and the NSX Manager.
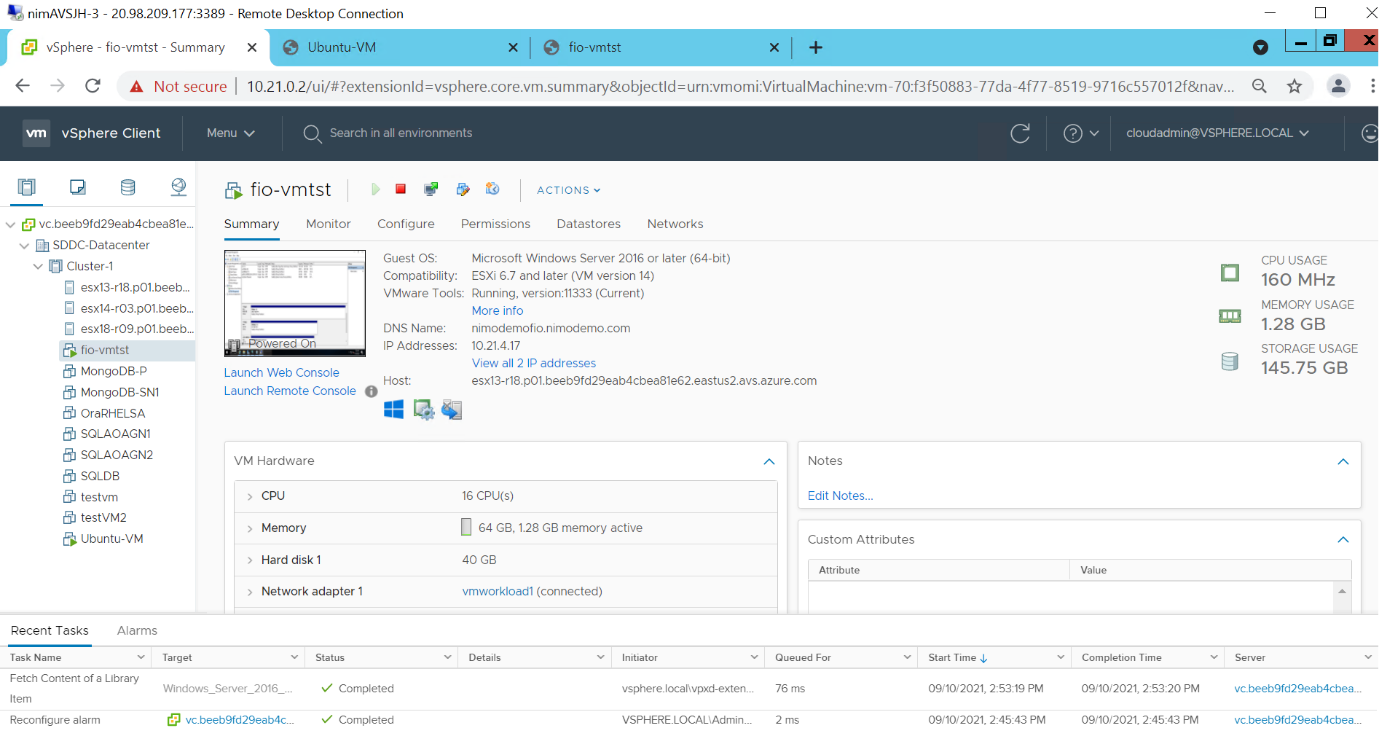
- After the VM is provisioned, select Connect to access RDP.
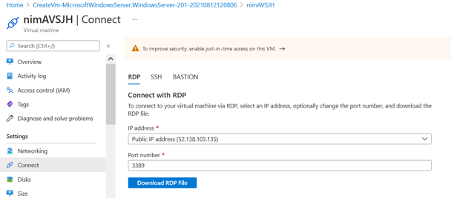
- Sign in to vCenter from this newly created jump host VM by using the cloud admin username. To access the credentials, go to the Azure portal AVS Private Cloud Manage You can copy the URLs and user credentials for private cloud vCenter and NSX-T Manager from here.
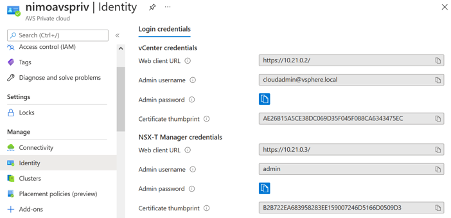
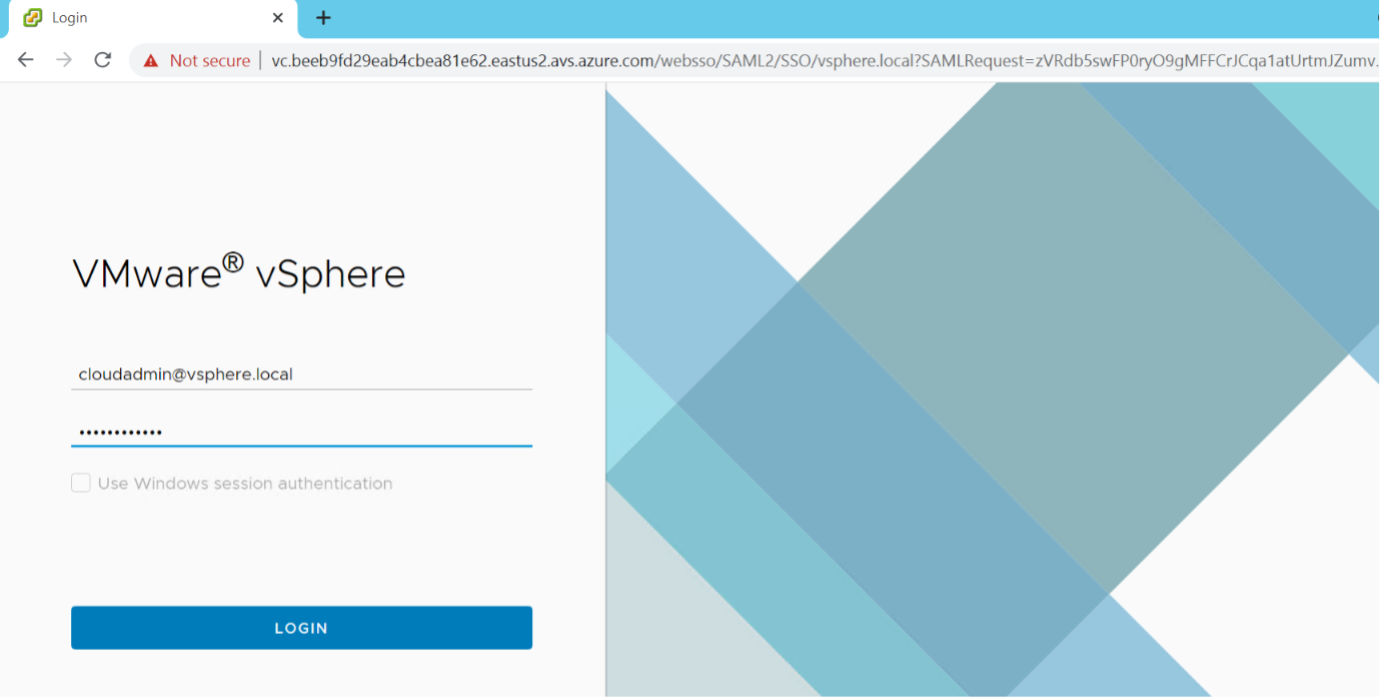
- In the Windows VM, open a browser and navigate to the vCenter web client URL https://10.21.0.2/. Use the admin username cloudadmin@vsphere.local and paste the copied password.
Similarly, you can access NSX-T manager by using the web client URL https://10.21.0.3/. Use the admin username and paste the copied password to create new segments or modify the existing tier gateways.
Note: The web client URLs are different for each SDDC provisioned.
Now the AVS SDDC is deployed and configured. Leverage ExpressRoute Global Reach to connect the on-premises environment to Azure VMware Solution private cloud. For more information, see Peer on-premises environments to Azure VMware Solution.
In the next part, we will cover integrating Azure NetApp Files with Azure VMware Solution.